
How To Fix The Brush Tool In Photoshop
It can be overwhelmingly frustrating when your brush tool stops working out of the blue. You aren’t sure what went wrong or why it’s suddenly not doing what you need it to. In most cases, there are only a few possible reasons why the brush tool stopped working in Photoshop. Each situation is relatively simple to solve and can be fixed in well under a minute. So no matter what problem you’re running into right now, know that it will be an easy fix and you’ll be up and running again soon!
One of the most common problems with the brush tool is that the cursor suddenly disappears. This isn’t because your brush tool has stopped working, but because your cursor has been changed. To bring make your brush cursor visible again, turn off your caps lock and start using the brush tool as you were before!
Now let’s go through 8 different problems you might be running into with the brush tool in Photoshop and how you can fix them.
8 Common Brush Tool Problems And How To Solve Them
1. Your Brush Tool Cursor Disappeared
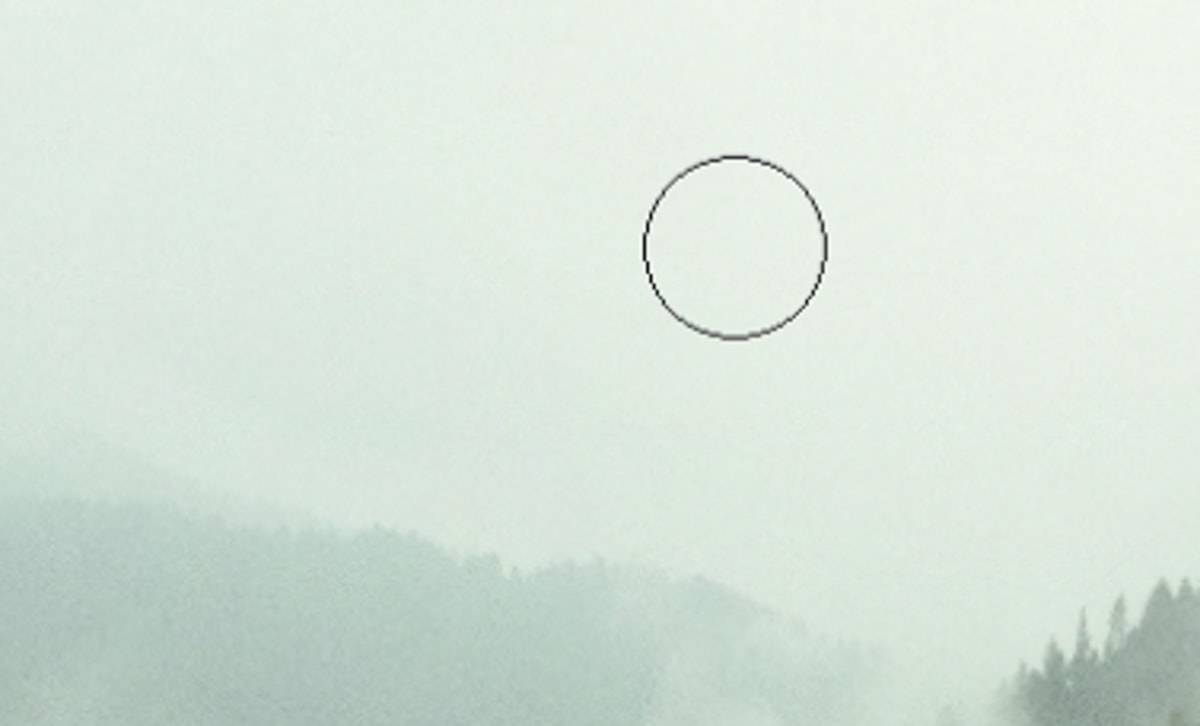
The first time I had this happen to me, I thought Photoshop was completely broken. It turns out the caps lock key was just left on. While you’re using the brush tool (or any brush-related tool), you’ll see a circular cursor to represent the brush. This makes it easy to know exactly how large the brush will be and where it will be painting.
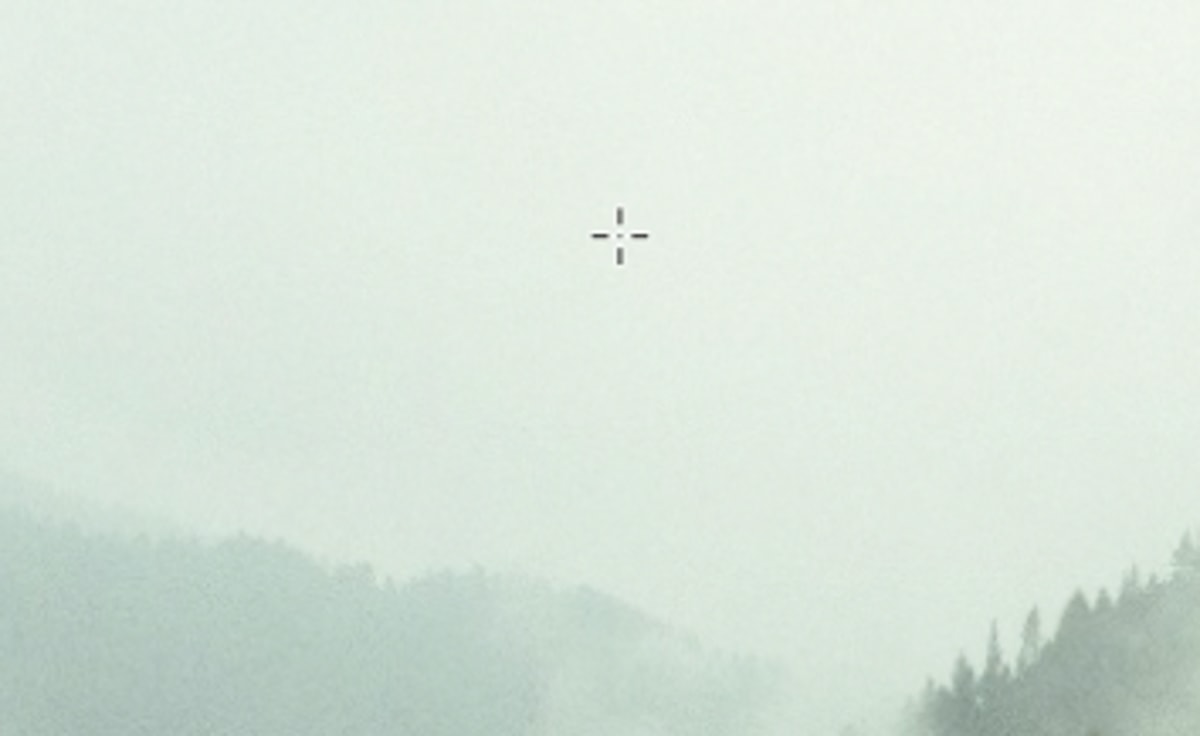
If you accidentally press the caps lock button, this brush cursor disappears. Instead of a circular brush, you see something called the precise cursor. This cursor is meant to help you get super specific with where a brush adjustment will be. Rather than a giant circle, you get a small crosshair to narrow in your brush strokes.
The problem here is the precise cursor isn’t as useful in most situations. To fix this, just make sure your caps lock is turned off, and you’ll be back in action!
2. Your Brush Tool Isn’t Visible On A Layer
Another brush tool problem you’ll run into is that it will not paint on any layer. No matter what you try, nothing seems to work. Luckily, the solution comes down to changing the blending mode of your brush tool.
With your brush tool active, look to the settings bar to see the current blending mode of your brush tool. Although different blending modes can be useful in specific situations, certain ones will make your brush appear invisible altogether. Make sure that your layer blending mode is set to “Normal” to get your brush tool back to its regular state.
 By using a normal blending mode, you’ll be able to paint solid colors on any layer or layer mask without issues.
3. The Brush Tool Properties Panel And Toolbar Have Disappeared
While you’re painting something with the brush tool, it’s possible to accidentally press something on your keyboard, and suddenly everything disappears. No more properties panel, brush presets, or anything else you rely on while using this tool. If all your panels suddenly go away, press the tab key to reveal all your panels again.
The tab key will toggle the visibility of all the panels in your Photoshop workspace. This can be useful if you want to get a better look at your photo, but you lose access to all your adjustment options. If you want a larger workspace, try using one of the full-screen modes instead!
4. Your Photoshop Brush Paints The Incorrect Color
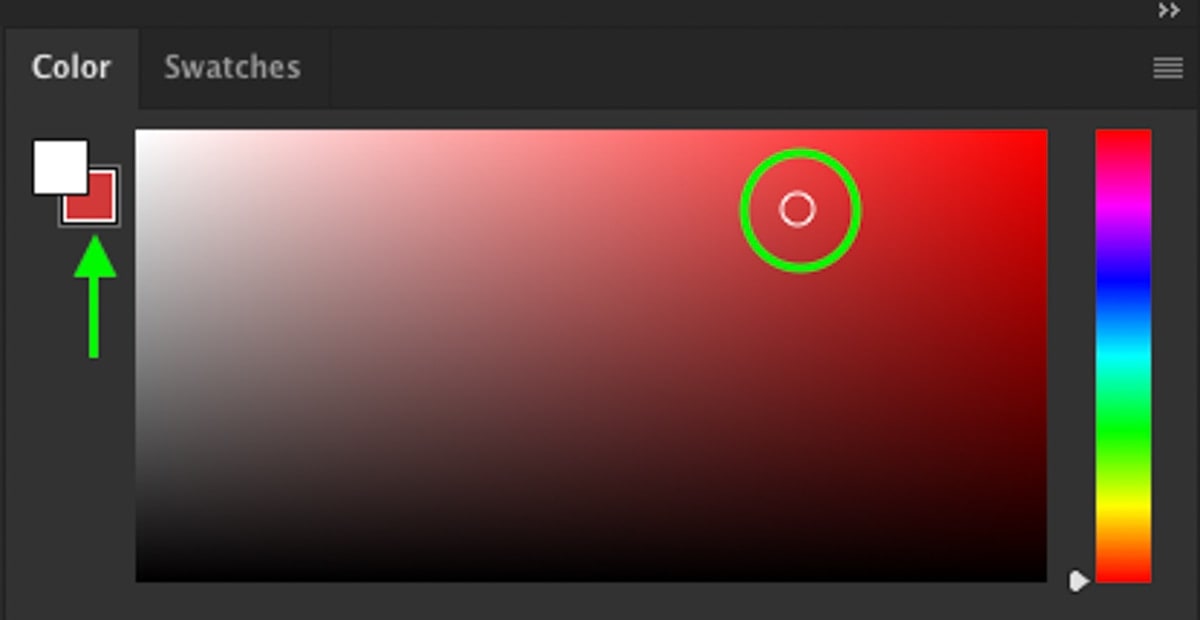
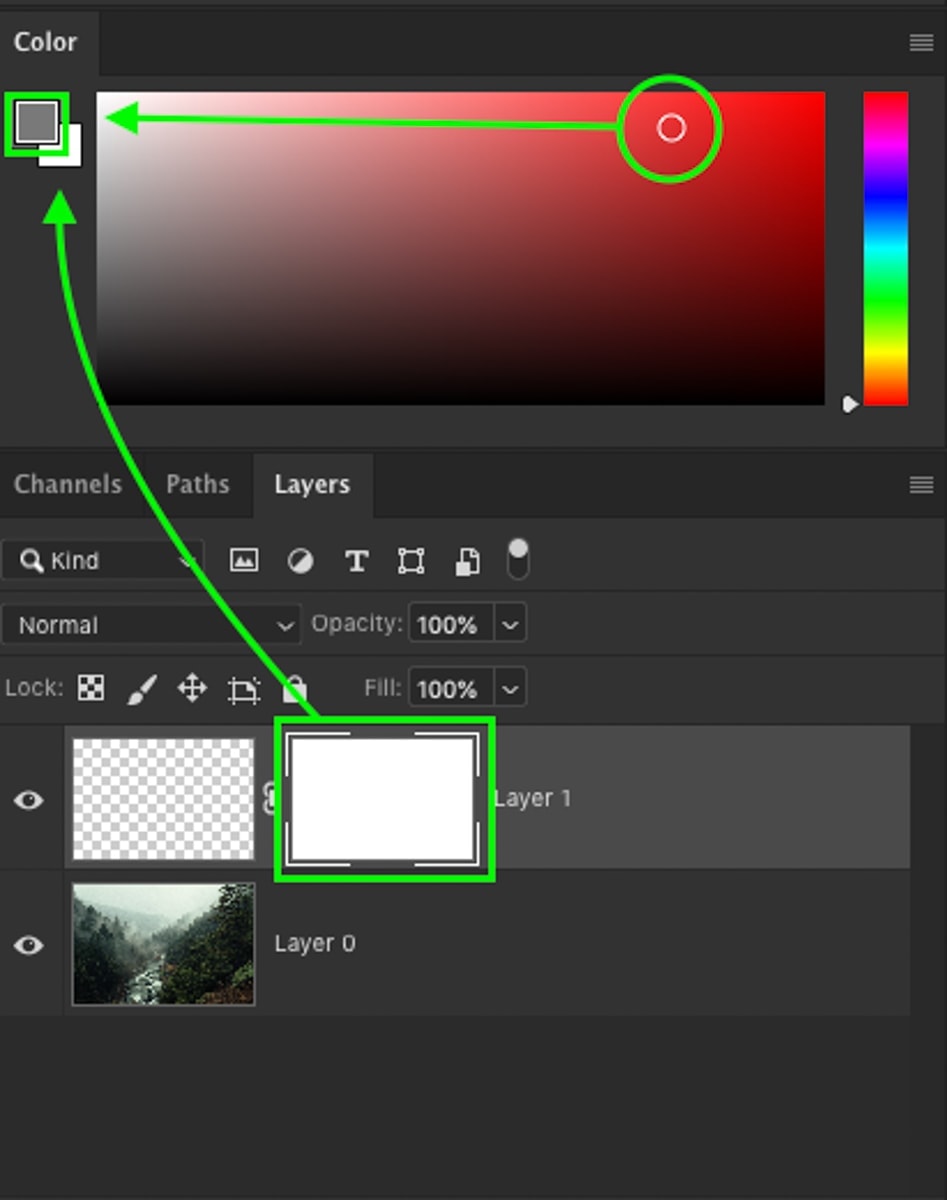
The main reason why your brush isn’t painting the correct color is that you’re not changing the foreground color. In Photoshop, there are foreground and background colors. Each of these colors is editable, but only the foreground color is used when painting or creating gradients. That means that if you’re changing the background color, it’s not going to matter since only the foreground color will be used for the brush tool.
For example, when you pick a brush color using the color palette, you can see the foreground and background color options beside. Currently, when I change colors, it ends up changing the background (bottom) color. This is because I have the background color selected.
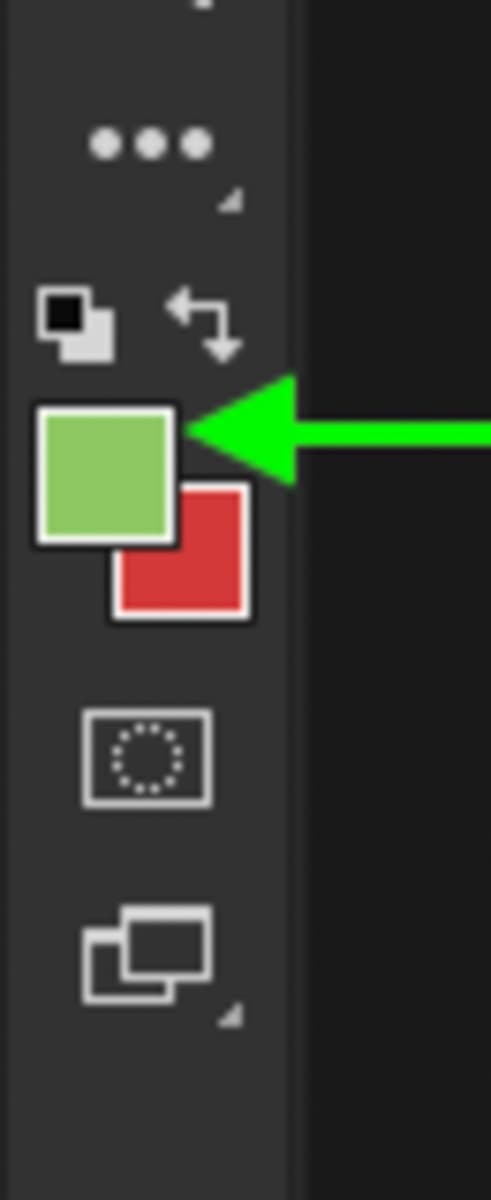
By clicking on the foreground color, any color you choose from the color palette can now be used as your brush color.
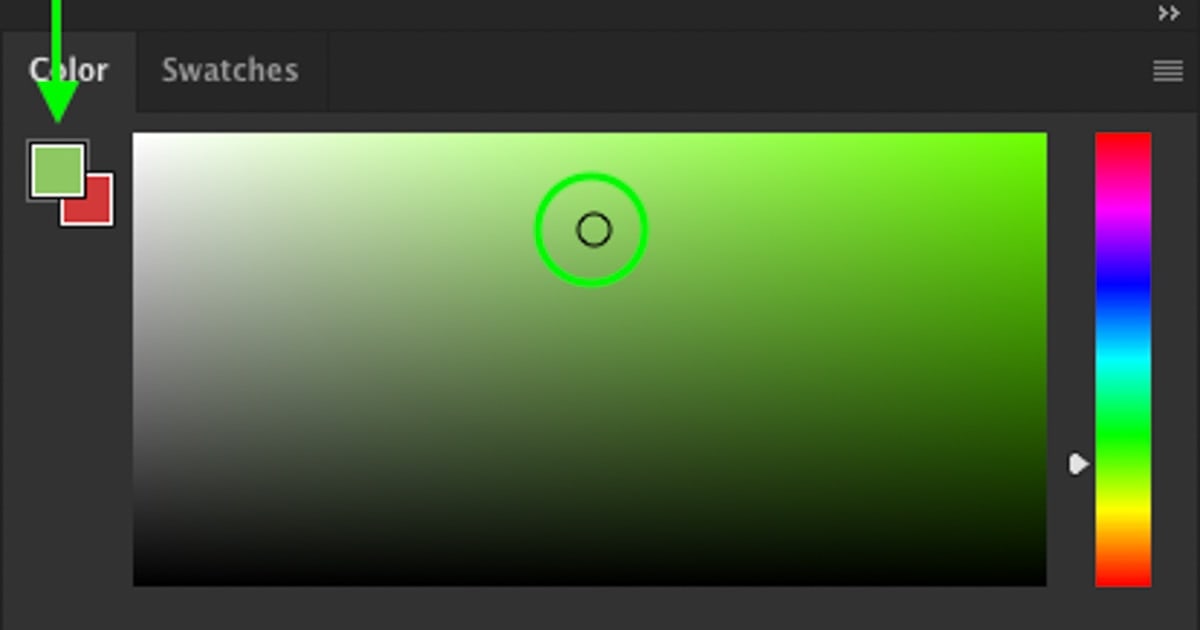
If you don’t use the color palette module and stick to the toolbar, make sure to click on the top color (aka foreground color) to make sure your brush paints the right colors.
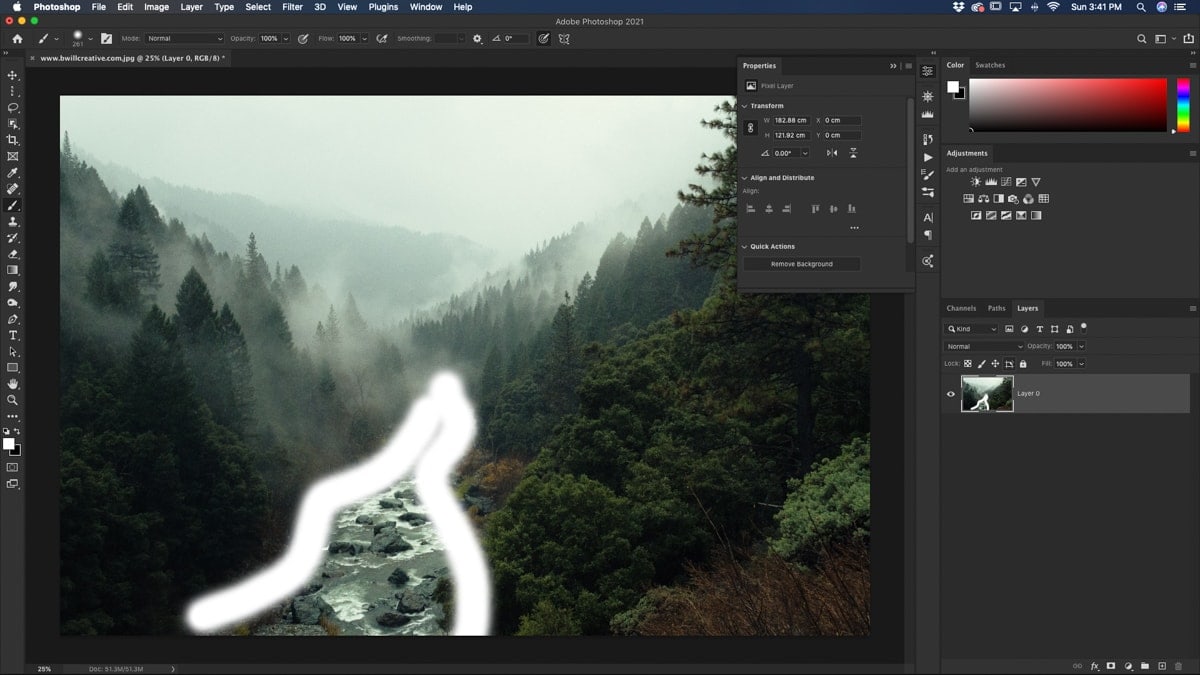
5. Your Photoshop Brush Only Paints White, Black, Or Grey
If you’re using the brush tool and the only colors it will select are whites, blacks, or greys, it’s simply because you have a layer mask selected. Whenever a layer mask is selected, Photoshop automatically narrows your brush tool options to stay within the world of layer masks. Since layer masks only use black, white, and grey, you’re limited to these colors. Even if you were to select a bright red color, Photoshop would change this into the closest shade of grey.
To fix this brush color issue, you’ll need to click on a layer thumbnail or a layer without a mask. As long as you don’t see the white boarders around any layer masks to indicate it’s selected, then you’ll be good to go!
6. Your Define Brush Preset Option Won’t Save Your Brushes
Photoshop has many cool features. One of them is that you can make your own brushes! The trouble is that you may end up getting an error when selecting the “define brush preset” option. The reason for this primarily comes down to the size of your document.
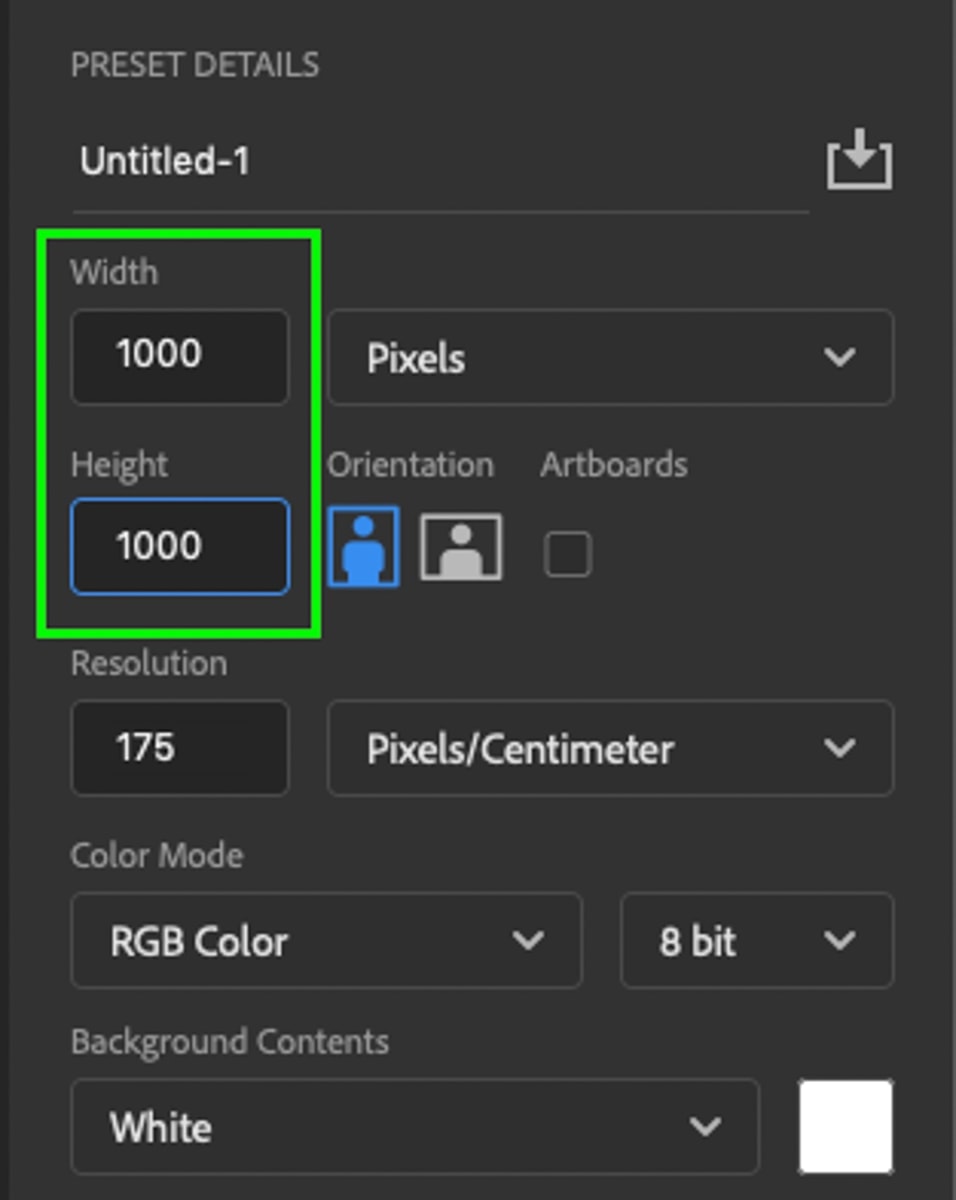
The limit for brush presets is a document size of 2500×2500. If you’re editing a photo and are trying to create a brush preset from that document, it will likely be too big. The result is an error message preventing you from creating a new brush preset. Instead, make a new document with dimensions that are well within the 2500×2500 limit. Create your custom brush and define your brush preset without any worries!
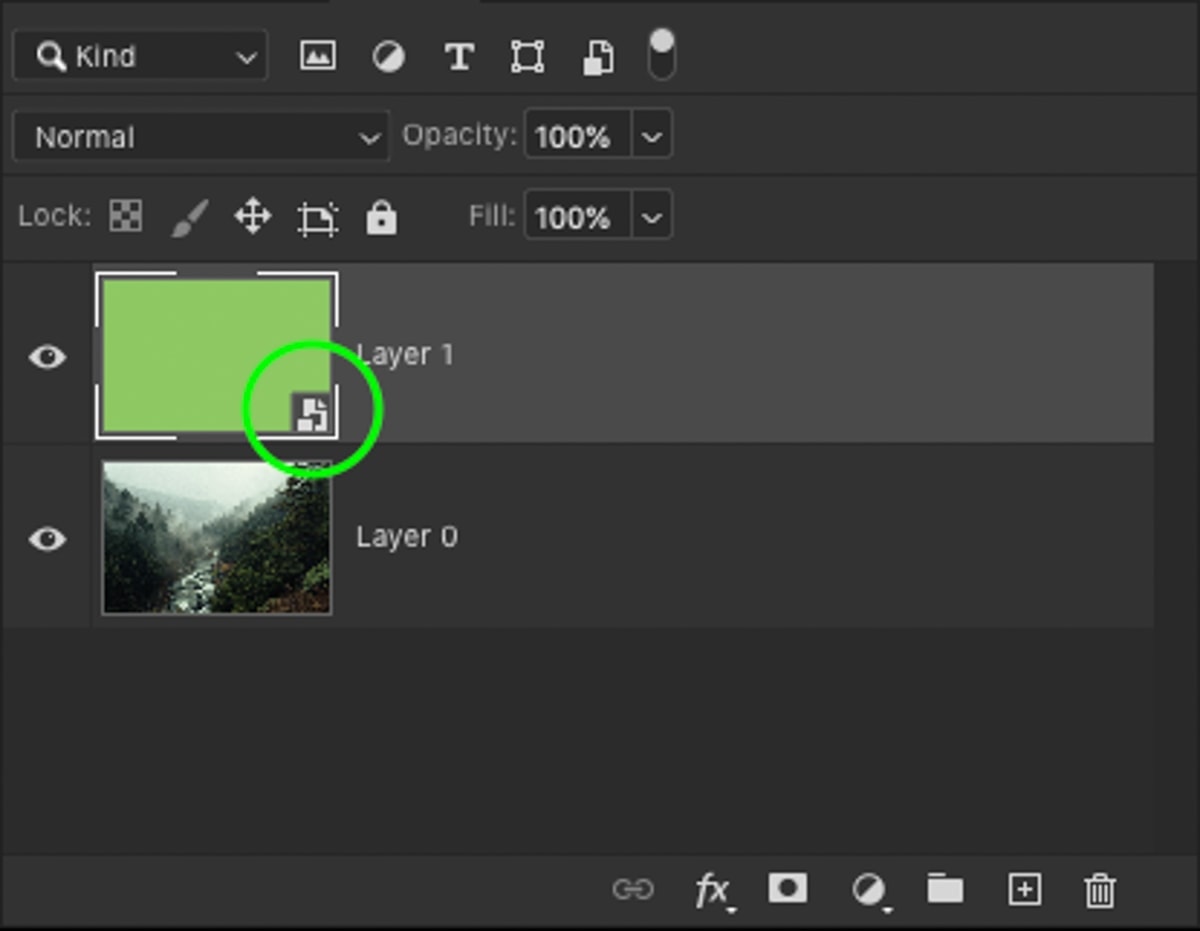
7. You Get An Error Message Every Time You Try To Paint On A Layer
Some layers you try to paint on with the brush tool will not work for one of two reasons. The layer is locked, or it’s a smart object. Both of these will create an error message whenever you try to paint onto an image layer directly.
If the layer is locked, you’ll know by the lock icon beside it. To unlock it, all you need to do is click on the lock icon for it to disappear. Now you’ll be able to paint freely on that specific layer.

On the other hand, a smart object is represented by a smart object icon displayed on the layer thumbnail. Smart objects cannot be directly edited; therefore, you cannot paint a brushstroke onto one. Although you could create a new layer to paint on, you can also rasterize the smart object to make it editable again. This isn’t great if you’re trying to edit non-destructively, but it will get the job done. With smart objects, it’s always better just to add your brush strokes to a new layer instead.
8. You’ve Tried Everything And Still Don’t Know What To Do
If you’ve tried everything and still are having problems with the brush tool, then you can reset the entire tool completely. This will get rid of any of the customized features that you’re using and set it back to its default settings.
To reset the brush tool, activate the brush tool by pressing B and click on the drop-down menu beside the brush icon in the settings bar.
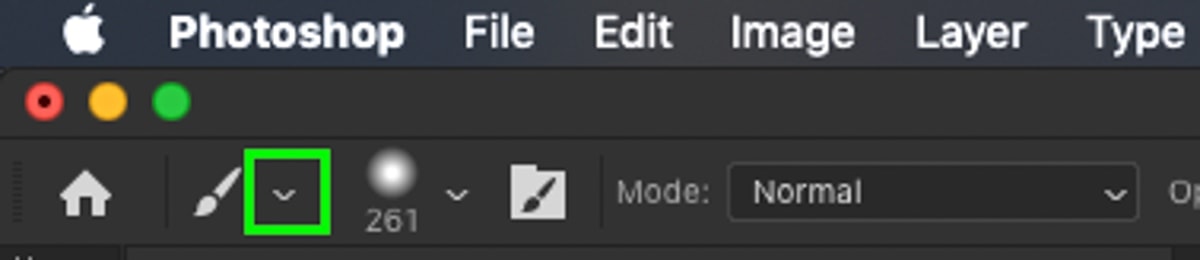
Next, click the gear icon and then select “Reset Tool.”
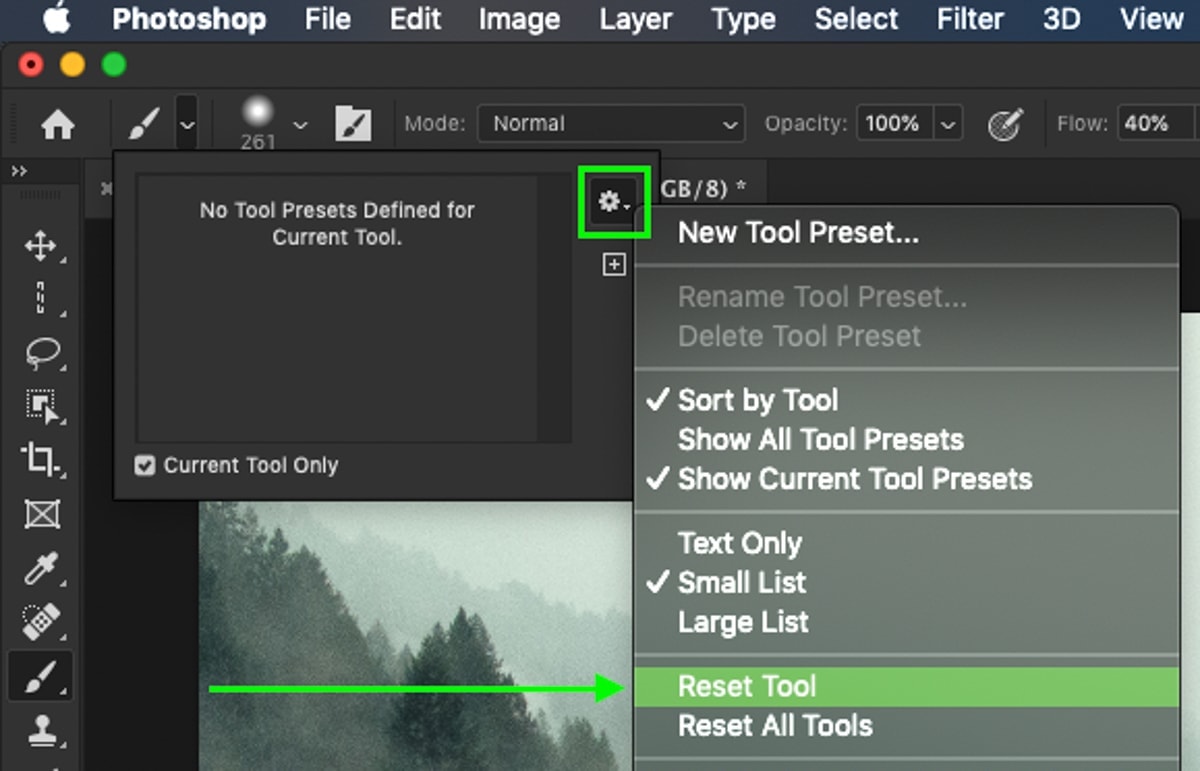
This will bring the brush tool back to its default settings and should solve any major issues that you aren’t able to solve.
By using any of these 8 tips, you can figure out how to fix just about any problem you face while using the brush tool in Photoshop. Just like any tool in the program, there’s usually a simple explanation behind why something isn’t working the way it should. As you continue to run into new problems, you’ll eventually build a strategy for troubleshooting different tools. Although this post is centered around the brush tool, these fixes also apply to other brush-related tools such as the eraser tool, clone stamp tool, or spot healing brush.
Happy Editing!
Brendan 🙂


