
How To Make Photos Look Soft In Lightroom
You’ve probably seen a dreamy-looking photo with glowing highlights and thought, “how the heck did they shoot that?” I want to let you in on a little secret… it’s all done with photo editing! With the amazingly simple techniques outlined in this post, you’ll discover exactly how to make a photo look soft and dreamy in Lightroom.
To give your photos a soft and dreamy look, use the Texture, Clarity, and Dehaze sliders in Lightroom. Found within the Basic Tab of the Develop Module, these sliders work to reduce edge contrast and give your photo a glowing appearance.
No matter what camera settings you used, the steps outlined here allow you to add a dreamy look quickly. This effect is a ton of fun to create and helps make your images look larger than life.
Here’s how it’s done.
How To Edit Dreamy Photos In Lightroom
For this Lightroom tutorial, I’ll be using selective adjustments to isolate where the softening takes place. You can apply this effect to an entire image but be warned that it will significantly reduce certain details.
To give you an example, the softening needed to lighten someone’s skin versus the background will be very different. If you go overboard and apply a heavy softening look to your subjects, it can take away details in their face or clothing.

That’s why I prefer to use this effect with selective adjustments such as the Gradient Filter, Radial Filter, Or Adjustment Brush.
If you want this dreamy effect to appear everywhere on your image, then skip step number 1!
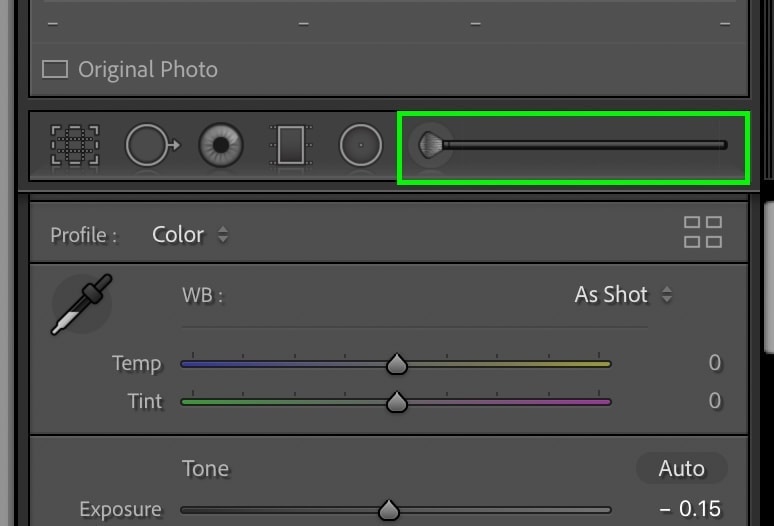
Step 1: Create A Selective Adjustment
There are several ways you can create spot adjustments in Lightroom. If you want to learn about each of them more in-depth, check out this tutorial about masking in Lightroom.
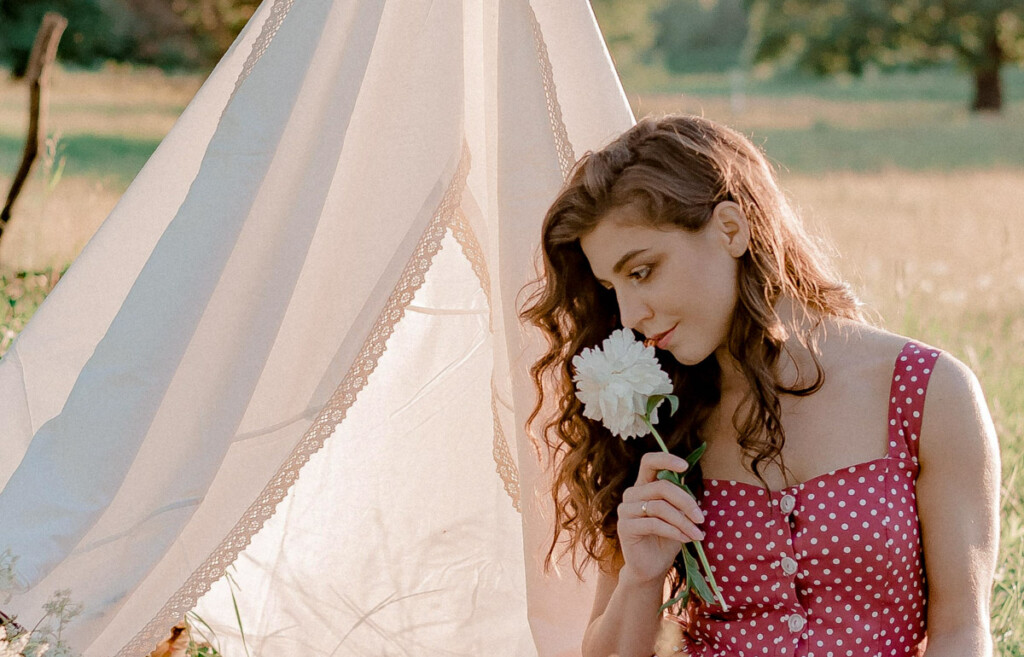
For this example, I want to add a dreamy look to the background of the photo. Since I don’t want to affect the subjects, the adjustment brush will be the best tool for the job.
With the adjustment brush selected, scroll down to the brush settings and set the Feather, Flow, and Density to 100%.
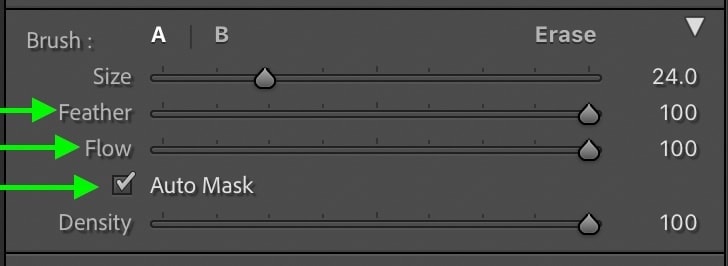
If you’re using the adjustment brush (and not the gradient or radial filter), check off Auto Mask as well.
These settings will help make your brush adjustments more visible while still blending into the photo’s surrounding areas!
– Defining The Adjustment Area
Before making any adjustments, start by creating your mask (aka the area that will be adjusted). By clicking and dragging around parts of your image, you can choose where you want the dreamy look to appear.
To make life easier, press O on the keyboard to make the mask visible. Anything red will be affected by your adjustments later on.
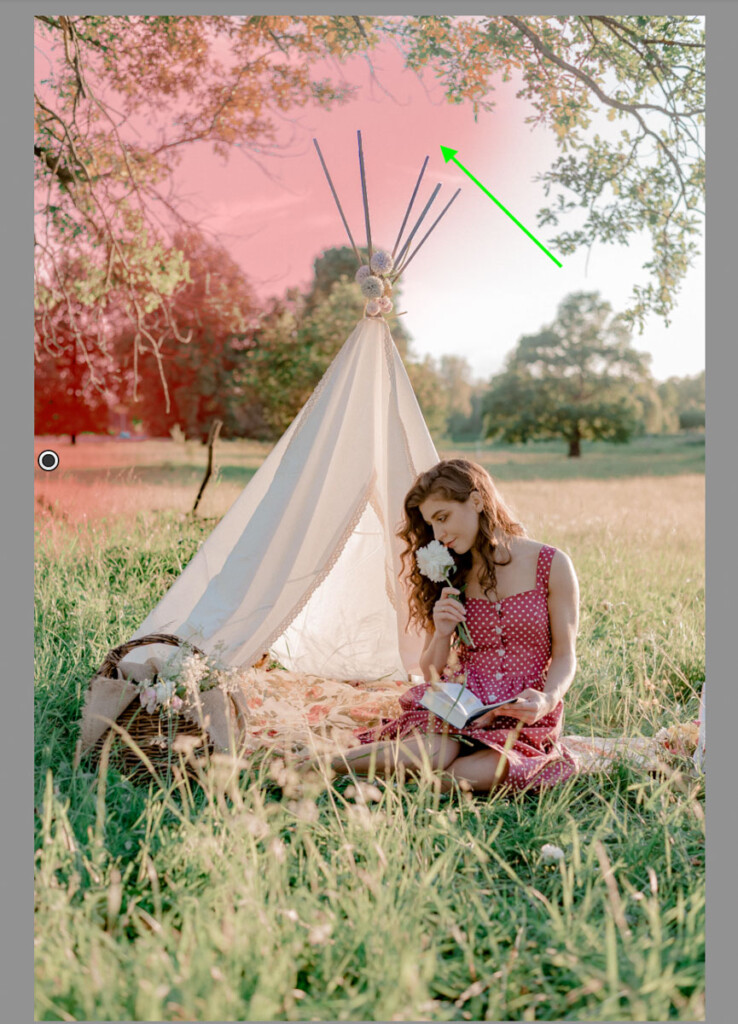
Continue to paint around your image until everything you want is selected (aka red). Since I only want to edit the background, I’ll make sure my entire background is red (selected).
Press O again to hide your masking area.
Step 2: Decrease The Texture
Now for the fun part, making your photo look dreamy! The first slider for the job is the Texture adjustment.
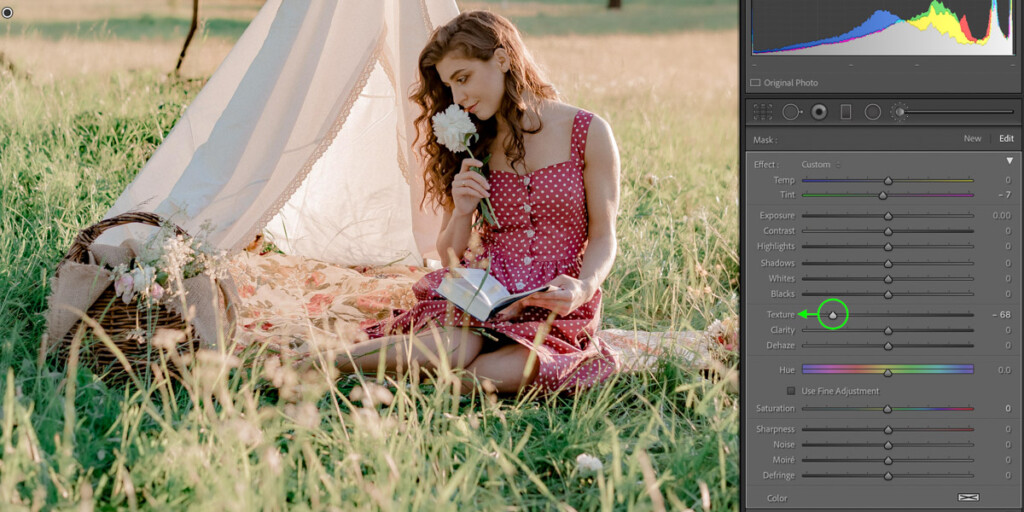
Decrease the texture until you’re happy with the effect it gives. The further you go, the softer your photo will start to look.
As you decrease your slider, you’re essentially reducing the amount of edge contrast in your photo. With less edge contrast, things become less defined, therefore making it look soft in the photo.
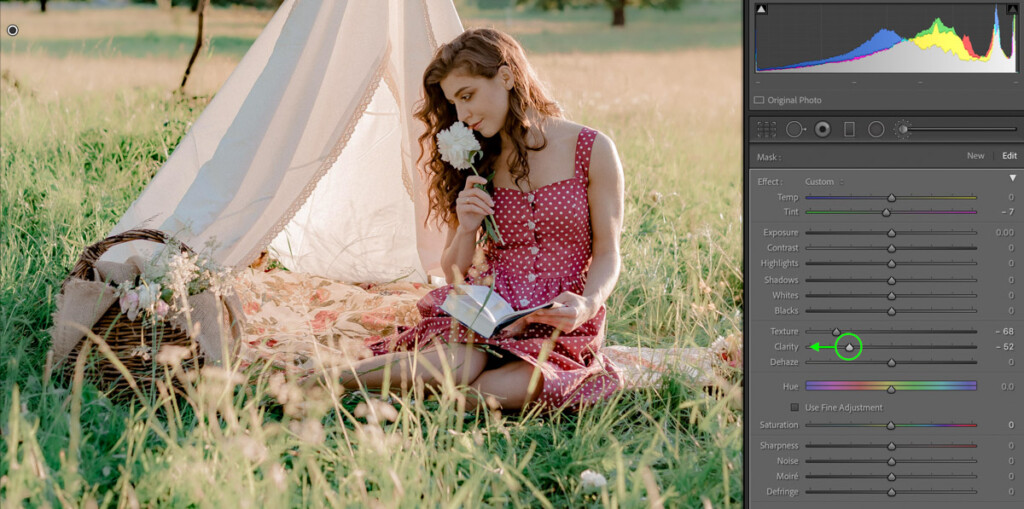
Step 3: Decrease The Clarity
Next up is the Clarity slider. Drag this slider down to further add to the dreamy look of your photo.
Step 4: Lower The Dehaze Value
Lastly comes the Dehaze slider. By dragging this adjustment down, it flattens out the darks and highlights in your photo and improves that dreamy look.

Play around with this adjustment to see what setting value you need for your image.
Step 5: Increase The Contrast Slider
Now you have a nice soft and dreamy-looking photo. The only problem is that it might look a little bit flat. To help spice things up, add back some contrast with the contrast slider.
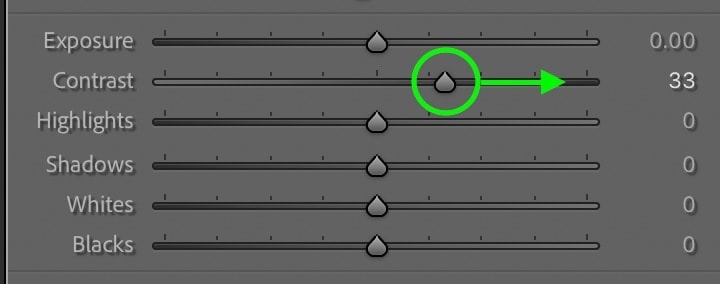
By adding more contrast, you help accentuate the highlights in your image. This ultimately makes anything such as sunlight, waterfalls, or sky pop a lot more in your photo and improve the edit.
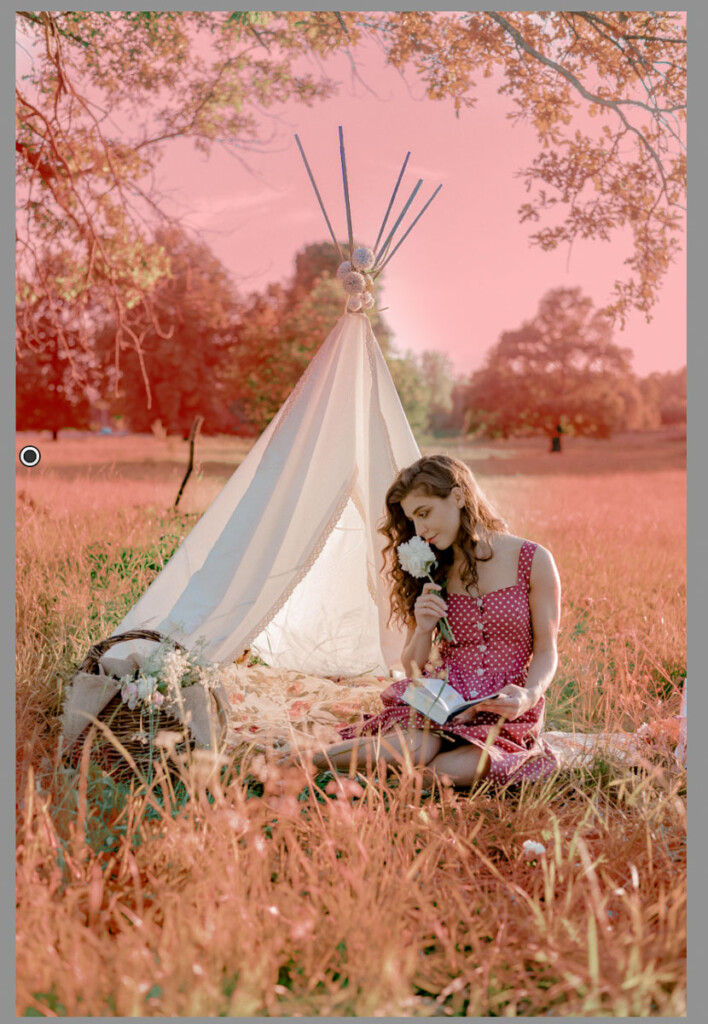
The Result
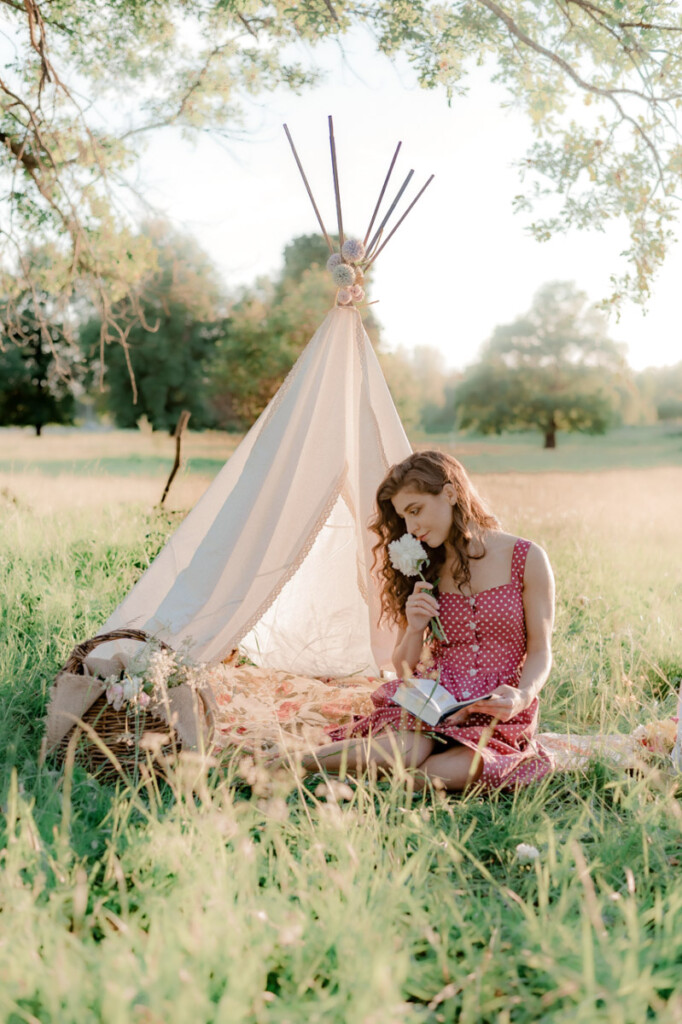
With 5 simple steps and the help of 4 sliders, you’ve successfully made your photo look soft and dreamy in Lightroom! These three sliders work to blend edge contrast and change how certain details are displayed. Especially for waterfalls or golden hour photos, this effect is amazing.
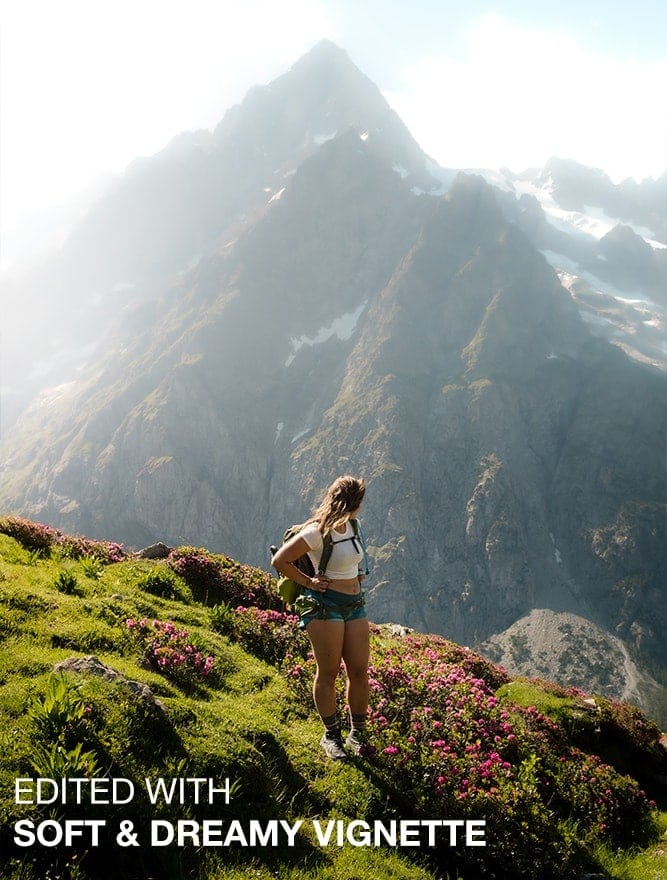
Get 10 Soft & Dreamy Presets For Lightroom
If you’re looking for a faster way of doing things, then these Soft & Dreamy presets for Lightroom are a must.
With these presets, you’ll be able to give any photo a dreamy look with a single click. Included in this pack are 10 soft, and dreamy presets perfect for any editing style.
To make life easier, they come in various intensities so that you can add a subtle or in-your-face effect. With general glows that target your entire photo to spot adjustments that affect select locations, you’re left with everything you need for this effect.
This preset pack is the ultimate way to spice up any image you’re working on. With a single click, you can make your pictures look glowy and magical without spending the time to do it manually.

Click Here To Get The Soft & Dreamy Preset Pack For Lightroom.
So now you know the keys to success for making dreamy and soft photos in Lightroom. If you’re ready to experiment with some other great Lightroom effects, try the Orange And Teal Look or Brown Earthy Tones in your edits!
I love to use this effect for photos as a final touch to my edit. I think it helps to make parts of your image pop or make busy areas appear less distracting. This style of edit looks excellent in landscape or portrait photography, especially mixed with vibrant colors!
Happy Editing!
Brendan 🙂


