As you start to edit more and more photos in Lightroom, it makes sense to export your images in batches. Rather than going through and individually exporting each photo from a set, you can learn how to export multiple photos in Lightroom.
Let’s get started!
How To Export Multiple Photos From Lightroom
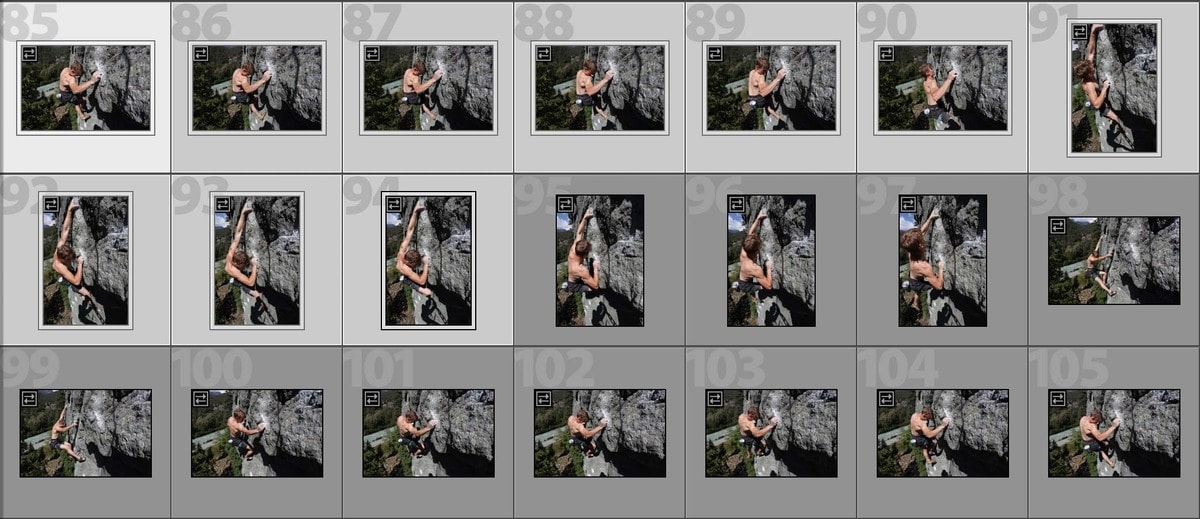
Step 1: Press Control/Command And Select Your Photos
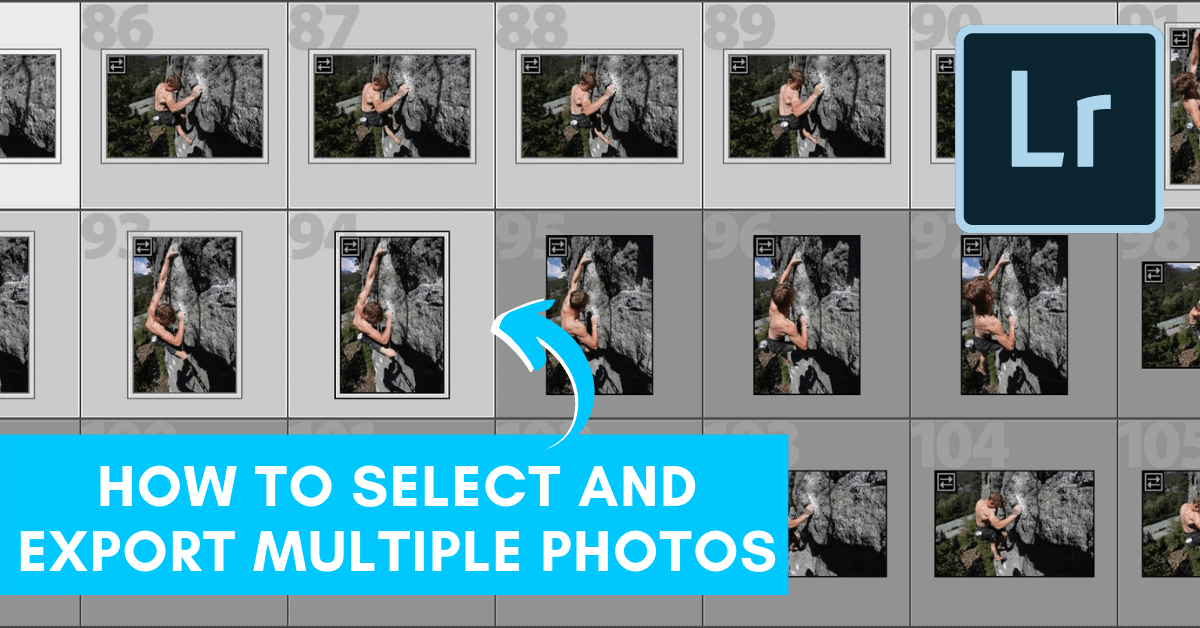
The most important part of exporting multiple photos at once is to select them. There are many different ways to select Lightroom photos.
- Select alternate images individually by holding Control (Win) or Command (Mac) and clicking on the photos you want to select.
- Select multiple photos by holding Shift and clicking on the first and last photo you want to select, Lightroom will automatically select all the images in between.
- To select all the photos in a folder, open the Library tab and press Control (Win) or Command (Mac**).**
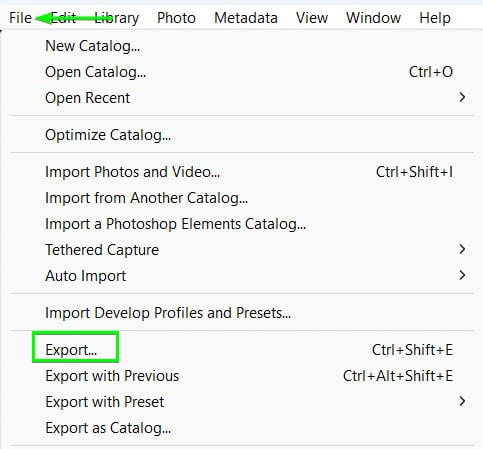
Step 2: Go To File > Export
With all of your images highlighted, it’s time to export. Go up to File > Export to begin the export process.
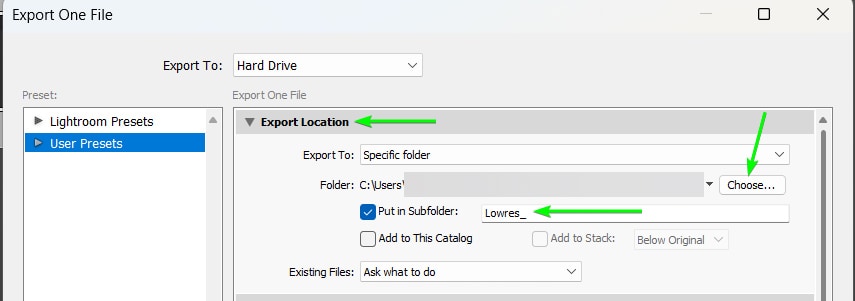
Step 3: Use The Choose Menu To Set An Export Location
In the Export Location tab, click on Choose and navigate to your desired folder. To create a new subfolder, tick off the Create New Subfolder option and give your folder a name.
Note: It’s a good idea to go through each section in the Export Panel to ensure everything looks correct before you export. I talk about this more in-depth in my guide to exporting photos from Lightroom.
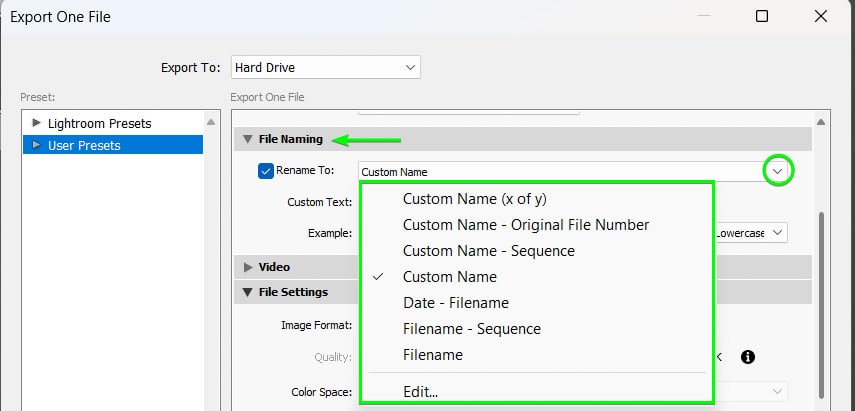
Step 4: Set The File Naming Option
To select the naming method, enable the Rename To option and select your naming option from the menu bar. If applicable, you’ll be able to type in your custom text in the box below. This option will only appear when you select the custom file naming options. Otherwise, you’ll just see an example file name preview, such as “IMG_4570.JPG”.
Step 5: Set The Image Format, Quality, And File Size
From Lightroom, you can export images as JPEG, PNG, PSD, TIFF, DNG, or Original (aka same as the source file). All of this can be accessed by clicking on the Image Format menu.
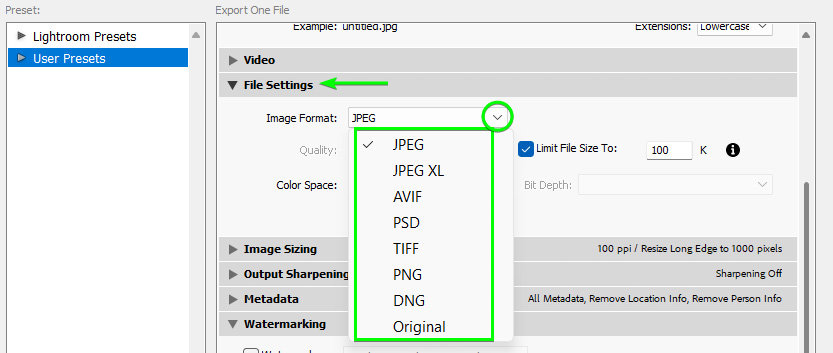
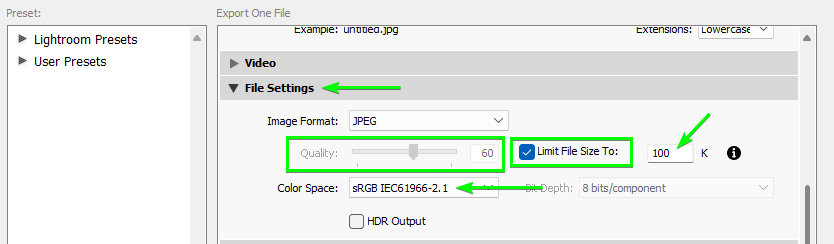
For general purpose and online use, leave the Color Space set to sRGB to guarantee your picture’s colors will look the same on your screen as anyone else.
Then, choose the output quality of your photos. If you are exporting proofs for a client, keeping them in low-res files makes it easier to share and upload large numbers of photos. If you need to be specific, you can check off the Limit File Size To option and enter a preset file size. That way, all your photos will export with the maximum file size you entered.
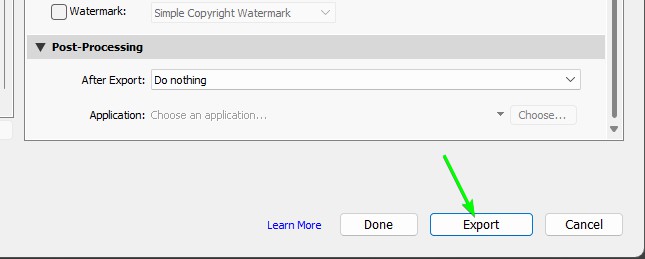
Step 6: Click Export To Save The Files
To batch export your photos, just click the Export button at the dialogue box’s bottom corner. The box will close, and a progress bar will appear in the top left corner of your Lightroom window. Depending on how many files you’re exporting at once, the amount of time can vary from a few seconds to a few minutes.
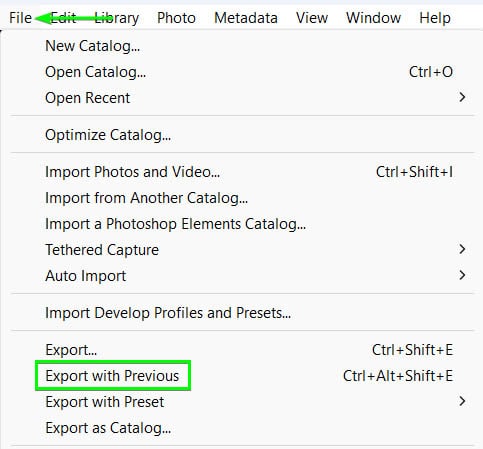
Step 7: Export Additional Images With Previous Settings (Optional)
If you missed a few images, or need to add to your exported batch, you can select the images and go to File > Export With Previous to quickly export the additional images with the rest. Lightroom will apply the same settings to your additional images.
How To Export Flagged Or Rated Images Only
Click on Filters Off at the top right corner of the Library Filter space and change the filter option to Flagged or Rated. Now, only your flagged or rated images will be visible in your library.
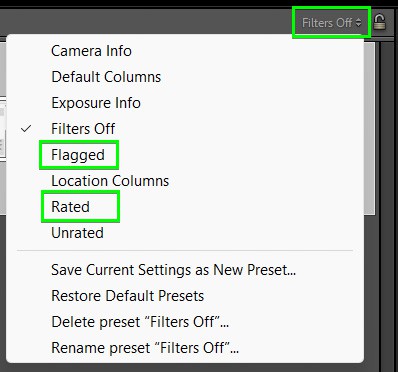
Since you’ve pre-filtered your files for export, you can skip the manual selections. Just press Control + A (Win) or Command + A (Mac) to select all your images and then go to File > Export. From here, follow the same steps as before.
Now, when there comes a time that you need to export hundreds of photos at once, it won’t take you all day. Instead, you can select and export batches of photos with just a few clicks!
- Brendan :)