

The easiest way to change the brush size in Photoshop is to use the [ or ] keys on your keyboard. The left bracket key will decrease the size, while the right bracket key will scale the brush up in size. This handy shortcut works well to quickly change your brush size as you work.
Below, I also show you how to use the mouse or the Brush Preset Panel to adjust the size. Along with how to change the default brush size so you can always have your favorite size ready to use.
Video Tutorial
3 Best Ways To Change The Brush Size In Photoshop
Below are three of the best ways to alter brush sizes, starting with the most versatile option.
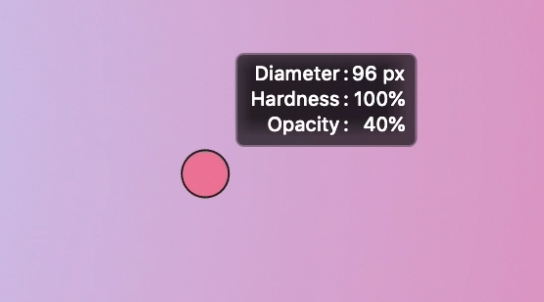
Option 1: Changing The Brush Size With Your Mouse
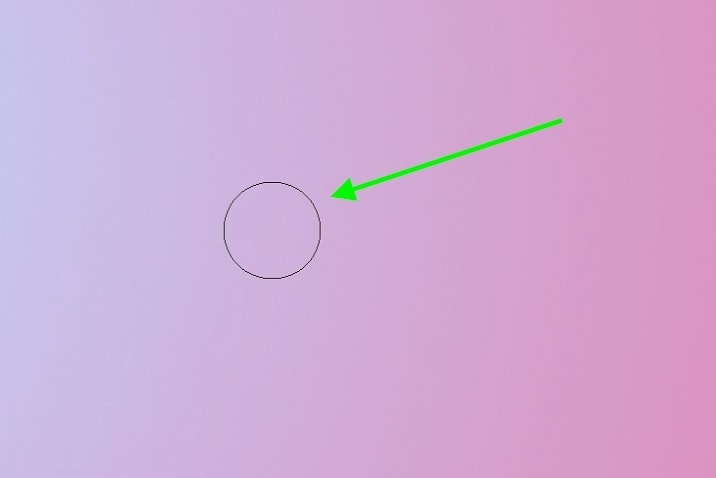
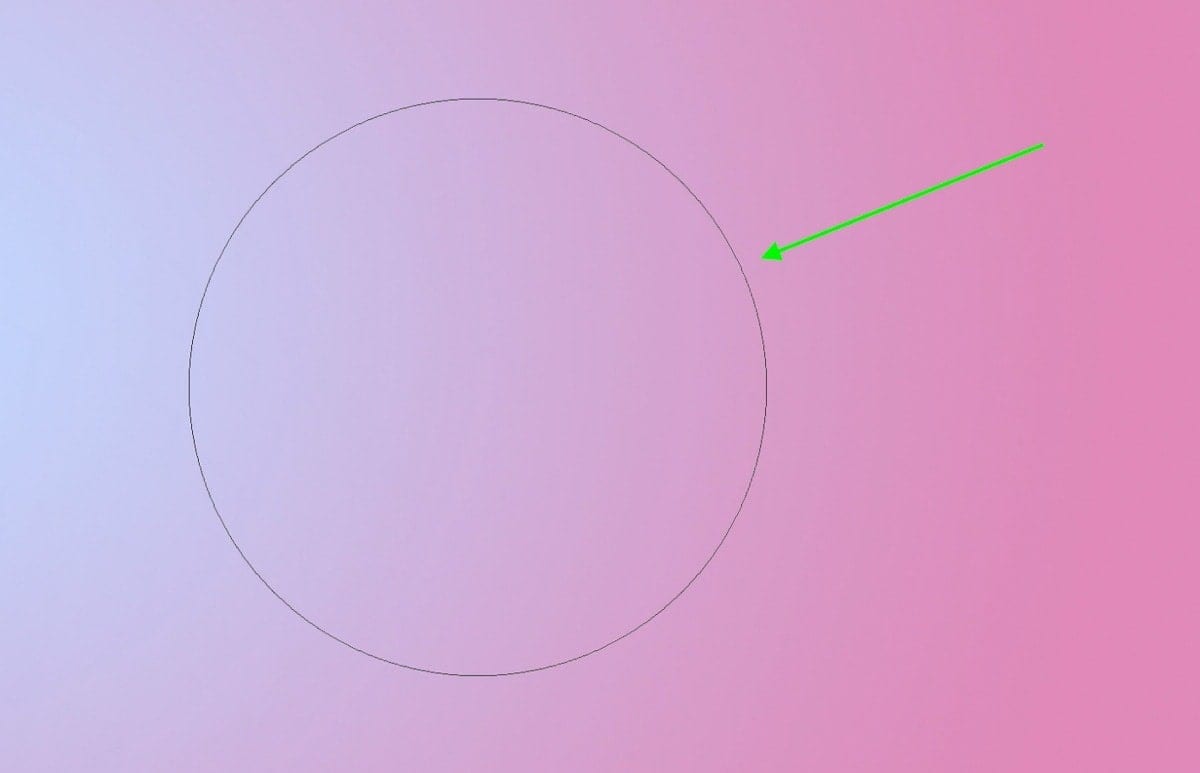
This first method varies slightly depending on whether you use a Mac or PC. On a PC, the shortcut is Alt + Right Click + Drag Horizontally. On a Mac, this shortcut is Option + Control + Click & Drag Horizontally.
When dragging to the left using this shortcut, the brush will decrease in size. By dragging to the right, the brush will increase in size. This is one of the fastest ways to change the brush size while you work, but it takes some shortcut memorization.
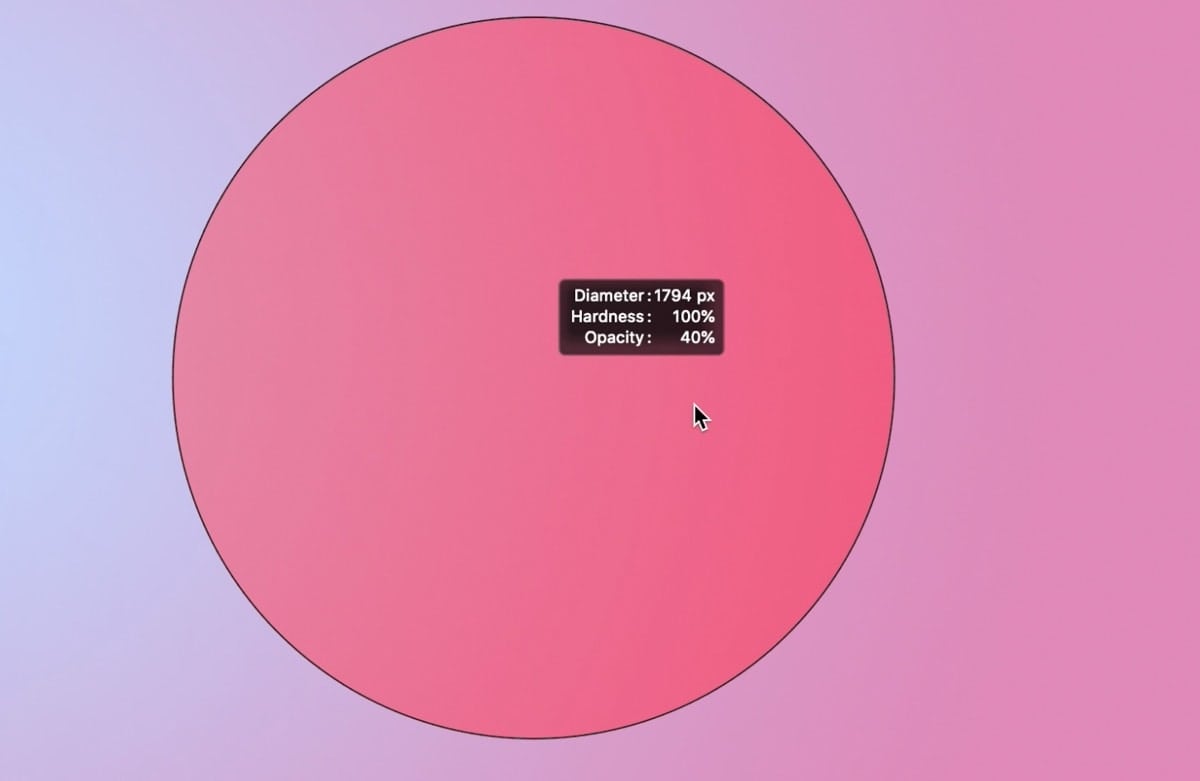
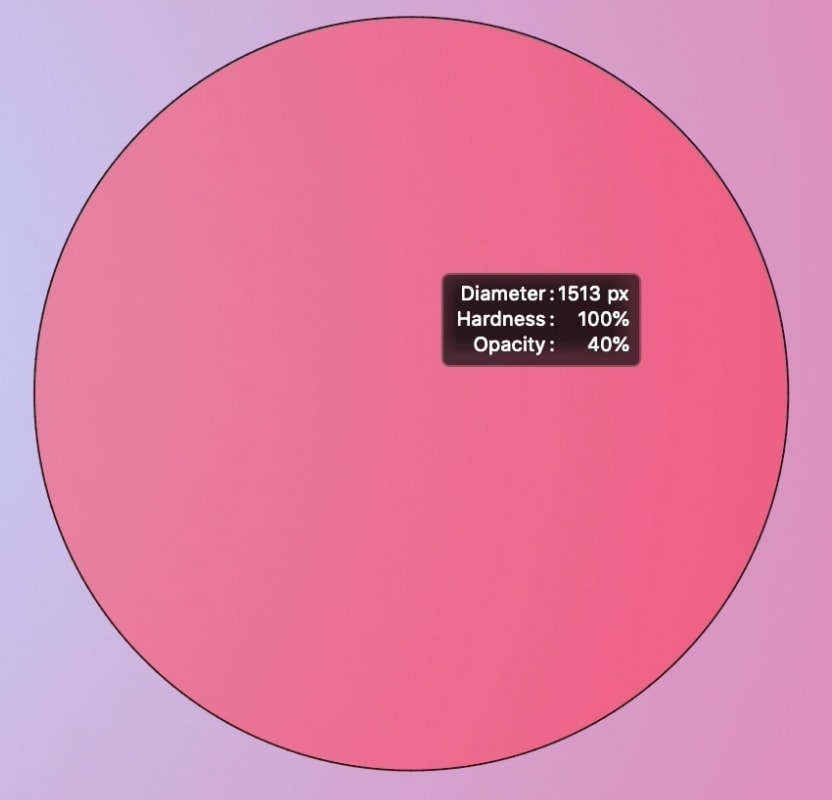
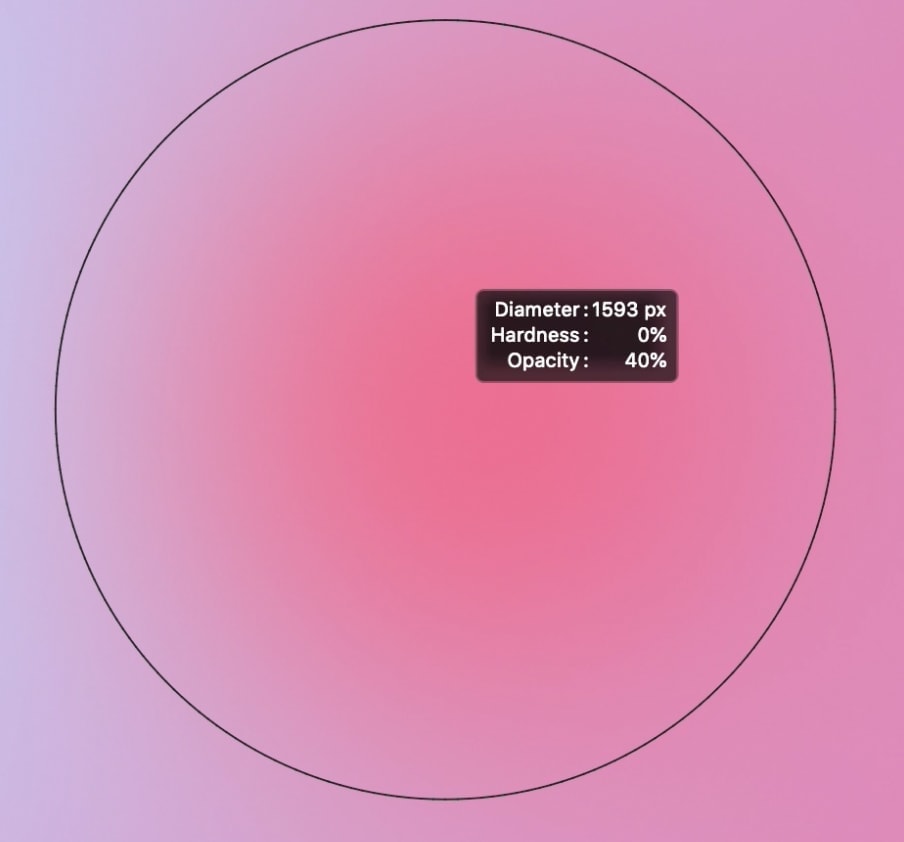
Changing Brush Hardness With Your Mouse
You can also change the brush feather using the same shortcut. Rather than dragging left or right, you can drag up or down to change the brush’s softness. You can easily tell how your brush will look based on the red highlight that appears when using this shortcut.
Option 2: Changing The Brush Size With Your Keyboard
The second way of changing the brush size doesn’t allow you to change the brush’s feather, but it works well for quickly scaling your brush. By pressing the [ or ] keys on your keyboard, you can quickly increase or decrease the size of any brush in Photoshop.
To make life even easier, you can hold down either of these keys to scale large amounts with less effort.
Option 3: Using The Brush Preset Panel To Change The Brush Size
The third and final way to change your brush size is with the sliders found within the Brush Preset Panel. You can access this panel in one of two places. The first is in the Options Bar when the Brush Tool (B) is active.
By opening this panel and adjusting the Size slider, you can easily make manual adjustments or type in precise values.
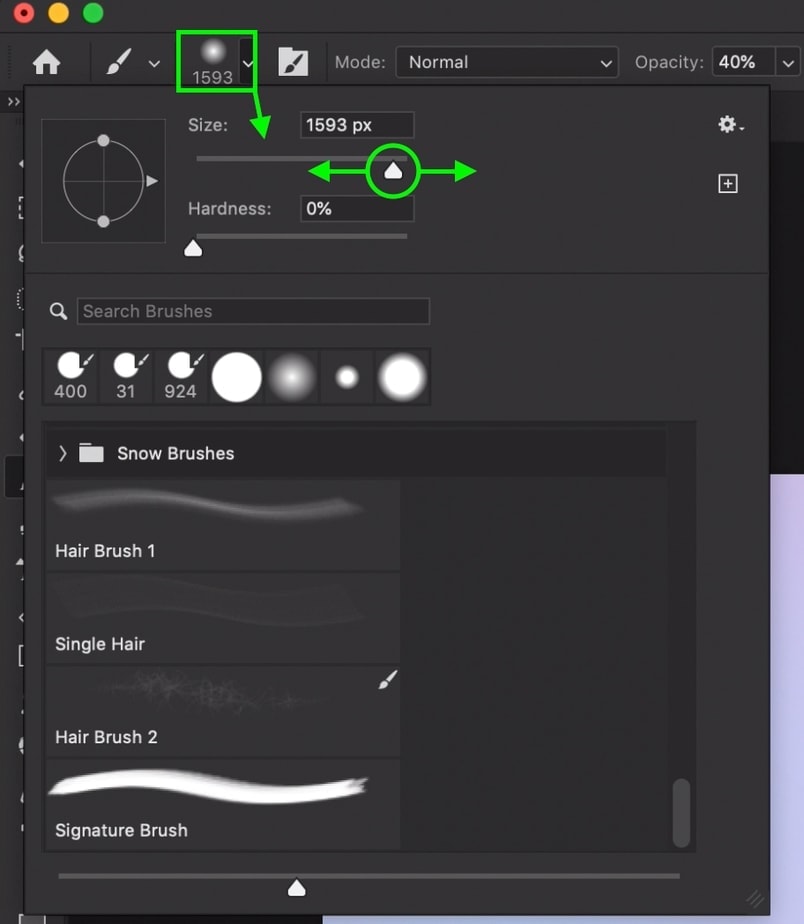
Alternatively, you can open this same panel in your canvas while you work. While your brush tool is active, right-click on your canvas to open the brush presets panel. Here, you can once again change the size slider and quickly change the size of your brush.
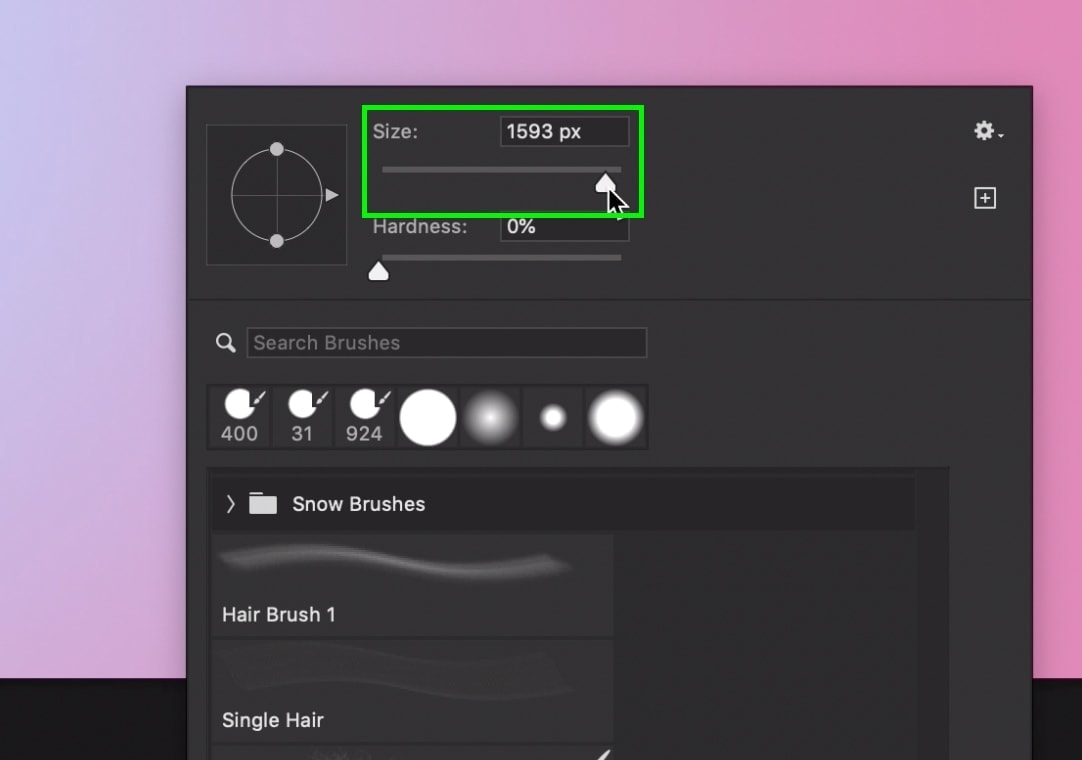
With both of these methods, you can also use the hardness sliders to change your brush’s feather on the fly.
How To Change The Default Brush Size In Photoshop
You may find yourself using a certain brush size regularly and would love to have that size set to your default setting. Unfortunately, you can’t set a default brush size across all your brushes, but you can create a default brush size for individual brushes.
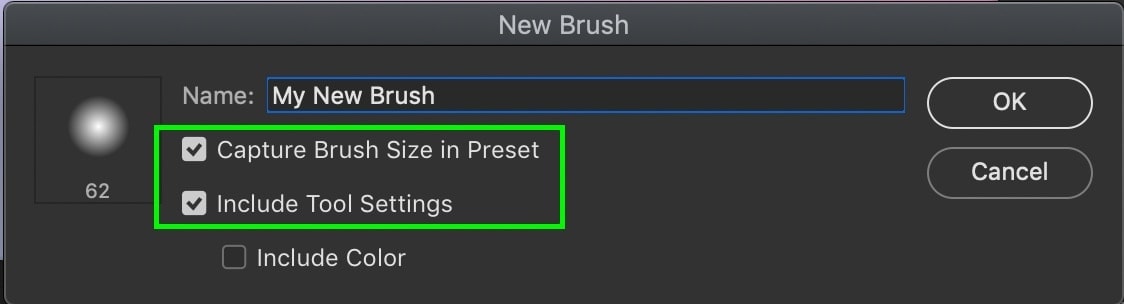
To set a default brush size in Photoshop, open the Brush Settings panel and pick the desired size for your brush. Then click on the hamburger menu and choose “New Brush Preset.” In the dialogue box that appears, check off the “Capture Brush Size In Preset” option and click OK to save the brush. Now you have a default size saved for your new brush.
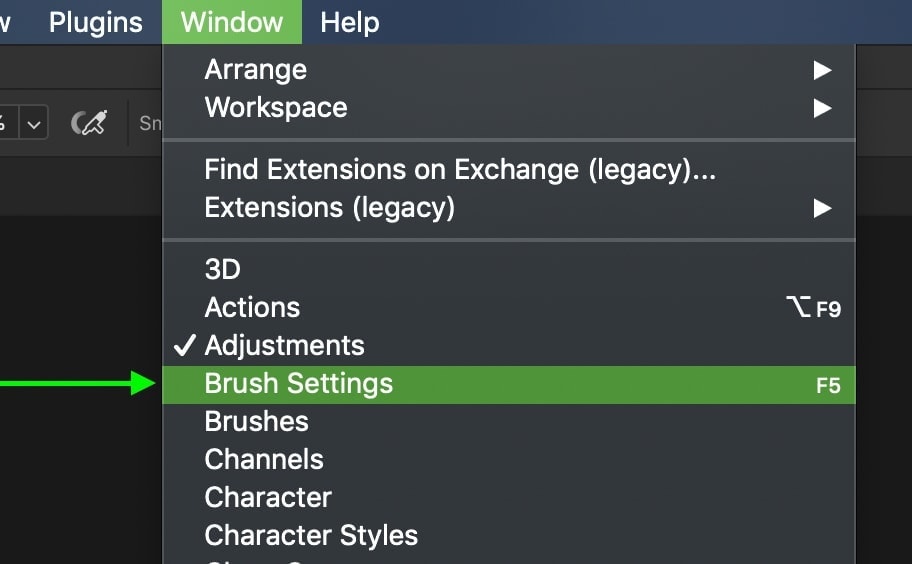
Step 1: Open The Brush Settings Panel
Depending on your workspace, the Brush Settings Panel may not be in your toolbar. If that’s the case, go up to Window > Brush Settings to reveal the panel.
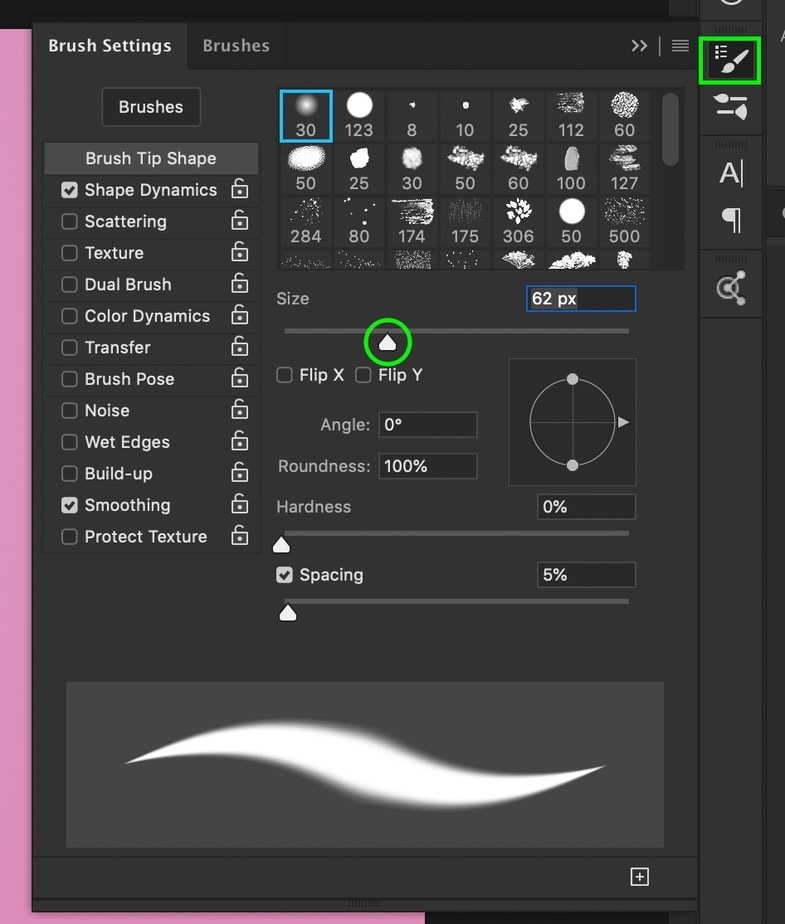
Step 2: Change The Brush Size Using The Size Slider
The settings shown in your brush panel will vary depending on the brush you have selected. However, they all have a Size slider to change the brush size. Set your desired brush size using this slider.
Once you make any adjustments to the brush in the brush settings panel, they’ll be applied to your active brush, but they won’t be saved. That’s why after you adjust the size of the brush, you need to create a new brush preset.
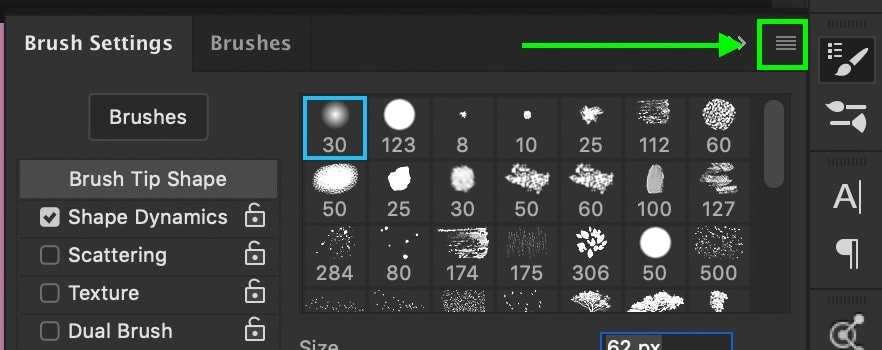
Step 3: Open The Menu And Select New Brush Preset
Click on the hamburger menu and go to New Brush Preset to save your current settings as a new brush to use later on.
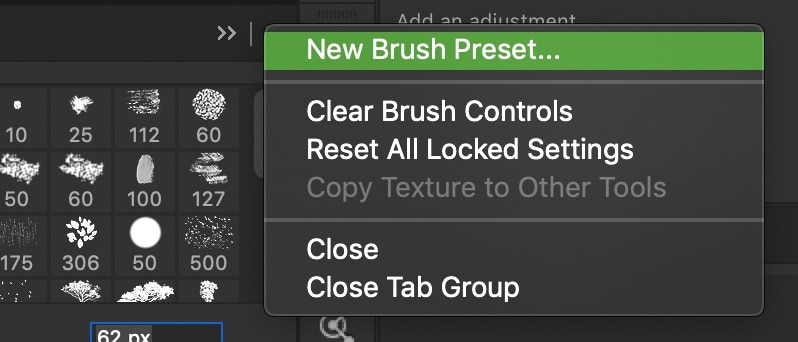
Step 4: Check Off “Capture Brush Size In Preset”
A new dialogue box will appear, allowing you to rename your new brush if you wish. The most important part here is that you check off the Capture Brush Size in Preset option. Without this, you will not have a default size saved for your new brush.
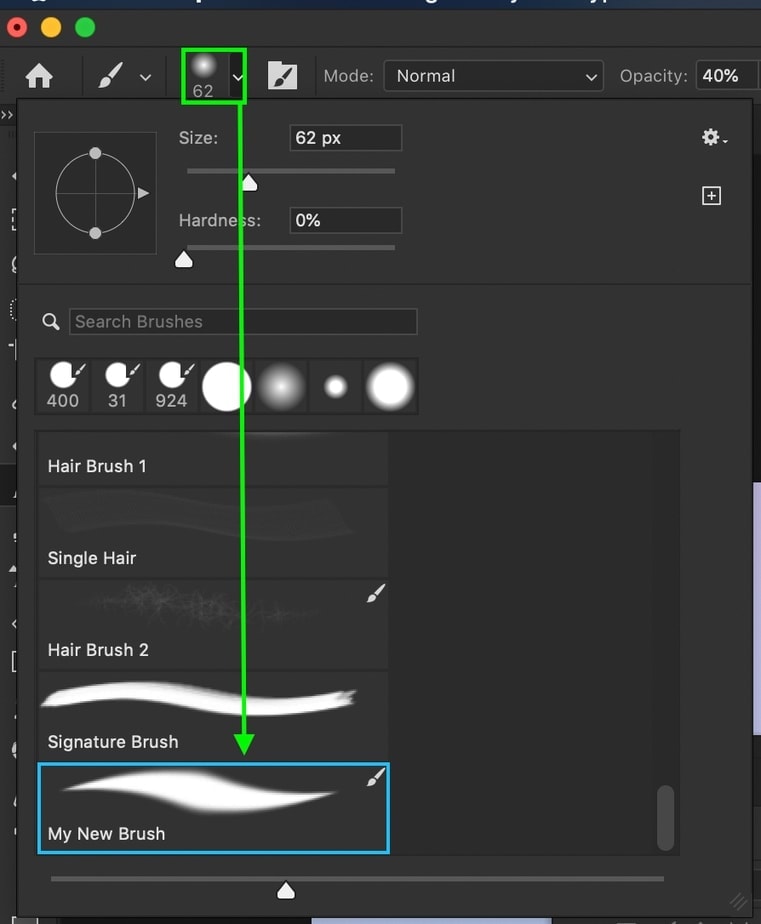
Step 5: Find The New Brush In The Brush Preset Panel
After the brush is saved, it will appear as a new brush at the bottom of the Brush Preset Panel. Now, when you select that particular brush, no matter your prior brush size settings, it will reset the brush size back to the default value you’ve chosen.
So now you know three different ways to change the brush size in Photoshop, along with a helpful option to set a default brush size for new brushes. The right resizing shortcut will depend on your editing style, but I prefer the click-and-drag option the most. Since you can change the brush size and hardness all in one click, it’s the most efficient way of doing things.
With that said, remembering some keyboard shortcuts can be challenging, so the [ or ] keys and the Brush Preset Panel offer some other worthy alternatives to brush resizing.
Since you’ve mastered changing your brush size in Photoshop, let’s put those skills to use and learn how to edit photos in Photoshop!
Happy Editing!
Brendan 🙂


