

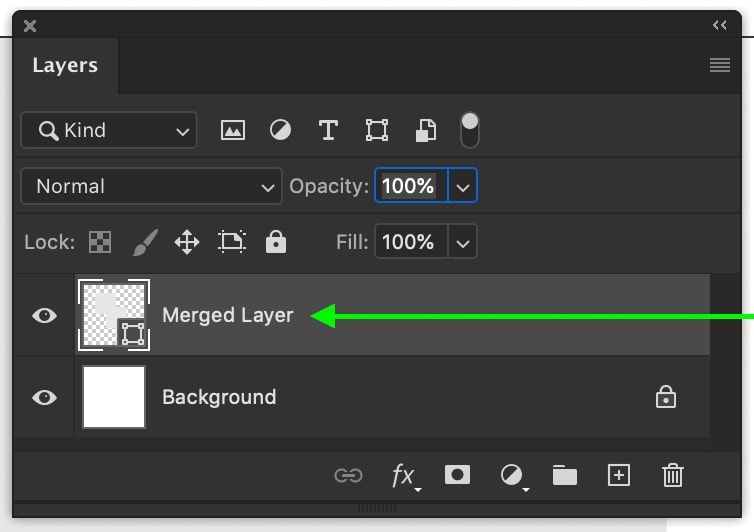
Merging or flattening layers makes your file size smaller and keeps the Layers Panel neat. However, if you need to edit a layer separately, you need to know how to unmerge layers in Photoshop.
Unmerging has several limitations, such as you can’t unmerge a layer from a previously saved project. In some cases, workarounds allow you to undo the action and keep the layers separate. Here’s how along with alternatives to merging layers.
How To Unmerge Layers In Photoshop
Method 1: Use The Undo Command
If you’ve recently merged or flattened your layers, you can simply use the undo command to step backward. Just press Control + Z (Win) or Command + Z (Mac) to undo changes.
Alternatively, you can go up to Edit > Undo. However, using the keyboard shortcut is ideal for undoing several times quickly.
Method 2: Use The History Panel
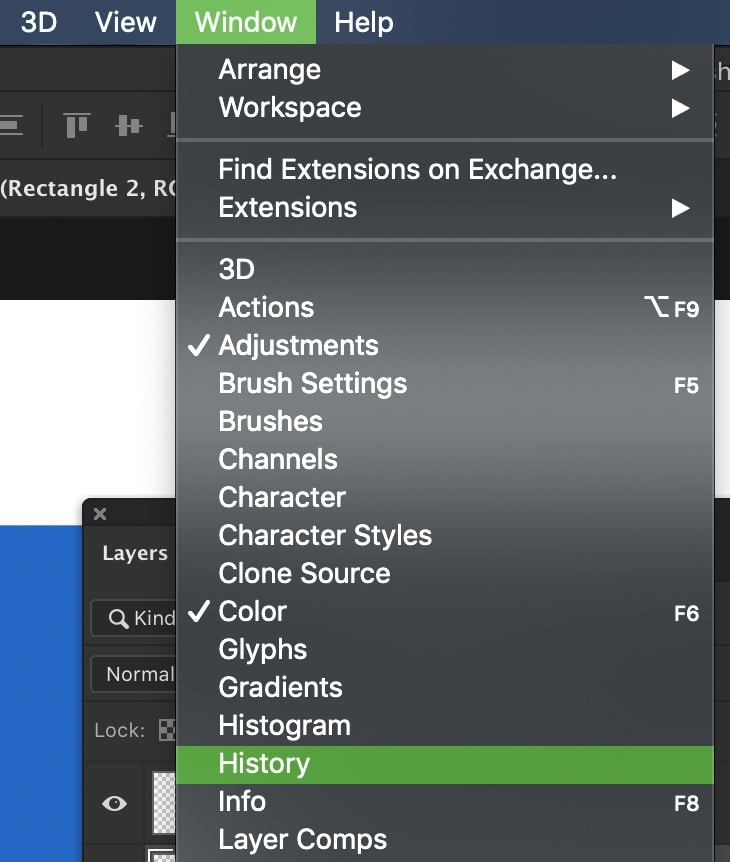
Step 1: Go To Window > History
Open your History Panel or locate it by going to Window > History.
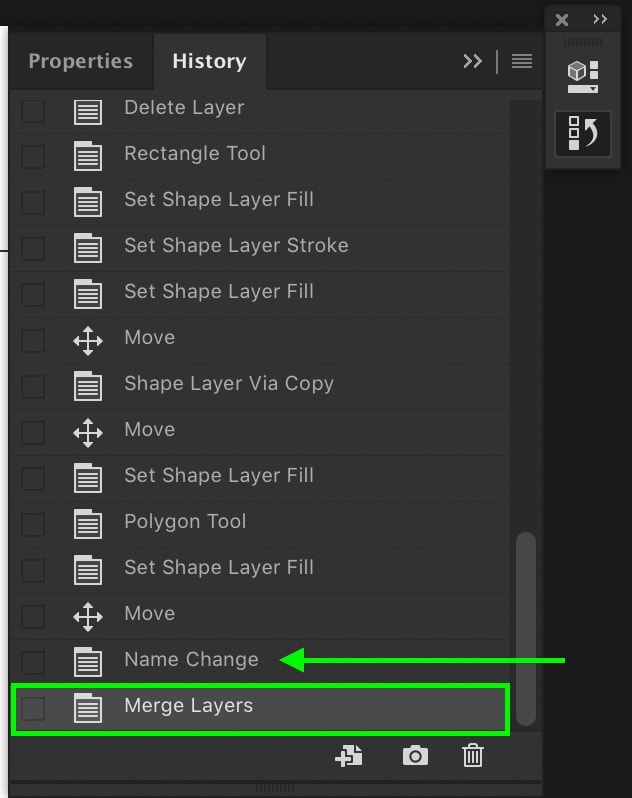
Inside the history panel will be a list of recent adjustments. Scroll through until you see the merge layer adjustment.
Step 2: Click On The History State Before The Merge Layers Action
Click on the history state before the merge layers to step back before the merge. This will undo all your previous adjustments and step back to the point before you merged or flattened the layers.
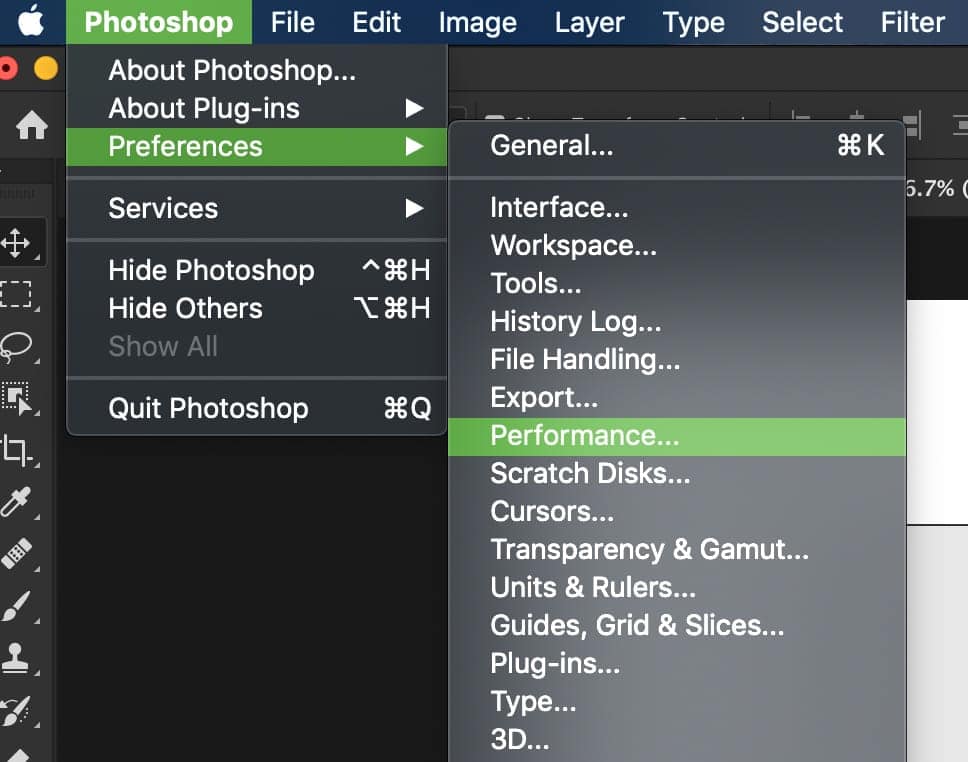
Step 3: Go To Edit/Photoshop > Preferences > Performance And Increase The History States (Optional)
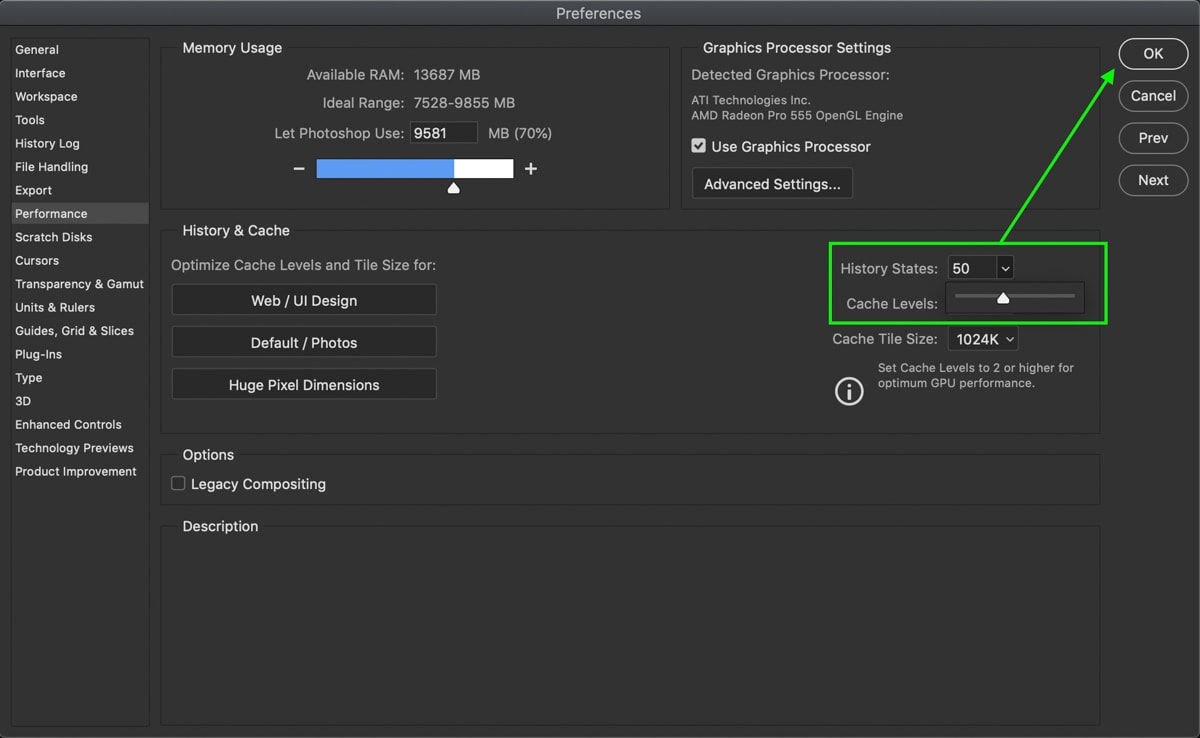
If 50 history states don’t feel like enough for you, you can increase the amount as necessary. To increase the number of history states, go to Edit > Preferences > Performance (Win) or Photoshop > Preferences > Performance (Mac).
Increase the slider next to History States to have more history states to step back to in the future. Keep in mind that this may affect the performance of the program, depending on your computer specs.
Alternatives To Merging Layers In Photoshop
– Create Smart Objects
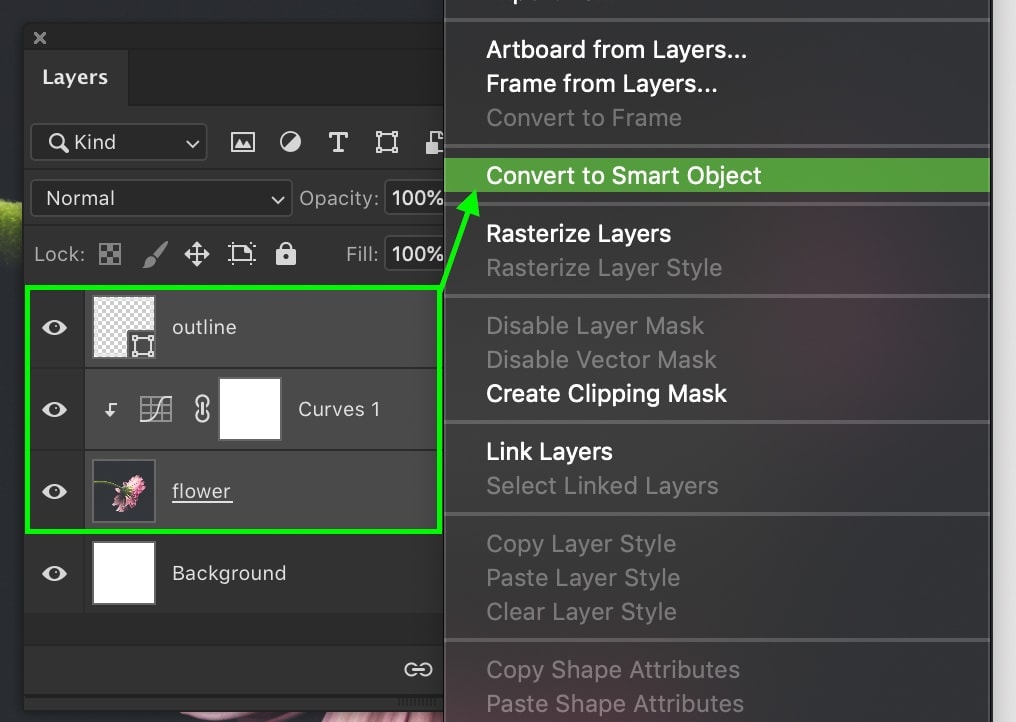
Smart objects are a fantastic feature that merges multiple layers while allowing each layer to be individually accessed. To create a smart object, select the layers you want to merge. Right-click on the highlighted layers and select Convert to Smart Object.
All the layers will merge, and you’ll notice a smart object icon over the layer thumbnail. If you double-click on the layer thumbnail, the smart object will open in another tab.
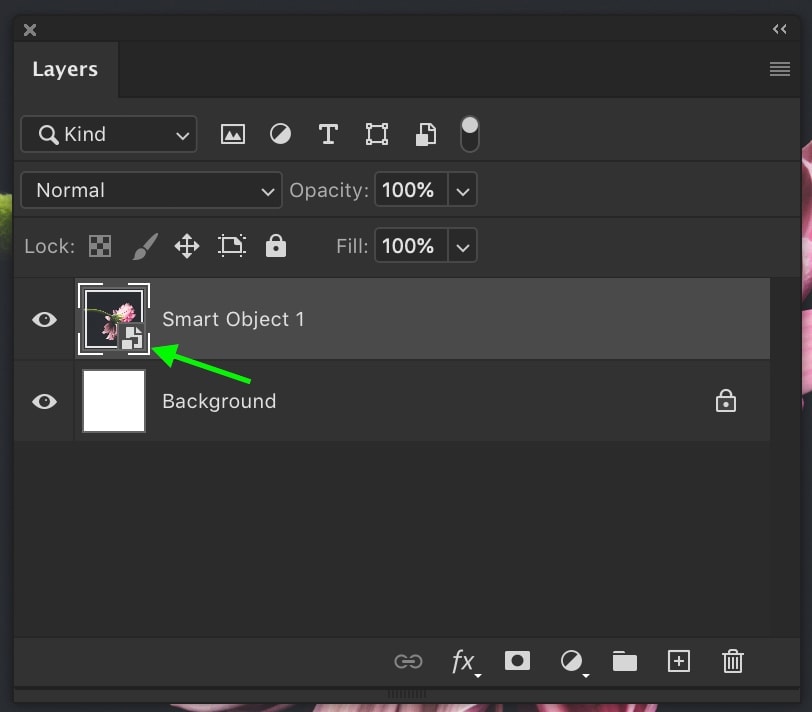
In this new tab, you can edit individual layers as necessary and save them back into your original project window. Smart objects are much easier to work with and can be unmerged at any time without having to undo anything.
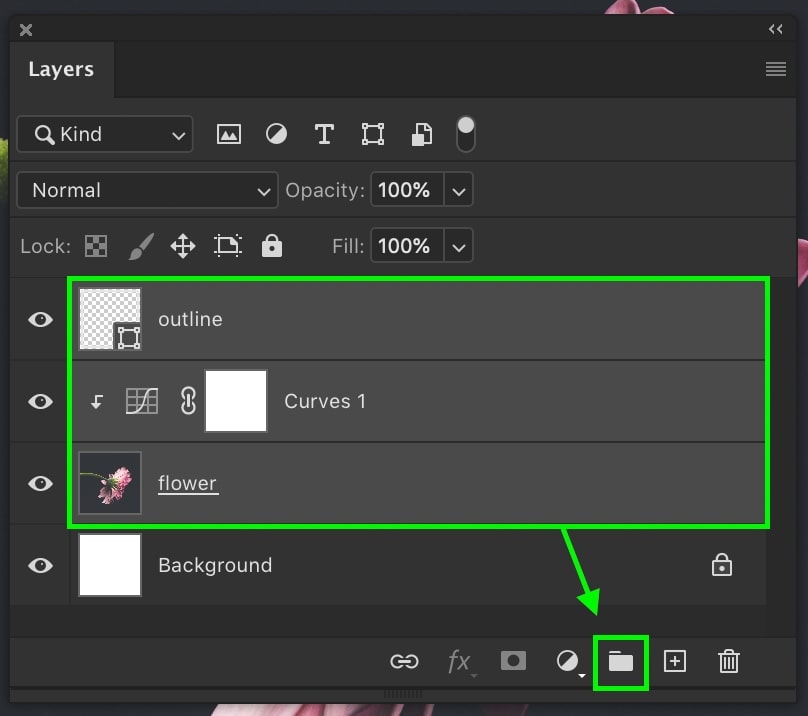
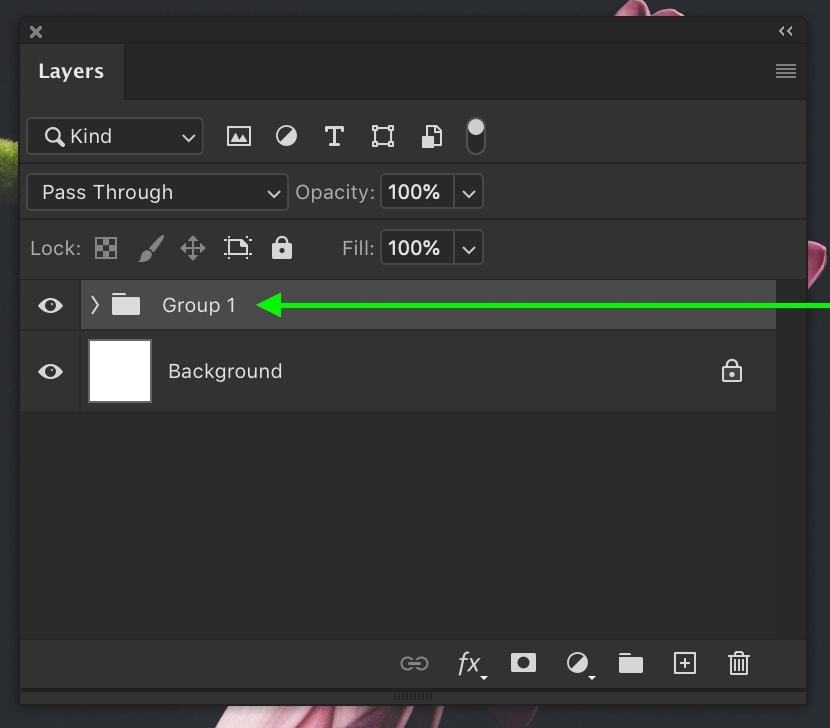
– Group Your Layers
If you find yourself merging layers to declutter your Layers Panel, consider using a group instead. Groups are a folder of layers that can be edited as a whole or individually. They not only free up space in your Layers Panel but make it much easier to find specific layers.
To create a group, highlight the layers you want and press Control + G (Win) or Command + G (Mac). You can also click on the Folder icon at the bottom of your Layers Panel instead.
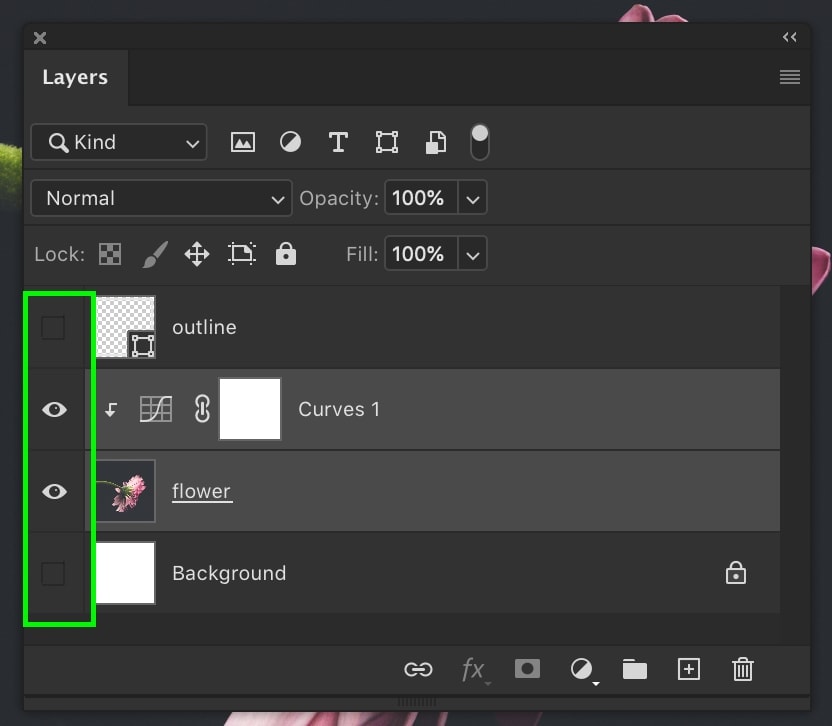
– Merge Layers Into A New Layer
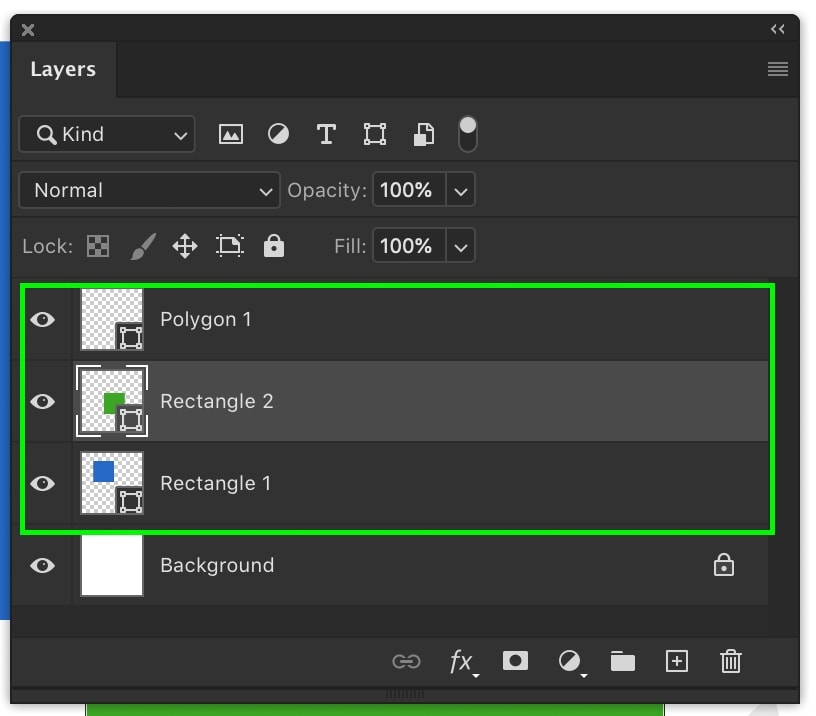
If you still want to merge layers, consider merging them onto an entirely new layer. This way, you always have the original layers to go back to if need be. Before you do the following shortcut, click on the eyeball icons of the layers you don’t want to merge. The eyeball icons should only be visible beside the layers you wish to combine.
To merge and duplicate your layers, press Control + Alt + Shift + E (Win) or Command + Option + Shift + E (Mac). This will duplicate and merge all visible layers.
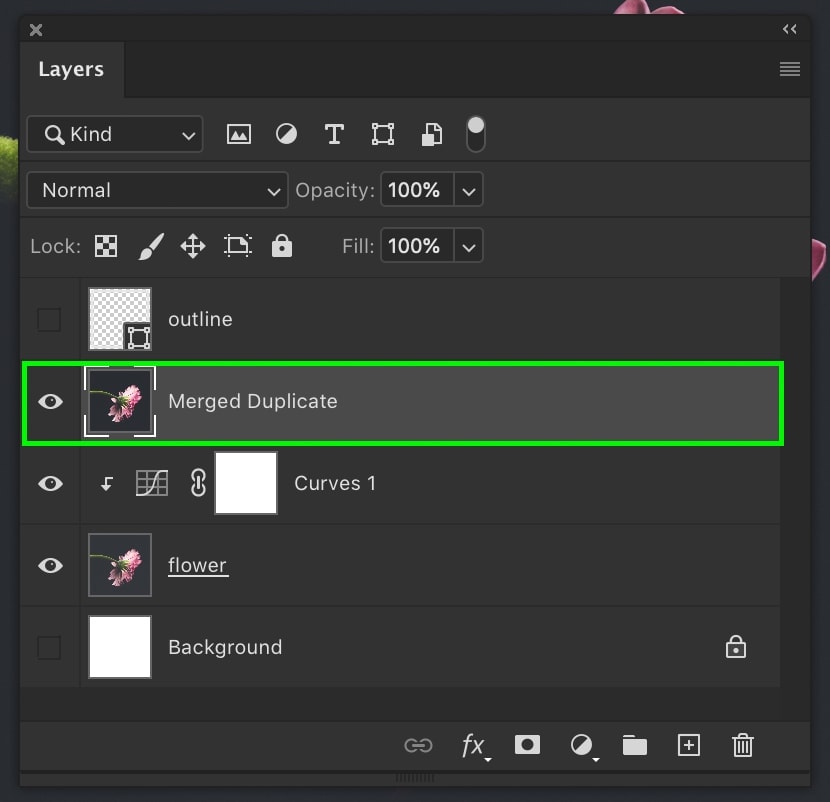
Toggling the eyeball icon once again turns back on the visibility of your other layers. Now you have a new merged layer while keeping the individual layers as a backup!
There aren’t many options for how to unmerge layers in Photoshop besides undoing your actions. Since merge adjustments are destructive edits, it’s hard to go back on them in any other way. That’s why it’s so valuable to consider alternative options for merging layers like smart objects, groups, or merging to a new layer.
– Brendan 🙂


