

How To Fix Blown Out Highlights In Lightroom
Learning how to fix blown out highlights in Lightroom is a crucial part of creating a more professional edit. After all, clipped highlights will reduce the amount of detail in your photo and are just plain distracting. As long as you were shooting in RAW, there are a few easy ways to fix blown out highlights in Lightroom. This article will share the best methods to correct your exposure, and identify any problem areas in your photo.
What Are ‘Blown Out’ Highlights?
Blown out highlights are when the whites of a photo are excessively bright. The result will limit the amount of detail shown and looks very distracting. This can be caused by a variety of reasons both in camera, and in post-processing.
How Do Blown Out Highlights Occur?
Blown out highlights can happen in camera if you don’t use the proper exposure settings. That’s why it’s so important to check your light meter before you take a photo. In all fairness, some situations are hard to expose for. In cases where there are really bright highlights and dark shadows, it’s challenging to expose for both. Like if you were taking a photo in the shade with a sunny background, for example. This would be a challenging situation to find the best settings for.
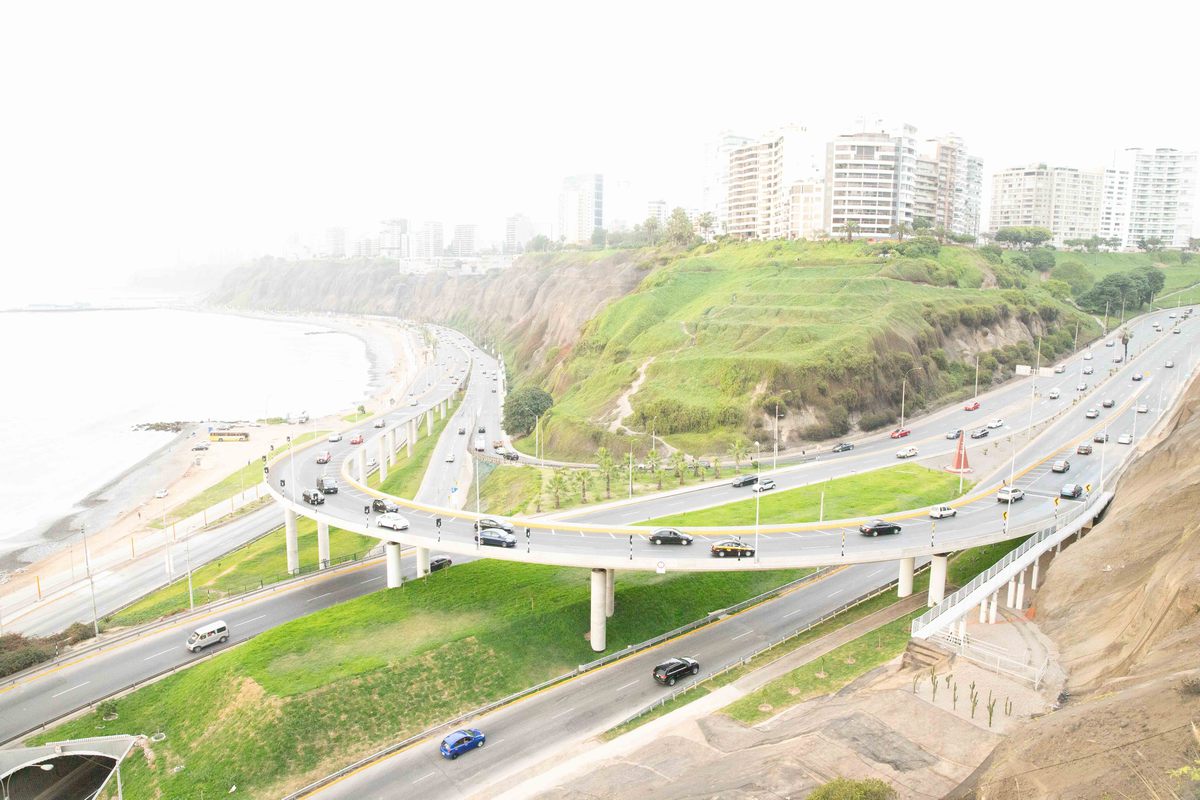
Luckily you can usually fix blown out highlights in lightroom with ease. With that said, it is possible that your highlights become so bright that it’s impossible to recover any information from them. In that case, you’ll run into the situation shown below:

Now even if you perfectly exposure your photo, you can create blown out highlights while editing your image. By making heavy adjustments, you can start to push your exposure too far in one direction or the other. Luckily there are a variety of tools to help you avoid this that I discuss below.
How To Identify Blown Out Highlights In Lightroom
The tricky part about identifying blown out highlights is knowing when it’s actually occurring. There are some parts of your image that may look bright, but aren’t actually blown out at all. Rather than using your eyes to make the judgment call, you can use a cool feature called ‘highlight warning’ in Lightroom.
Highlight warning is a tool that will add a red-colored highlight over sections of your photo that get too bright. As you make adjustments to your photo, the highlight will adapt depending on the new exposure. In an ideal world, your image won’t have any red highlights after you’ve finished editing.
How To Use Highlight Warning In Lightroom
To access the highlight warning feature in Lightroom, you’ll just need to access your histogram.
Once in the Develop Tab, open up your Histogram Panel on the top right of your screen.

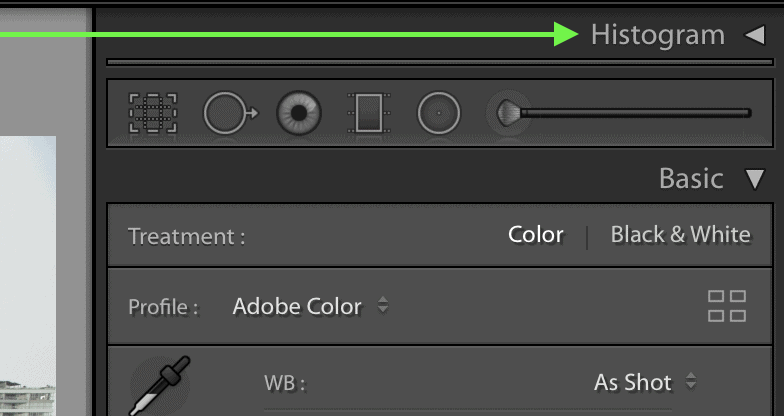
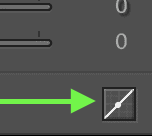
On either side of your histogram will be two small boxes with a triangle inside. The one of the left selects shadow warning, the one on the right selects highlight warning. Click the box on the right.
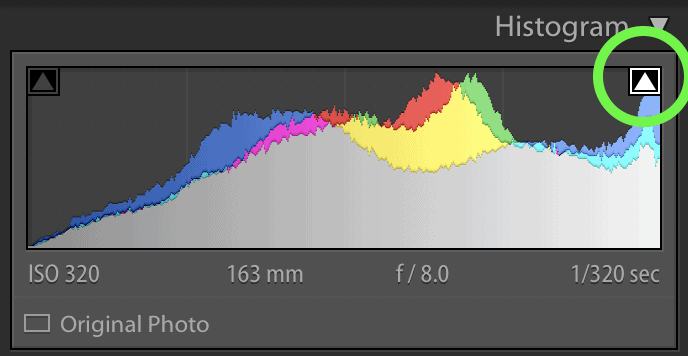
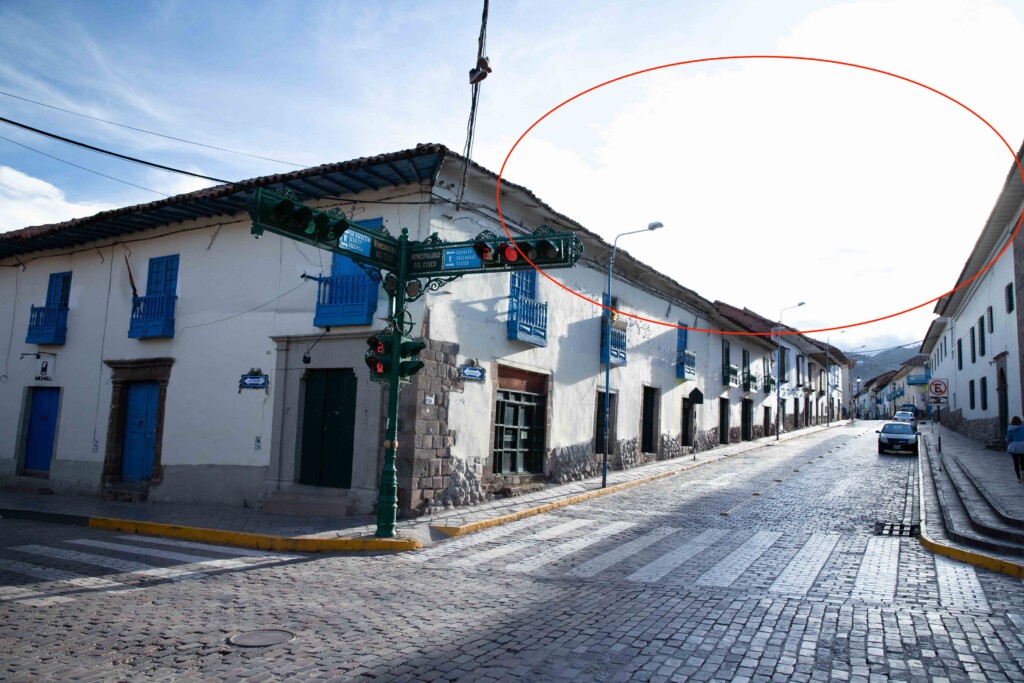
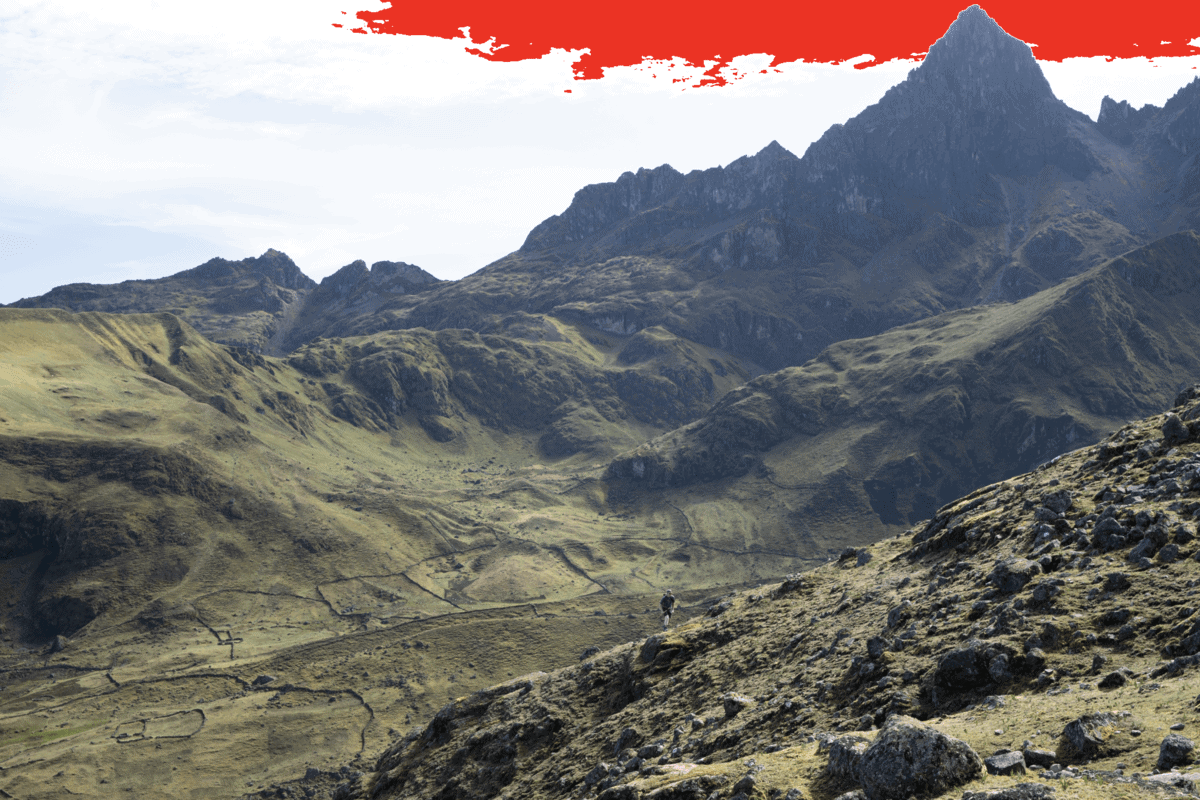
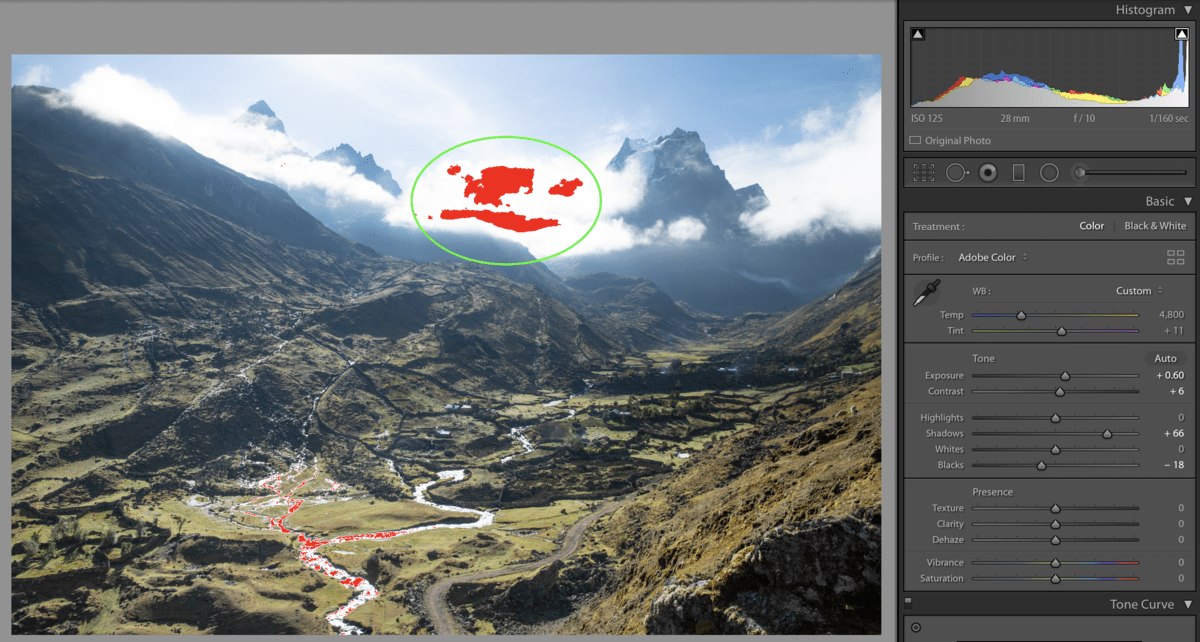
If there are clipped exposures in your image, a red highlight will appear over your those sections.
To turn off highlight warning, simply click on the same box on the right of your histogram.

You can toggle the highlight warning on and off whenever you wish. It can be distracting to leave on all the time when editing your image. I find the highlight warning is best to use at the beginning and end of your editing process. This way you can refine your exposure values more accurately before starting your workflow or exporting your image.
You Might Like: How To Use A Histogram
3 Tools To Fix Blown Out Highlights In Lightroom
Now that you know how to identify blown out highlights in Lightroom, it’s time to fix them! Let’s go over 3 tools you can use to fix blown out highlights in your photo.
1. Whites & Highlights Sliders
The first and easiest way to fix blown out highlights is with the whites and highlights sliders. These sliders can be found in the Basic Panel in Lightroom. Together these two sliders will target the exposure of the brightest part of your photo.
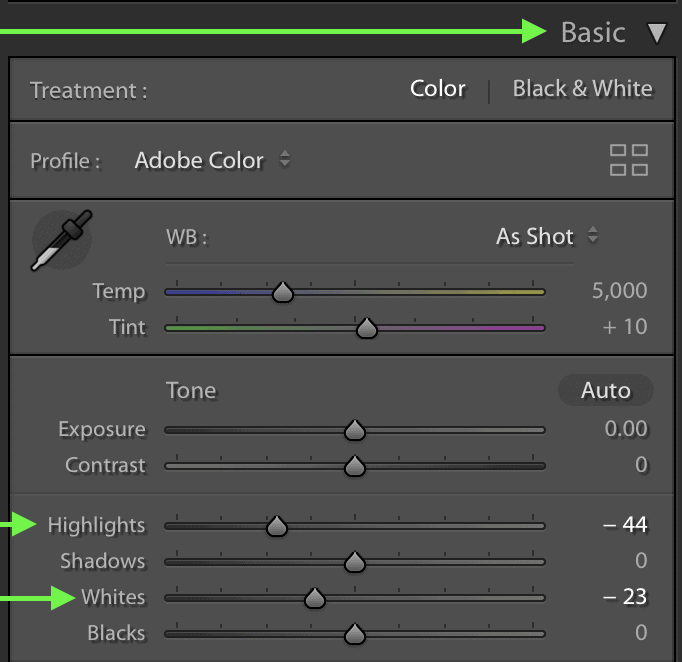
For reference, the highlights represent the brightest parts of your photo. By adjusting this slider, you’ll target the whitest whites in your frame.
The whites slider still targets the bright exposures in your photo, but slightly differently. Rather than affect just the brightest exposures, the whites slider adjusts the lighter exposures that sit closer to middle grey. In short, anything that is bright, but not the brightest, will be affected by the whites slider.
You can experiment with each of these sliders to see which one best targets the area in question. Using them together is another simple way to get even more control over the blown out highlights in your frame.
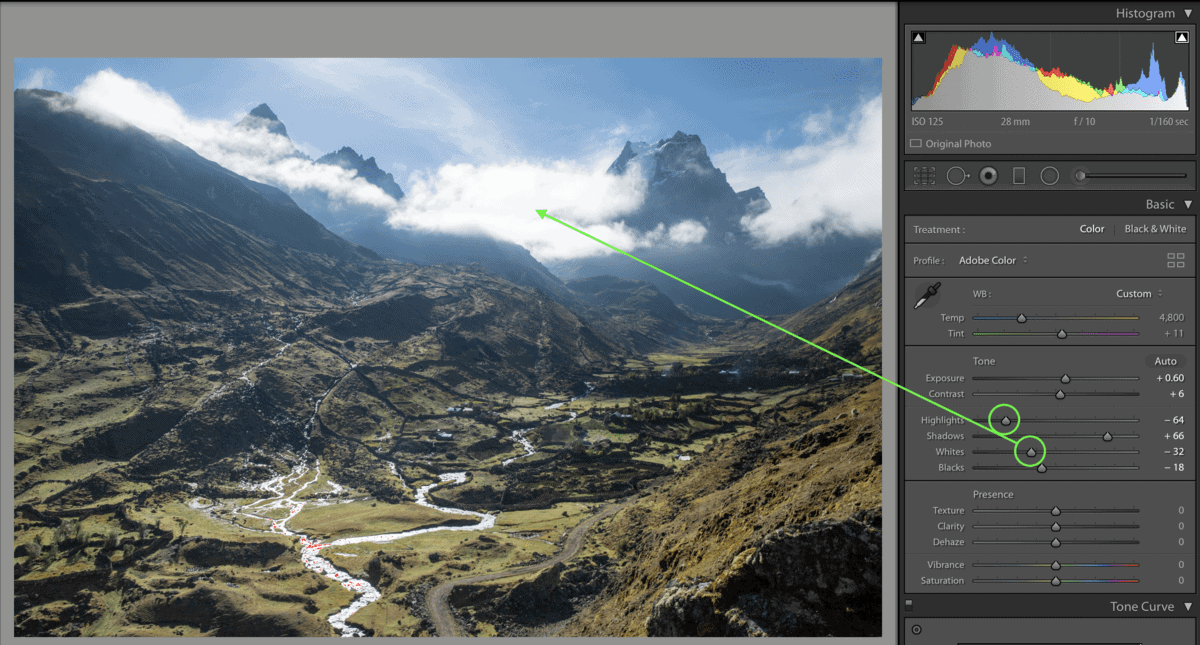
The beauty of these sliders is the fact they only target the trouble areas. Rather than adjusting your entire exposure, you can just target the blown out sections. That way you don’t have to sacrifice other areas of your image just to bring down your highlights!
2. The Tone Curve
The Tone Curve is another great tool to fix blown out highlights in Lightroom. Rather than a slider, the Tone Curve lets you get more specific with the adjustments. With the help of anchor points, you can isolate very specific highlight ranges to fix.
There are two types of Tone Curves in Lightroom. The first is called the Point Curve, while the second is called the Region Curve. Both options work well to fix blown out highlights, so it’s up to you which works best in your eyes. You can switch between them by pressing the curve icon on the bottom right of the panel.
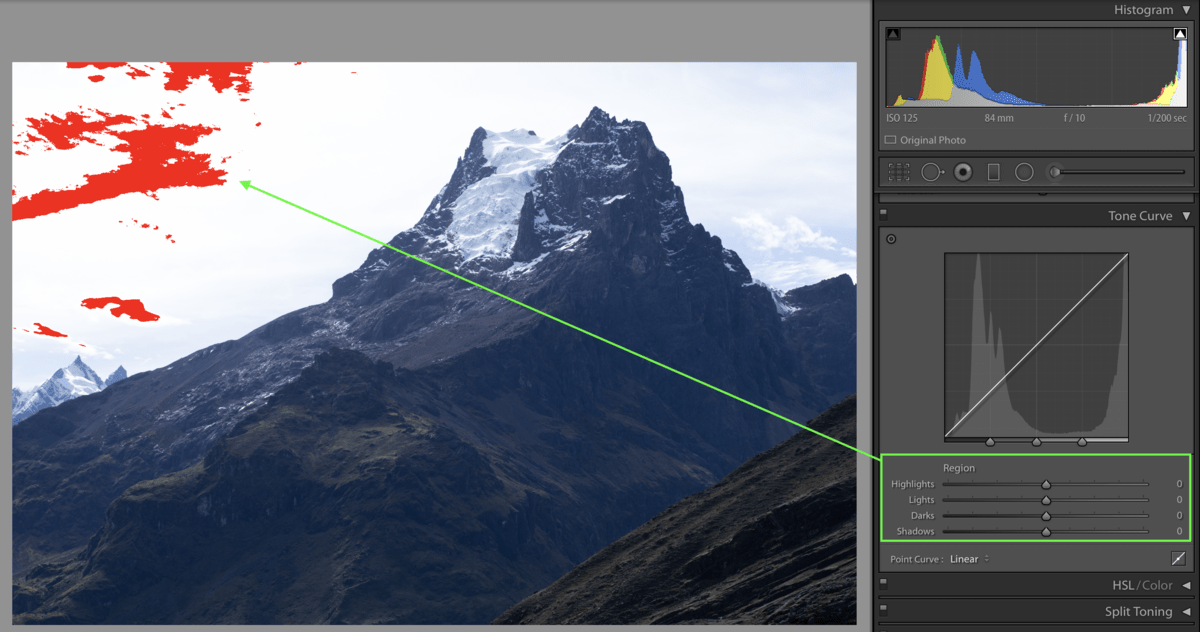
– How To Use The Region Curve To Fix Blown Out Highlights
The Region Curve breaks down your curve into sliders. Rather than having to move the curve yourself, you just need to move the sliders. Conveniently, there is once again a whites and highlights slider for you to utilize. Each of these sliders will work well to fix blown out highlights, but they are limited to how far they can adjust.

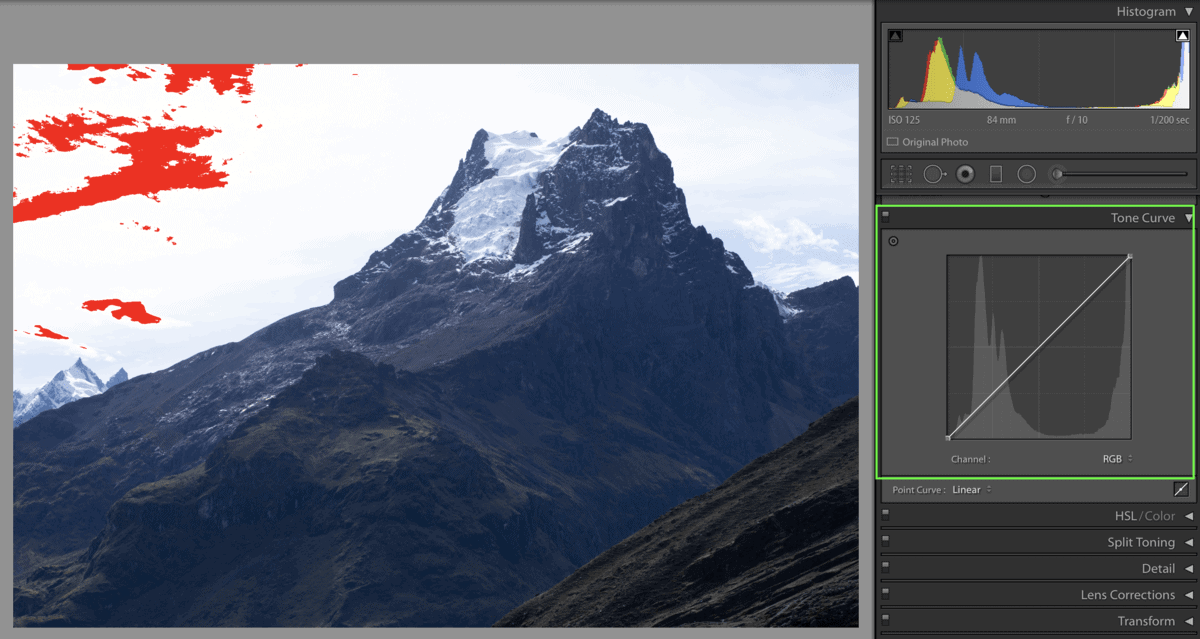
– How To Use The Point Curve To Fix Blown Out Highlights
The Point Curve leaves it all up to you. You’re in charge of adding anchor points to make all necessary adjustments to your highlights. The advantage of this is that you can make much heavier adjustments than with the Region Curve. In situations where your highlights are really blown out, this may be a better option.
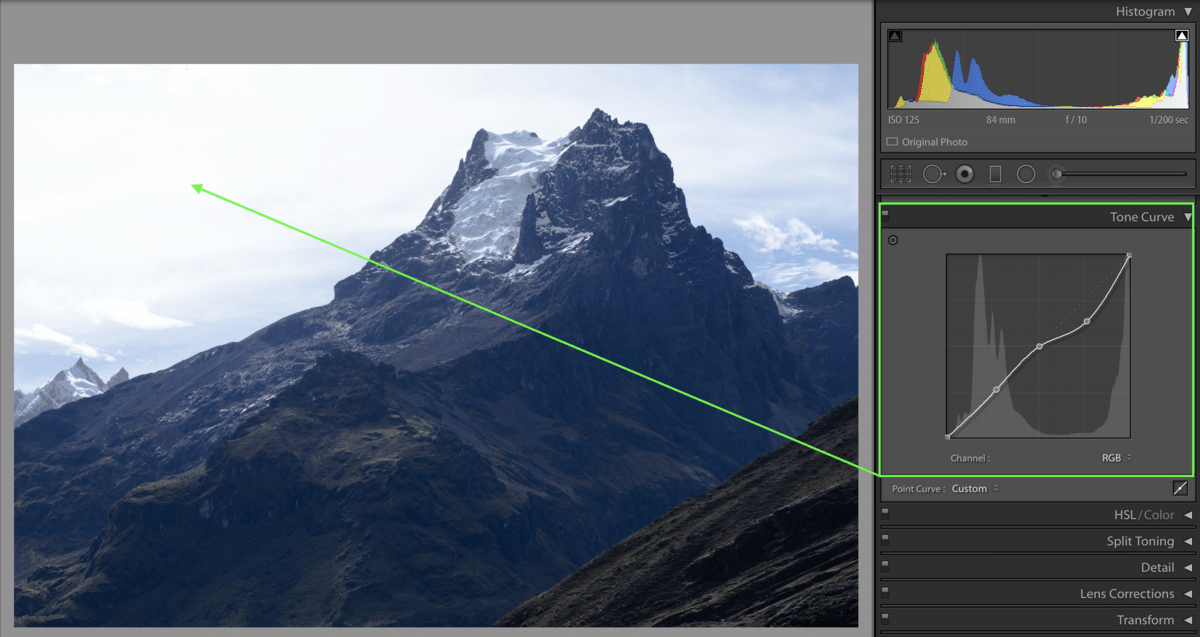
To add an anchor point, simply click anywhere on the Tone Curve. If you click and drag on any anchor point you’ll be able to move it up or down. In the world of the Tone Curve, up is bright and down is dark. That means you’ll want to bring your anchor points down to fix your blown out highlights!
The white and highlights of your photo can be adjusted on the right side of your Tone Curve. Adding anchor points here will target the lighter exposures in your image.
Extra Tip: Before you start, add an anchor point in the middle and near the bottom of your curve. This will lock it into place so your highlight points don’t accidentally affect your shadows as well!

Learn More: How To Master The Tone Curve In Lightroom
3. The Adjustment Brush
If all else fails, you still have the Adjustment Brush to have your back. Rather than a global adjustment like options 1 and 2, the Adjustment Brush only targets the areas you tell it to. All you have to do is paint over a problem area, and you’ll fix the blown out highlights in no time!
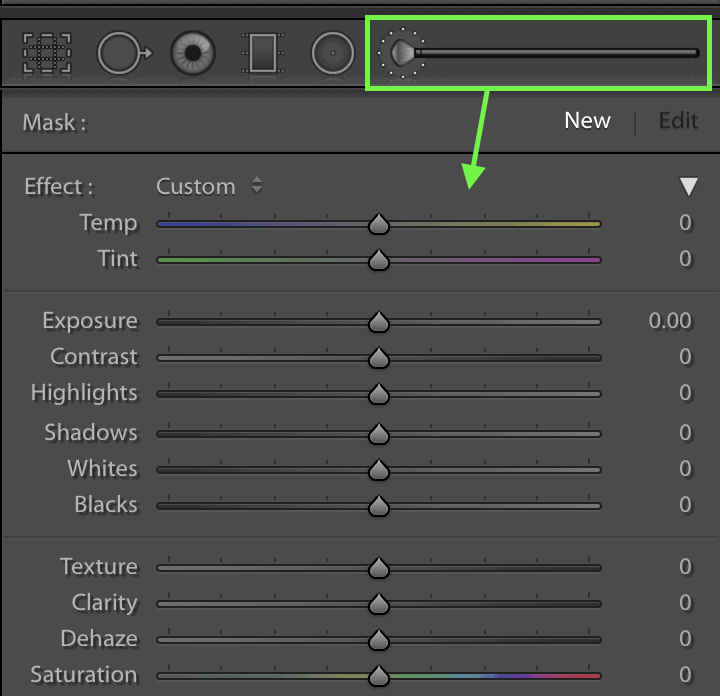
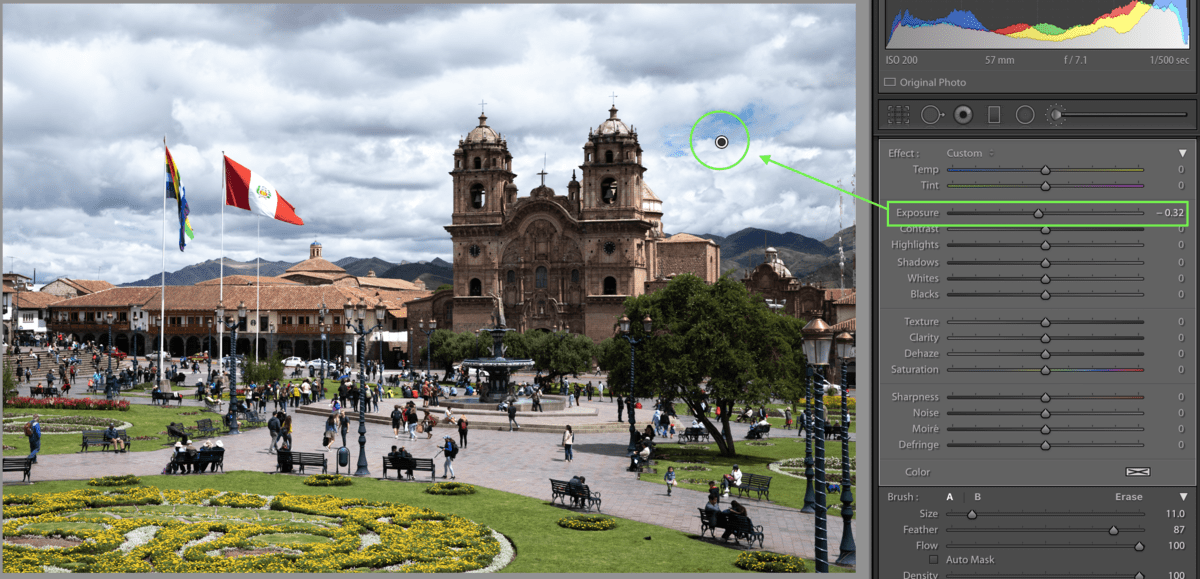
The Adjustment Brush is extremely easy to use. It can be accessed at the top of your toolbar on the right of your screen in Lightroom.
Once selected, all you need to do is paint on your image to create a selection. In this case, I’ll simply paint over where my highlight warning is showing up.
From here a new adjustment tab will open up so you can adjust the selected area. Since it’s isolated to one spot, you can use the exposure, whites, or highlights slider to bring down your highlights.

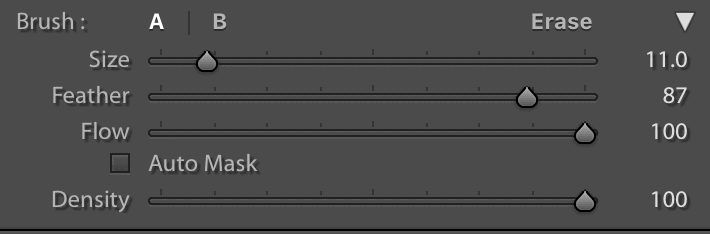
Extra Tip: Try to be as specific as possible. You don’t want to begin affecting areas that don’t need to be darkened, or else you’ll up with a weird look. Use your brush settings panel to refine the size, flow, and feather of your brush for more precise adjustments!
Is It Bad To Have Blown Out Highlights In Your Photos
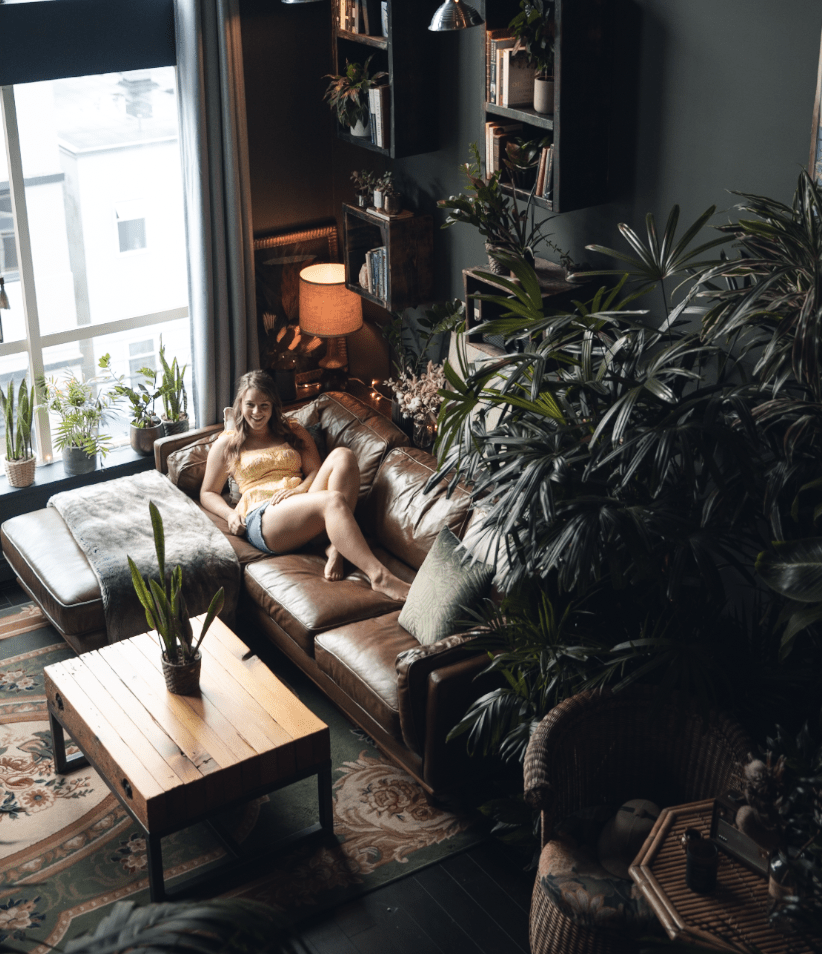
Although they aren’t ‘technically’ the best to have in your photo, they can be hard to avoid. In all honesty, you’ll have a hard time completely avoiding every speck of clipping you see. In some cases, it’s not feasible to fix the blown out highlights. For example, in this image, it was extremely dark in the apartment, but a sunny day outside. The result is a moderately blown out window, but a nicely exposed interior. If I were to give the window a perfect exposure, it would create an HDR effect that would look more unappealing.
If you can help it, preventing and fixing blown out highlights is an ideal option. It will make for a more professional looking image with better detail. However, don’t have a mental break down every time your photo looks blown out. Utilize the tools discussed here, and do your best to eliminate the highlight warning from appearing!
Conclusion
So those were 3 tools to fix blown out highlights in Lightroom with ease. Each of these tools mentioned has its own advantages so experiment with them all. The beauty of having backup options is that fact you always have a plan B. If one technique isn’t working to fix the blown out highlights, you can try another. Now nothing can stop you from eliminating blown out highlights from your photos!
If you found this article useful, be sure to share it with a friend!
If you want more articles like this one, subscribe to my weekly newsletter for more photography and photo editing tips!


