
How To Export And Share Photos From Lightroom Mobile
After editing an image in Lightroom Mobile, you may be left wondering how to export it. Within Lightroom Mobile, there are various export options allowing you to save images to your phone, external apps, or dedicated albums. Depending on where you want your photo to end up, the steps you follow will vary slightly. Luckily, learning how to export photos from Lightroom Mobile is easy, and this post will share exactly how to do it.
To export a photo from Lightroom Mobile, click on the “Share To” icon found in the top right corner. Then click “Export To Camera Roll” to quickly save your photo onto your device. If you wish to customize the export settings and save location, select “Export As” instead.
To make life easier, let’s break down these simple steps more in detail and discuss other export options from the Lightroom Mobile app.
How To Save Photos After Editing In Lightroom Mobile
After you’ve made your adjustments, it’s time to export. The easiest way to do this is while you’re still in the Edit Module.
Now if you’re new to using this app, then make sure to check out these previous posts on how to get the orange and teal look or how to change color in Lightroom Mobile.
For exporting a photo from the Edit Module, it can be done in just a few easy steps.
Step 1: Press The “Share To” Button
When you’re ready to export, hit the Share To button found in the upper right corner of the Edit Module.
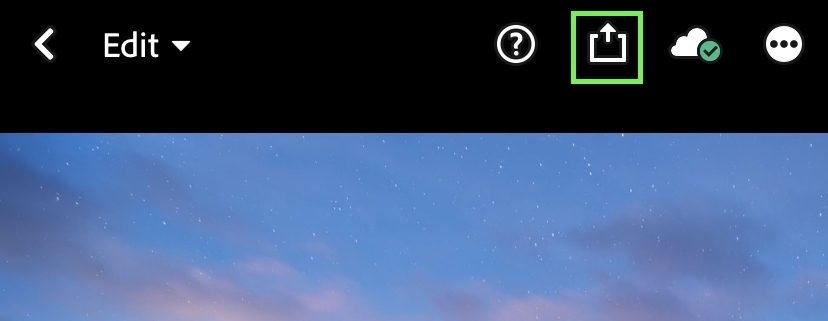
The icon is a box with an arrow pointing upwards from it. This is the typical export of sharing icon you’ll find across many Adobe apps.
Step 2: Select Your Export Location
A new tab will appear with a variety of exporting options. For this example, let’s say you want to export your photo as quickly as possible. In that case, choosing Export To Camera Roll or Export To Files is your best option.
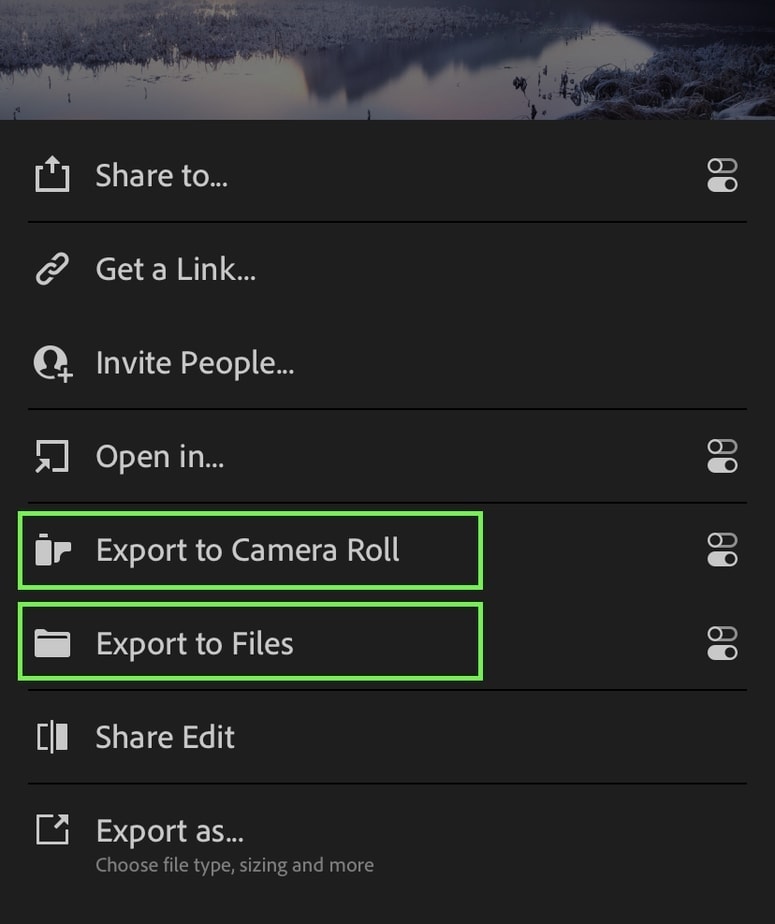
Your Lightroom Mobile edit will be saved as a new file among the other photos on your device by exporting to your camera roll. This option is a fast and simple way to export your photos since they’ll be easy to find later on.
The second option is to export to files, which allows you to save your photo to other apps or cloud storage. For example, if you wanted to export to Dropbox, Google Drive, or iCloud, you could do so through this option.
After deciding which method works best for you, click on it, and the export process from Lightroom Mobile will begin.
Step 3: Find Your Exported Photo In The Export Location
After exporting either to your camera roll or to files, take a moment to locate your file. That way, you can ensure everything is exported correctly before you move on to your next project.
In this example, since I saved it to my camera roll, I can see my Lightroom Mobile export as my newest photo in the photo library.
With these three steps, you can quickly export a photo from Lightroom Mobile, but you don’t have control over the export settings. If you want to change the image quality, dimensions, file type, and more, there is a slightly different method you’ll need to use.
How To Change Your Photos Export Settings In Lightroom Mobile
While exporting photos from the app, you can control many the same export settings as you can in Lightroom Desktop. Whether you need certain dimensions for social media, a special file type for a project, or a watermark to protect your images, it can all be done within Lightroom Mobile.
In the following steps, you’ll go through the same options as before, but with a bit of a variation. Rather than simply hitting the export button, you’ll need to open the export settings first.
Step 1: Choose Your Save Location & Press The Export Settings Button
Just like before, you’ll need to first press the “Share To” icon in the upper right corner of the Edit Module.
Next, select where you want to save your export to, choosing between Camera Roll or Files. The difference now is that you can also select the “Export As” option as well.
Export As lets you fine-tune your export settings and pick just about any location to save your image to. Although we’ll talk more about this feature, later on, it’s a good option if you are going to upload your photo online or to Instagram from Lightroom Mobile.
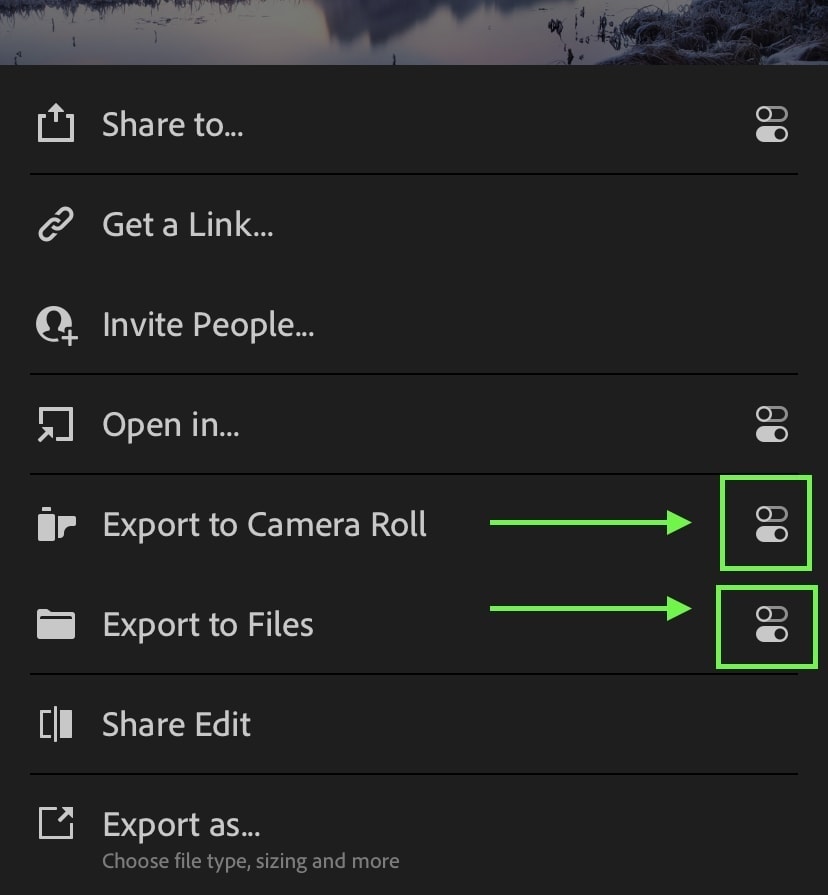
However, I’ll once again go with the Export To Camera Roll option for ease of use, this time pressing the export settings button.
Step 2: Adjust Your File Type, Image Dimensions, Quality, and Watermark Options
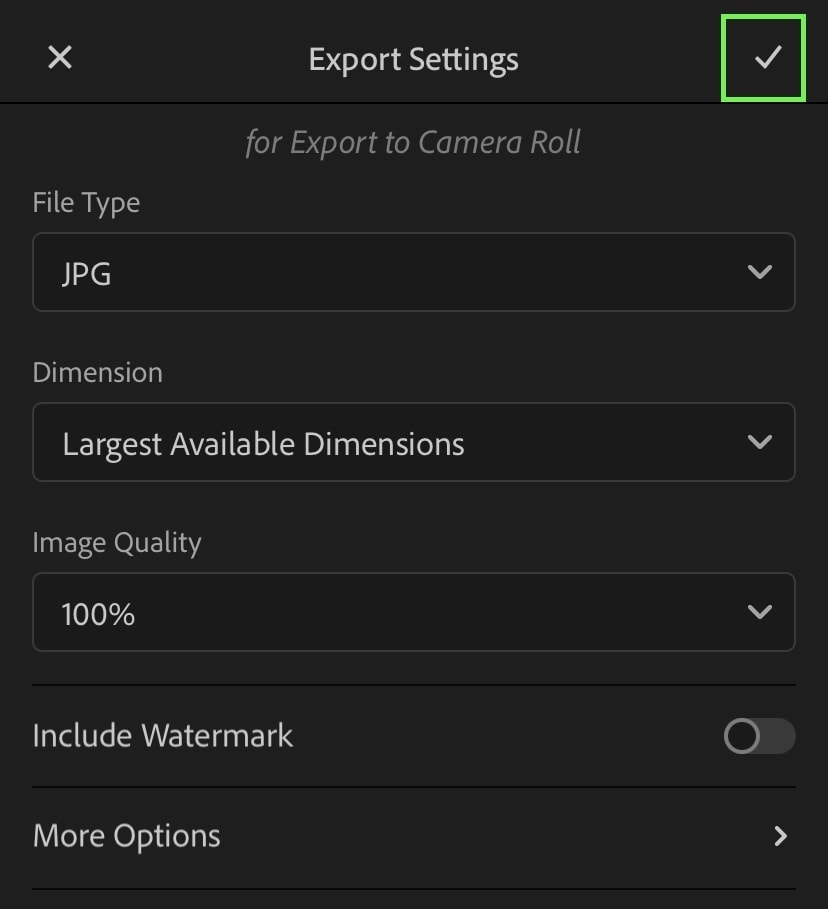
In the Export Settings menu, you’ll have a series of basic export options that control your photo’s final settings.
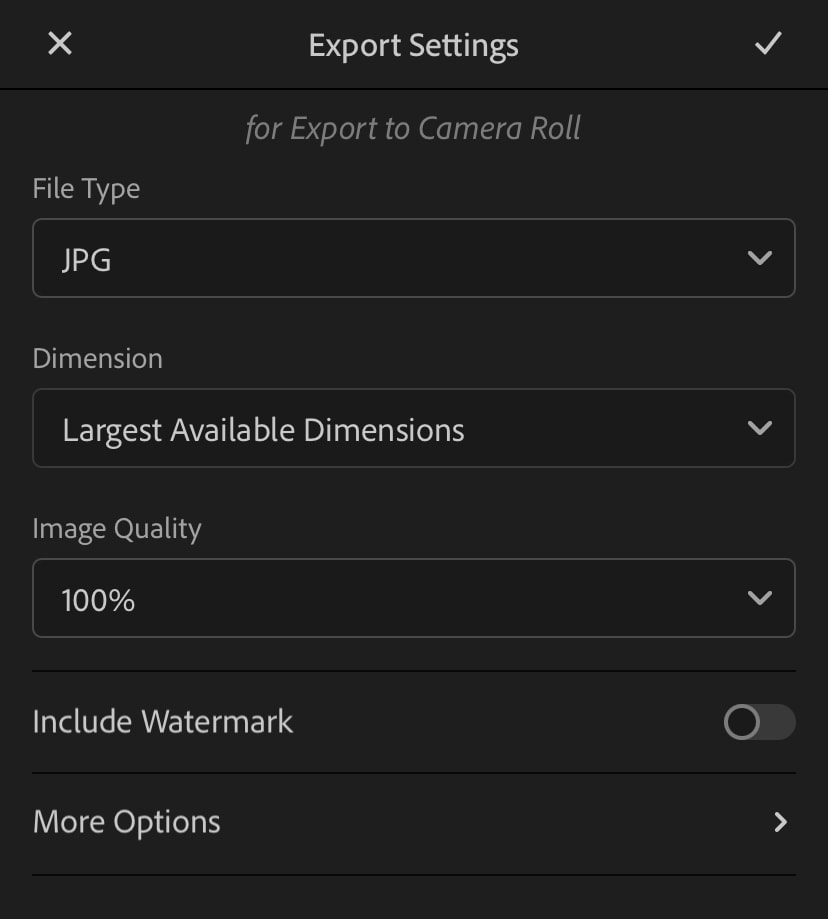
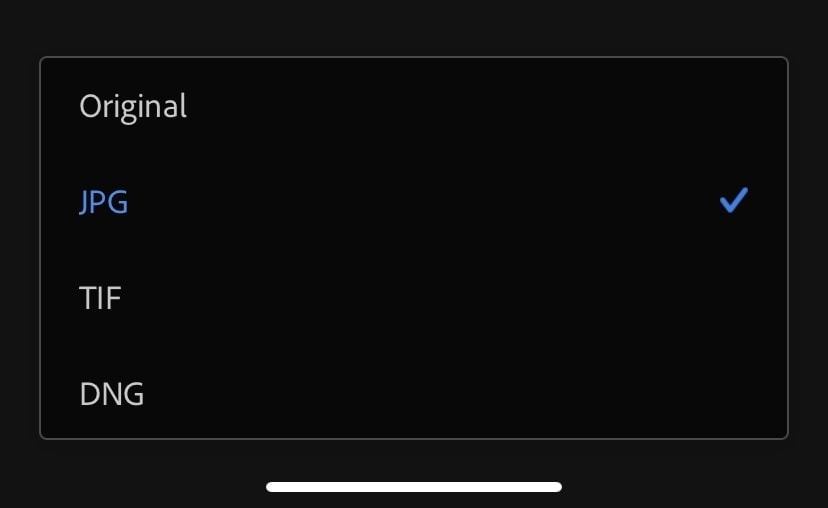
The first option to choose from is the File Type. In Lightroom Mobile, you can export photos as JPG, TIFF, DNG, or Original, meaning it’ll stay the same file type that it was imported as.
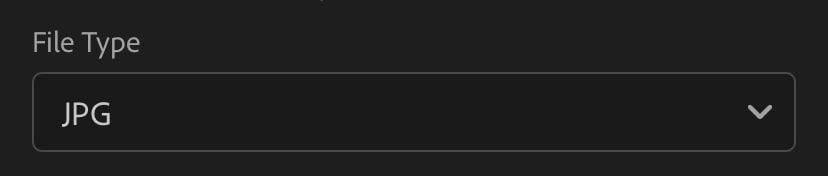
By clicking on the drop-down menu, you can select any of these four file types for your export. If you aren’t sure, saving to JPG is the best option.
Next is the Image Dimension settings. These control the width and height of your final export. By default, it will be set to “Largest Available Dimensions,” which means it will export your photo is the biggest size possible considering its resolution and crop.

However, you can also choose between a “Small” or “Custom” dimension setting.

The Small Dimension is good if you want to make your file as small as possible for website purposes. Rather than worrying about file size, this option will limit how large your final export will be.
The Custom Dimension option is slightly different, allowing you to set the long edge dimension value. That means you can manually set the longest edge size in your photo, and the shorter edge will be adjusted accordingly.
Since Lightroom Mobile will use the same aspect ratio as your original photo, you won’t have to worry about having a distorted photo with this option.
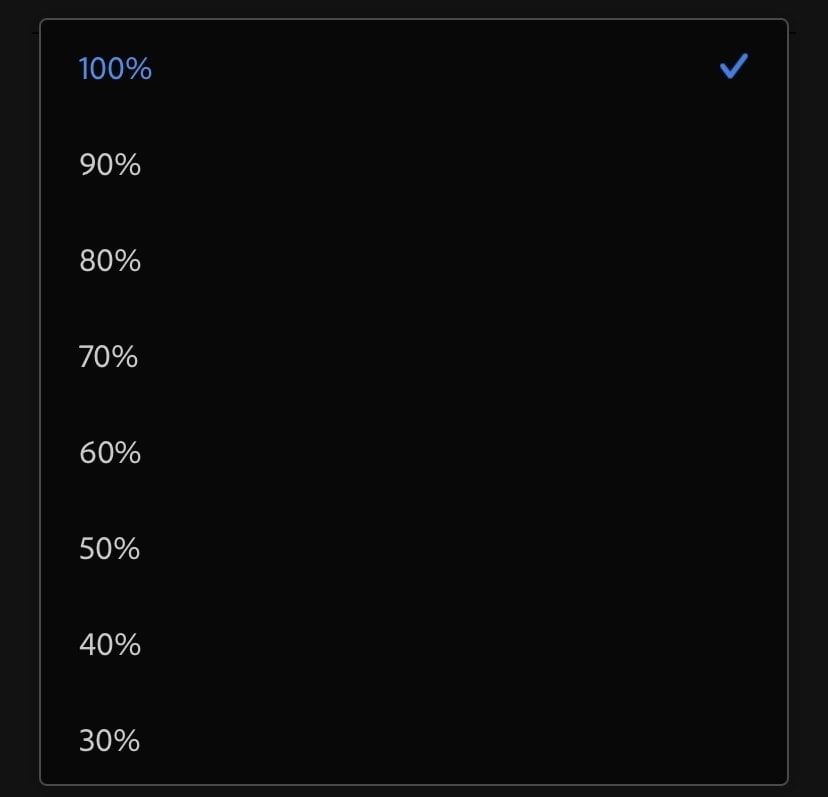
From there, you have the Image Quality, which is pretty self-explanatory. The higher your quality, the better resolution your photo will be. In most cases, it’s best to leave this setting at 100%, but it should be reduced if you want to limit your final file size.

Finally, you can choose to include a watermark on your photo by turning on the “Include Watermark” option. You can then choose to customize your watermark and place it anywhere over your photo.

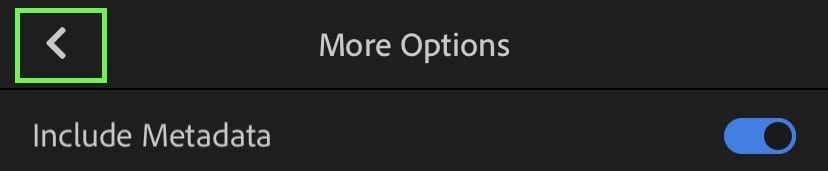
Step 3: Go Through The “More Options” Export Settings
At the bottom of your export settings panel, you’ll see “More Options.”
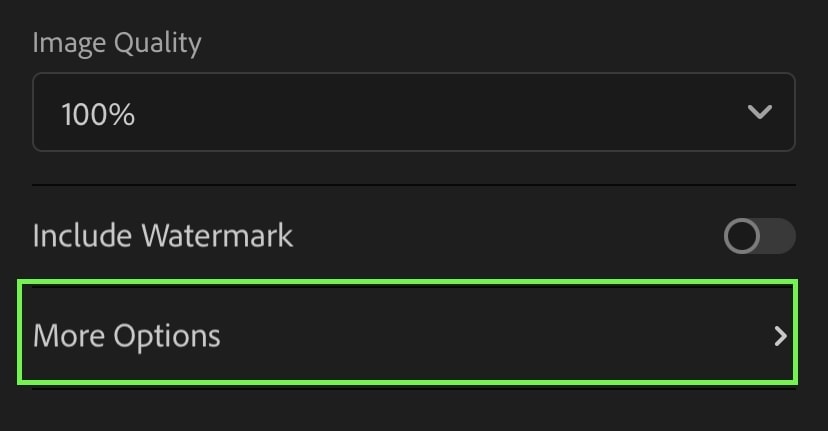
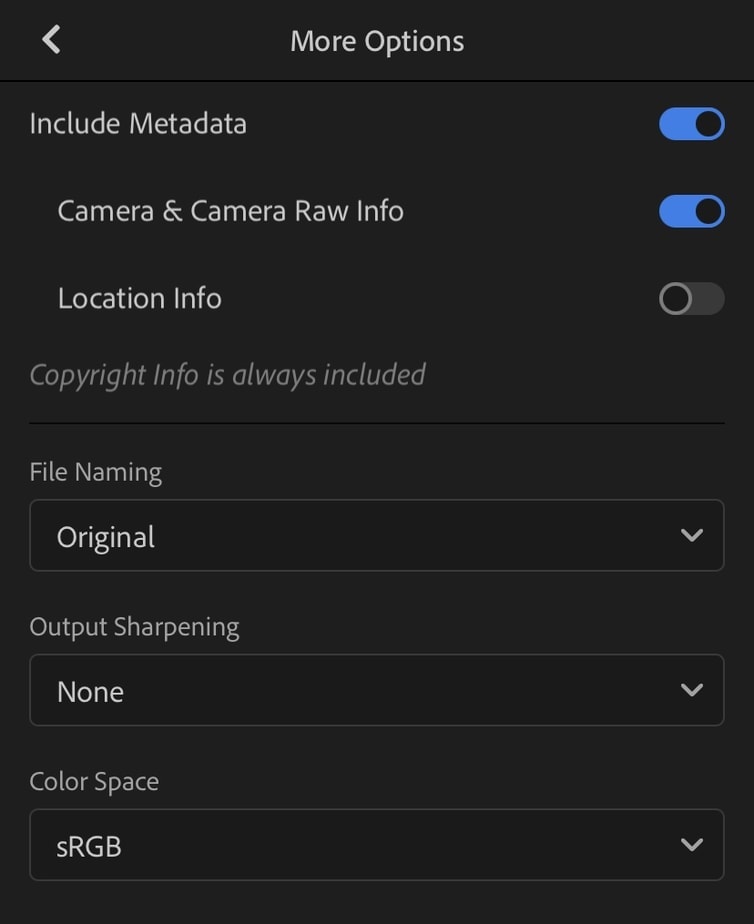
Click on this option to reveal additional export settings regarding metadata, file naming, output sharpening, and color space.
– Metadata Settings
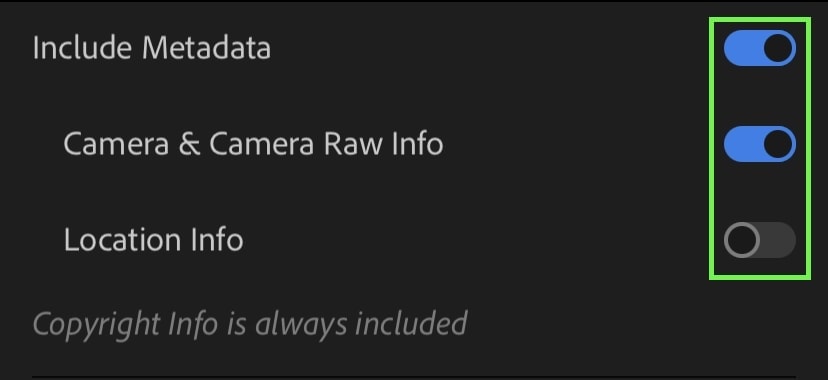
The first option you’ll see is the Metadata options. In a nutshell, photo metadata is the information about how and where the photo was taken. This information can include what device the photo was taken with, the settings used, the time of day, or where it was shot.
In most cases, it’s a good idea to leave your photo metadata enabled so that your images are easier to locate on your computer. Since it provides information on your photos, metadata can help locate images on your computer or in other photo editing software.
By simply switching the buttons between on and off, you can decide which metadata settings are exported with your edit.
– File Naming Options
The next option is file naming. By default, your image file will be named something like “IMG_26510.JPG,” but this isn’t always ideal. After all, nobody will remember what a photo is just by looking at a bunch of numbers.
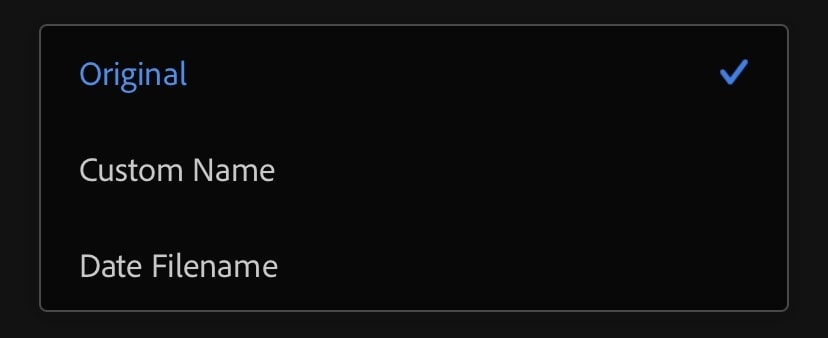
Instead, Lightroom Mobile lets you choose between the file naming options of original, custom name, or date filename.
To break it all down, Original will leave your file name unchanged, Custom will allow you to create your own name, and Date will add a date before your export’s filename.
Unless I’m editing photos for a particular project or client, I’ll leave the file naming option set to original.
– Output Sharpening
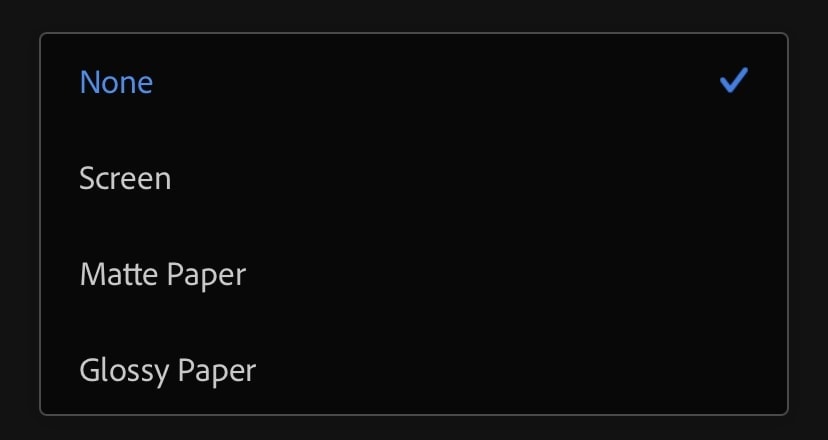
Output sharpening will add additional sharpening adjustments based on where your photo will be displayed. In Lightroom Mobile, the output sharpening options are None, Screen, Matte Paper, and Glossy Paper.
By default, this setting will be set to None. This is completely fine if you aren’t sure which option to use.
However, setting your output sharpening to Screen will help make your image appear crisper when viewed on mobile or computer screens.
On the other hand, the matte or glossy paper options will help enhance details depending on the type of paper the photos are printed on.
Once again, if you aren’t sure, leaving this option set to None is totally acceptable.
– Color Space
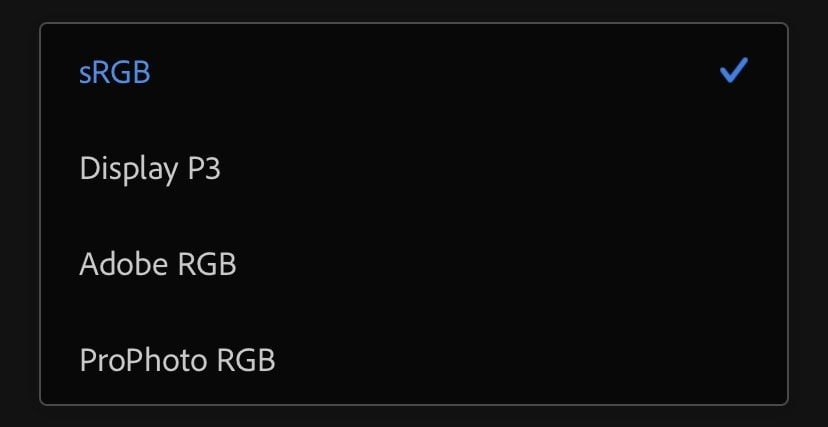
Color space controls how the colors in your image are displayed across different screens. Since different types of monitors may use a particular color space for optimal color viewing, it’s nice to have the option to adjust this setting.
With that said, the vast majority of modern devices use the sRGB color space. To appeal to the largest viewing audience, it’s best to leave the color space set to this default option.
Step 4: Export Your Photo With Custom Export Settings
After finishing with the more options window, press the back arrow to come back to the main export settings screen.
Since all your export settings are in order, press the checkmark in the screen’s upper right corner.
This will start the export process, this time using the custom export settings you just created.
If you aren’t sure where your export will be going, just look at the top of your screen. In my case, since I’m exporting the photo to my camera roll, that’s what it says. However, it would say something different if you were going through the Export To Files or Export As options.
Just like before, after your photo has been exported from Lightroom Mobile, make sure to find the image on your device. This is a good habit to get into, so you catch any mistakes early on!
Exporting Multiple Photos At Once
If you’re the type of person who loves to edit photos in batches, why would you want to export all your edits individually? If you ask me, that’s nothing but a massive waste of time.
Luckily you can export multiple photos at once from Lightroom Mobile to save yourself the hassle.
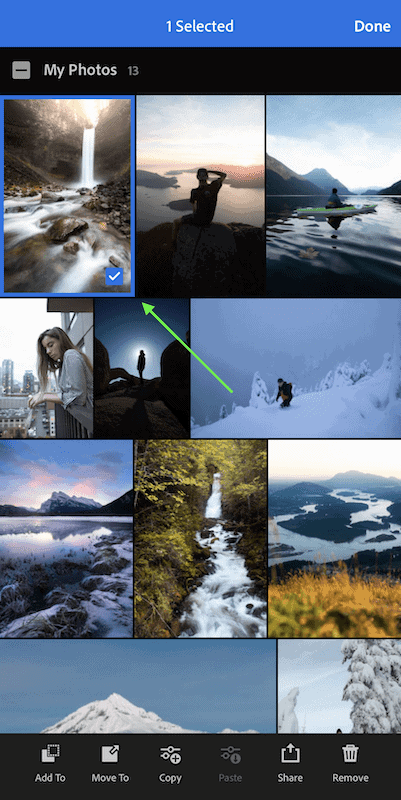
To export multiple photos from Lightroom Mobile, click and hold on an image while in Grid View in the Library Module. After selecting additional images, press the “Share” option at the bottom of your screen. Now you can choose to export your selected photos to your camera roll, device files, or other locations on your device.
Within your Library Module, select the album or group of photos you want to export from. If you’ve been editing some of your photos already from these groups, your edits will be saved within the Lightroom Mobile Library.
Once in Grid View, click and hold on the first photo you’d like to select for export. Now you’ll have the option to select multiple photos at once.
Continue on and select all the Lightroom Mobile edits you want to export together.
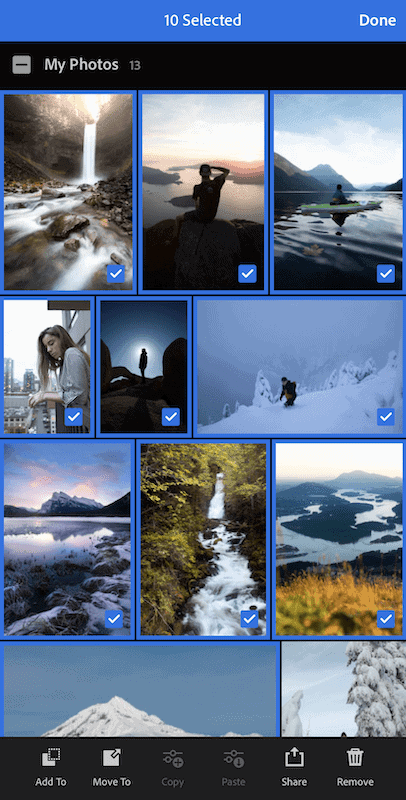
With all your images chosen, select the “Share” option from the bottom menu.
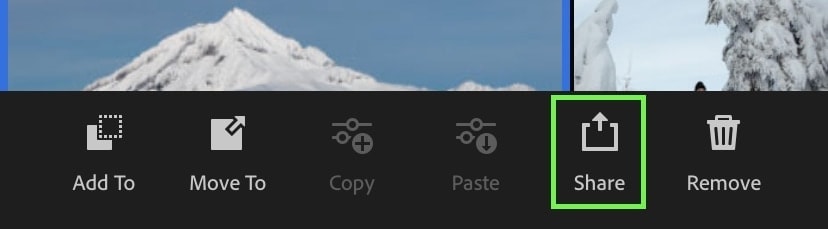
This will reveal a new window with most of the same options we discussed earlier—Select Export To Camera Roll, Export To Files, Or Export As depending on your preferences.
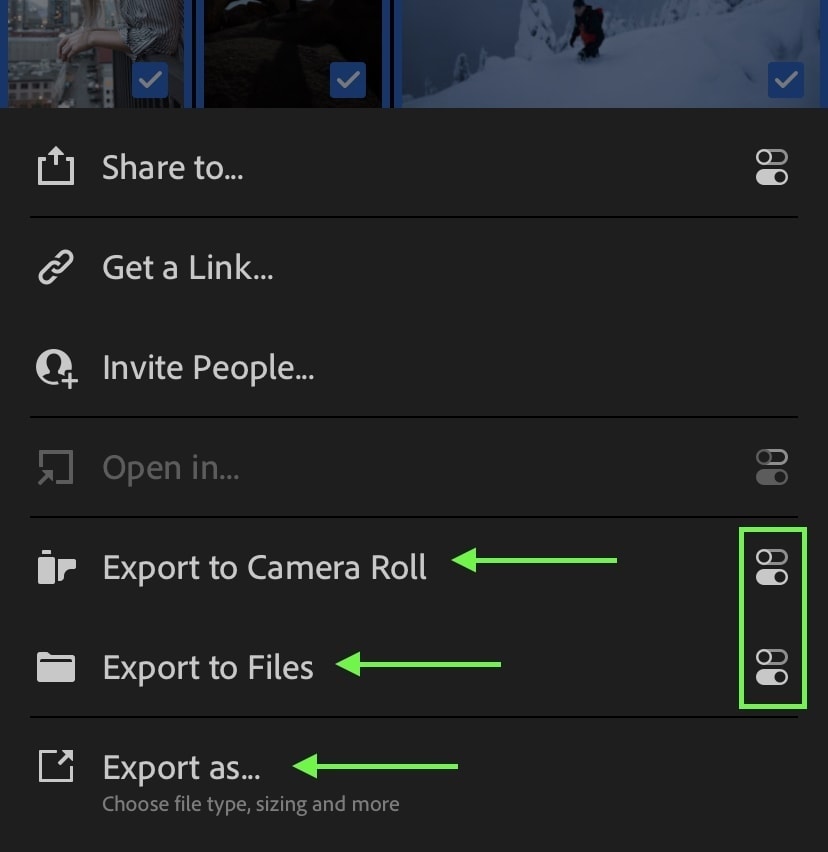
If you’d like to make custom export settings for your batch edit, just hit the setting button on the right-hand side.
After going through the same steps as you learned previously, your photos will export from the app. This time, you’ll be exporting a group of images at once, rather than individual photos.
How To Export Photos From Lightroom Mobile To Instagram
Now maybe you don’t have much of a need for saving your photos to your camera roll. If you plan to upload your photos directly to Instagram anyway, why not do it all from Lightroom Mobile? Here’s how to do it:
To export a photo from Lightroom Mobile to Instagram, click the “Share” button and then select “Share To” from your export options. A new window will appear, allowing you to select the Instagram app as one of the options. After choosing Instagram, you’ll be prompted to add a caption, then share your photo directly to the app from Lightroom Mobile.
Now let’s break that down in a more step-by-step method.
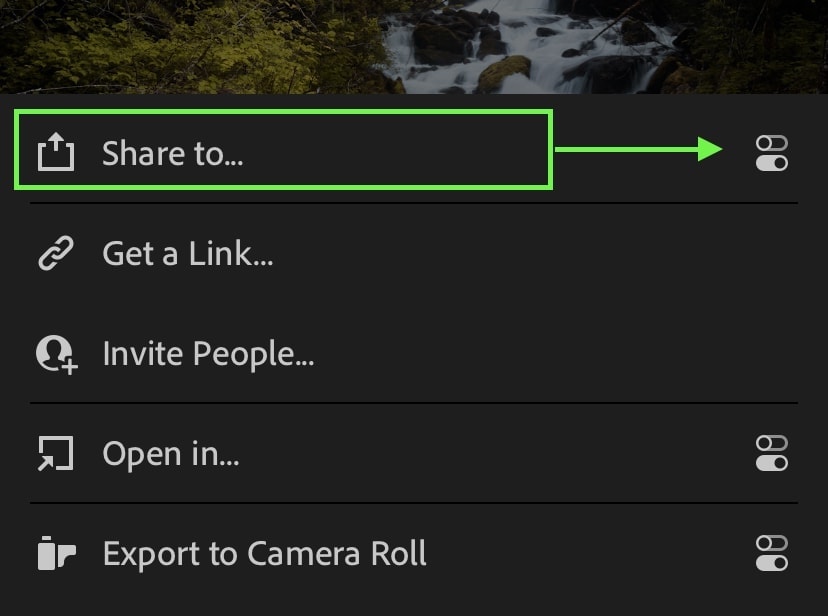
After you’ve made your edits in the Edit Module, press the “Share To” button once again.

This time, rather than choosing one of the export options we’ve discussed so far, you’ll want to choose the “Share To” option.
Just make sure that your export settings are in order before finalizing your export!
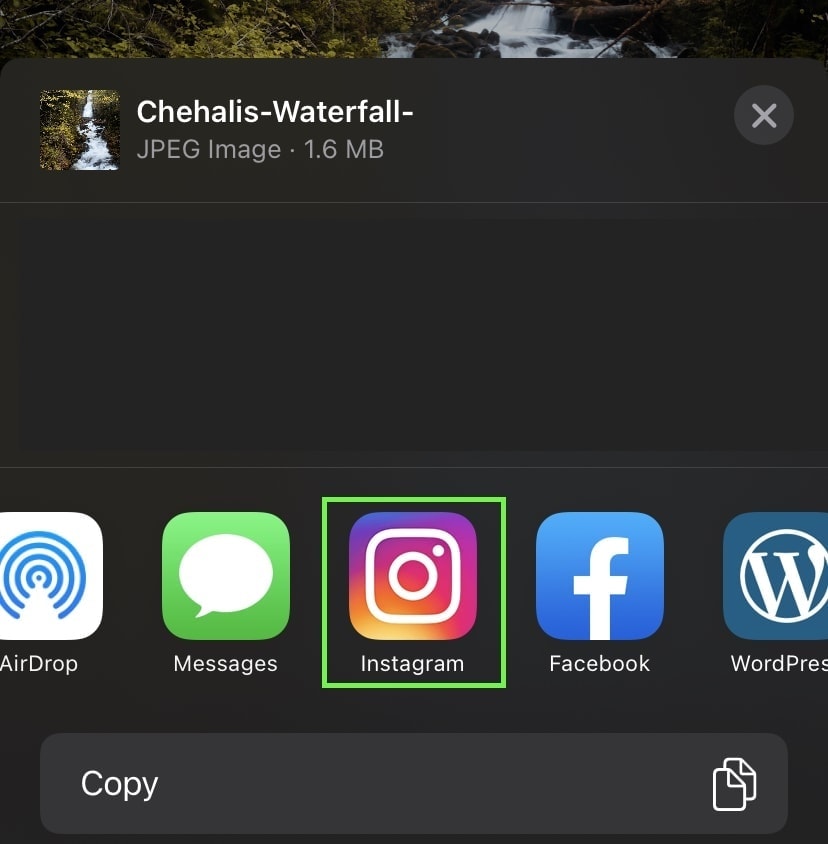
A new window will appear, giving you the option to export your photo to various places. Within the app options, look for Instagram.
Selecting Instagram, you’ll then be prompted to type a caption to go along with your photo. Simply type in the caption and add hashtags exactly as you would when uploading through the Instagram app.
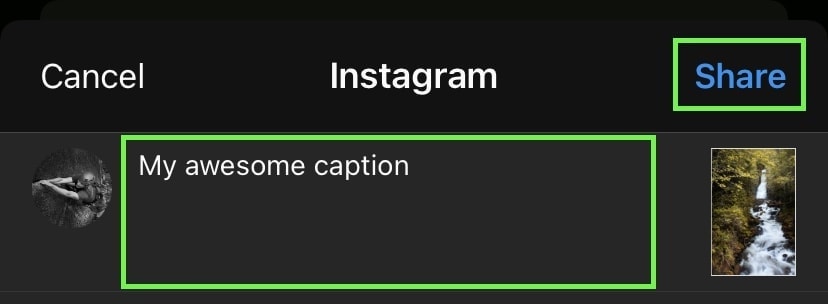
Once you’re happy, click Share.
Now your photo will export from Lightroom Mobile and be uploaded to Instagram all at once! This can be a huge time saver if you’re an Instagram fanatic.

With these different ways of exporting photos in Lightroom under your belt, you have all the tools you need to get started. Whether you want to export a high-res photo, optimize for the web, or share directly to social, it’s all possible from Lightroom Mobile.
Happy Editing,
– Brendan 🙂


