

How To Get Started In Photography
There has never been a better time to get started in photography. With endless inspiration and online tutorials, teaching yourself photography isn’t out of reach. You no longer need to have a college education in photography to be good at it. All you need is a camera and a passion for what you do.
To get started in photography you need to have an idea of what you want to photograph. Identify a style you like and start trying to emulate it. It doesn’t matter whether you shoot with a smartphone or a professional camera, just get out and shoot as often as you can. Over time you’ll fine-tune your images and forge your unique style.
Some of the most successful photographers I know got to where they are by simply doing it. They picked up a camera, knew what they wanted, and got after it. There’s no reason why you can’t do that same. To help you get started, this post shares the exact process to follow to get started as a photographer.
Can You Teach Yourself Photography?
Absolutely! You can teach yourself photography by just shooting photos or taking advantage of learning resources online. With some trial and error, you’ll begin to understand what’s needed to improve your photos. You’ll just need to be self-motivated and hungry to improve.
You don’t need to go to school for photography to become a “good” photographer. I’m willing to bet that many of your favorite photographers never even went to school. Just like any type of art, taking great photos can’t be taught in a single course. Great photos are the culmination of dedication to your craft. The more photos you take, the more you’ll refine your work and improve.
Although these changes are often extremely gradual, you’ll see huge improvements year after year when you look back.
To teach yourself photography, it doesn’t really matter which camera you use. You can take a great picture with just about any camera. However, if you are serious about taking photos, or even turning photography into a career, you’ll want to invest in a proper DSLR or mirrorless camera.
Where To Start With Photography
Contrary to what you might think, buying a fancy camera isn’t the first thing on the to-do list. When you’re just getting started in photography, you can start somewhere simpler than that. Here are three things to focus on before you spend any money on a camera.
– Identify What You Want To Shoot
If you don’t know what you want to shoot, you’ll end up being slow in your progress. Although it’s totally fine to have multiple interests, be sure to narrow it down somewhat.
For example, you might be interested in portraits, wildlife, macro, landscapes, action sports, and street photography. To get good at all of these things, you’d need to spend a whole lot of time with each. Instead of spreading yourself too thin, pick the ones that matter most to you.
When I went through this process I wanted to shoot just about anything I could. However, I had the most interest in outdoor lifestyle and action sports photography. Since both of these styles can be tied together, I was able to practice multiple styles at the same time.
From these styles, I began to get better at portrait and landscape photography as well. After all, I shoot people (portraits) who are doing things outside (landscapes). Whether you realize it or not, you will end up improving other areas of your photography by focusing on a certain niche. A lot of styles can be tied together in one way or another.
Rather than getting overwhelmed by this, remember that this isn’t a permanent choice. Pick something now, try it out, and soon enough you’ll realize if you love or hate it. Rinse and repeat until you find a genre of photography that lights a fire in your belly and gets you stoked to take photos.
Without getting into a style of photography you really love, then the rest won’t matter. To get good at taking photos you need to be doing it for the pure enjoyment of it. If you’re only getting started in photography to make money, you’re already off track.
Identify something you want to photograph, and shoot it over and over. As barebones as this sounds, this is the fastest route to success as a photographer
– Learn About Composition
No matter what camera you’re using, composition is something you can start working on right now. Even when you’re taking pictures on your phone, a good composition still can make all the difference.
In short, composition is how everything in your frame is positioned. It’s how you frame your shot to lead the viewer to the subject or make the image more pleasing to look at.
If you’ve ever looked at a photo you just couldn’t take your eyes off, you likely couldn’t identify why. However, with a better understanding of the rules of composition, you can start to see what makes certain photos so stunning.
A great photo will direct your attention directly to the subject. With these compositional rules, this process becomes easier than ever. Here are some of the most crucial rules of composition you can start experimenting with right now.
1. Rule Of Thirds

The most basic rule of composition is called the rule of thirds. In every type of photo, the frame is divided into three equal thirds running both horizontally and vertically. By remembering where these thirds are in your frame, it’s easier to know where to position your subject.
For example, if you were taking a picture of a person standing in front of you, you could position them on the right or left third. Instead of placing them right in the center or closer towards the edged, aligning them with a third is more pleasing to look at.
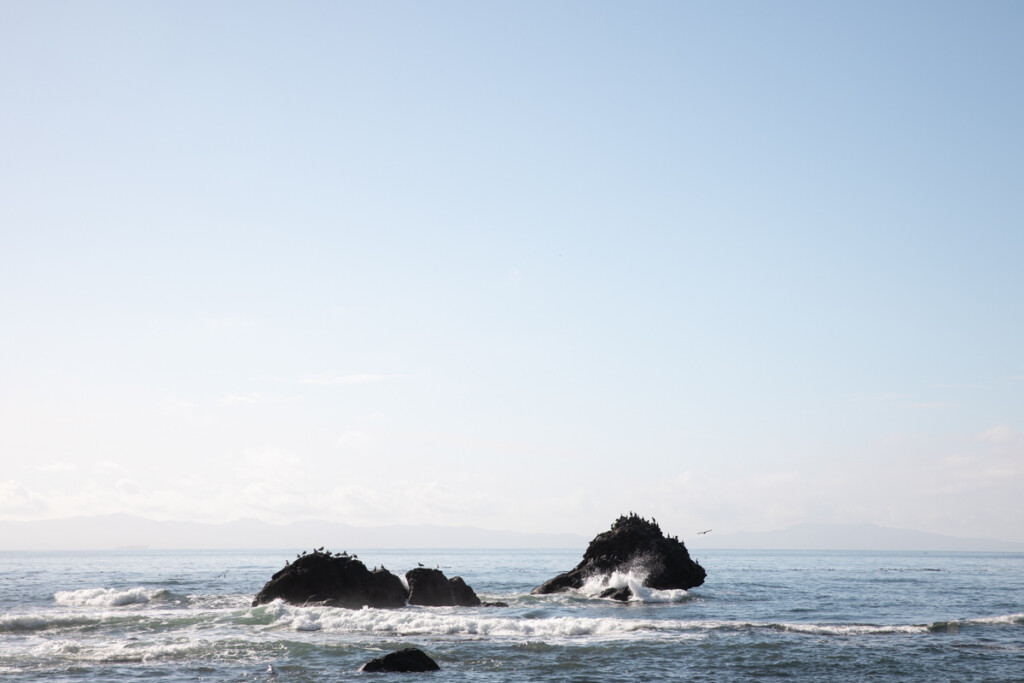
The same thing goes for horizons and horizontal thirds. If you’re taking a picture of the ocean, you’ll likely place the horizon light right in the middle of the photo. Instead, use the rule of thirds and align the horizon with either the top or bottom third. This, once again, will make your photo look more pleasing.
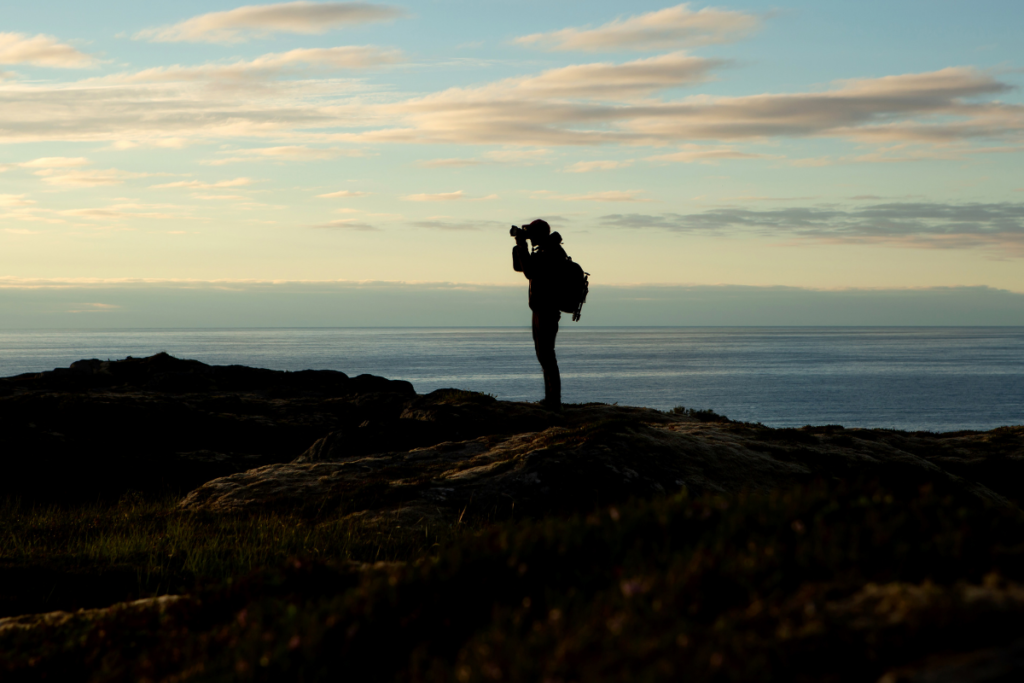
2. Leading Lines
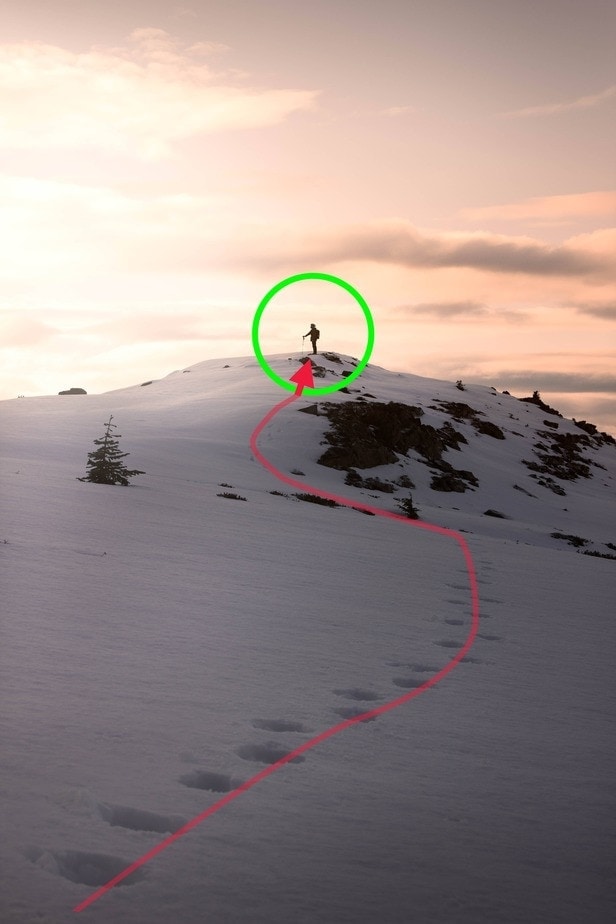
Another popular and very effective rule of composition is called leading lines. This rule uses natural lines within your photo to draw your viewer’s attention towards something. This line could be anything from a roadway to footprints in the sand. As long as it creates a clear path to follow, it’s fair game.
Leading lines can be found all around you. Next time you’re running errands, try to note any leading lines that would work for a photo. Something as simple as a grocery store shelf or a windowsill in your home. The better you get at identifying these lines around you, the better you’ll become at using these lines in your photos.
With that said there’s no point to a leading line if it doesn’t actually lead to anything. Rather than just aimlessly photographing lines that stretch through your frame, make sure they lead to a clear point of interest. In the example below, you can see how the footprints draw your eye to the silhouette of my subject.
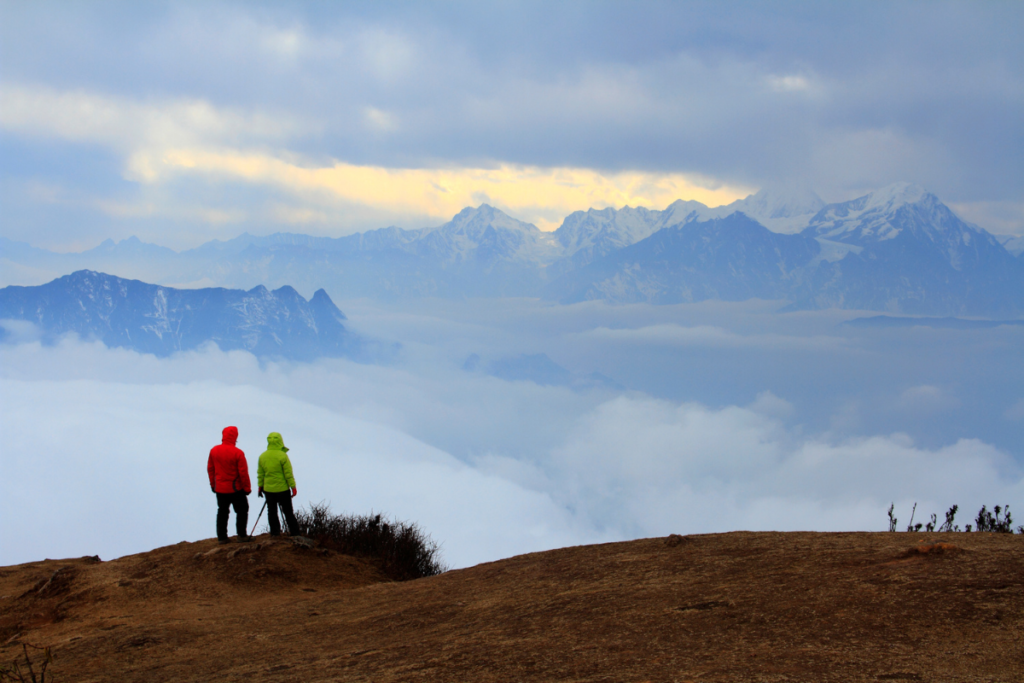
3. Depth
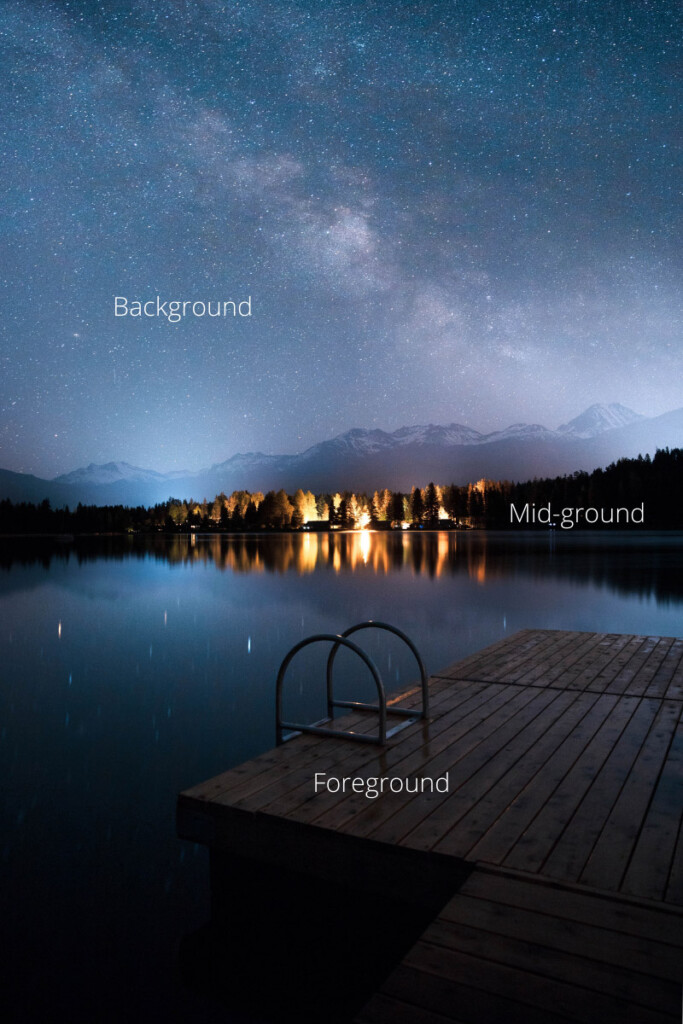
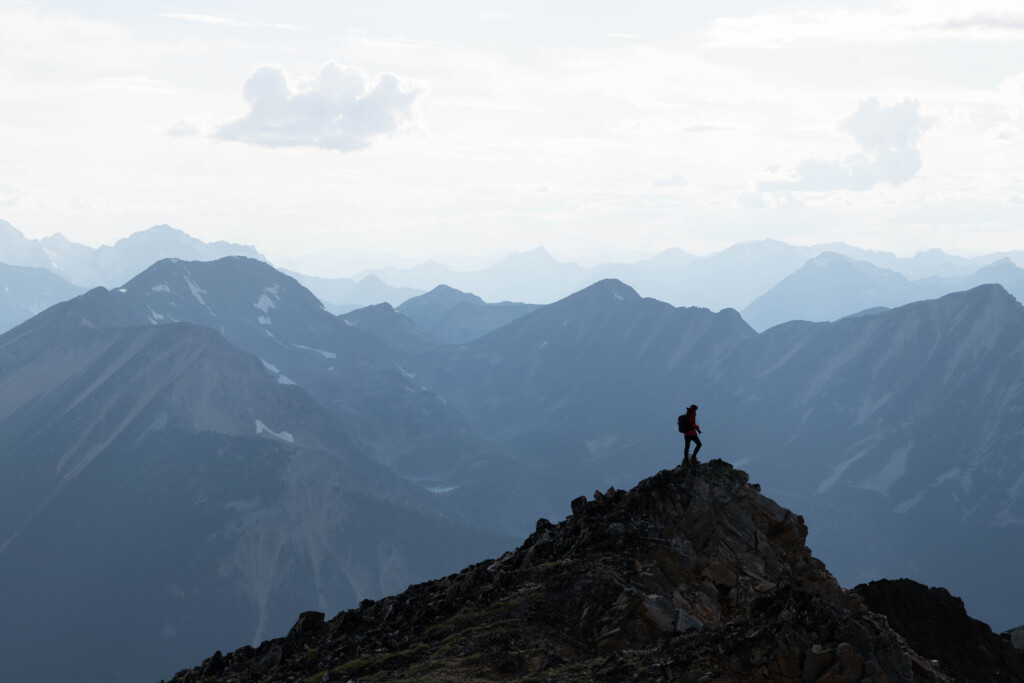
One of my favorite compositional rules is called depth. Everything around you is 3D, but when you take a photo, you see it from a fixed position. The problem with this is that you can start to make a scene look 2D and lack any interest. To solve this problem, you can use depth to establish layers throughout your photo.
The layers in your photo are considered as the foreground, mid-ground, and background. With an established object in each of these spaces, you can begin to create the illusion of depth in photos.
The foreground is considered anything that’s close to the camera. This is often the first thing the viewer will see or is immediately obvious. An example of foreground could be a tree branch near the lens or an interesting rock along the beach.
The mid-ground is where you want to establish your subject and what your photo will often be about. The mid-ground comes anywhere after the foreground.
The background is everything behind the subject. There can still be points of interest in the background such as a mountain or an interesting cloud, but it’s not the subject. The background is like the cherry on top of your photo. The extra little bit that helps to make your photo more interesting.
To start using depth in your photography, first, start by establishing a foreground. Try to shoot through something such as a tree branch or the edge of a wall. Anything that you can use to look past. With your foreground in place, you can see how to position your camera to best frame your subject.
Lastly, take note of your background and see if there’s anything you want to include. If so, you might need to reposition the camera and your subject to align with a better backdrop!
4. Negative Space
Negative space is when there is an absence of anything to look at besides your subject. This is extremely popular in cinema and is the main technique behind minimalist photography. Apple is a prime example of a company that uses negative space to highlight their products.
Negative space can be used in any kind of photography. All that matters is that you keep your photo extremely simple. No distractions, just your subject. The easiest way to do this is by placing your subject against or near a solid color.
When I say solid color, I don’t mean using a studio backdrop. Instead, you could use things like the sky, a wall, or shadow draw your eye to your subject. Since there’s nothing else to really look at, your eye is immediately drawn towards your subject.
Since showcasing your subject is what photography is all about, this compositional technique is extremely useful.
5. Frame Within A Frame
This rule of composition highlights your subject by placing them within a “frame” inside your image. Like a picture frame, a frame in your photo will outline or surround your subject. For example, this arch is a frame for my silhouette.
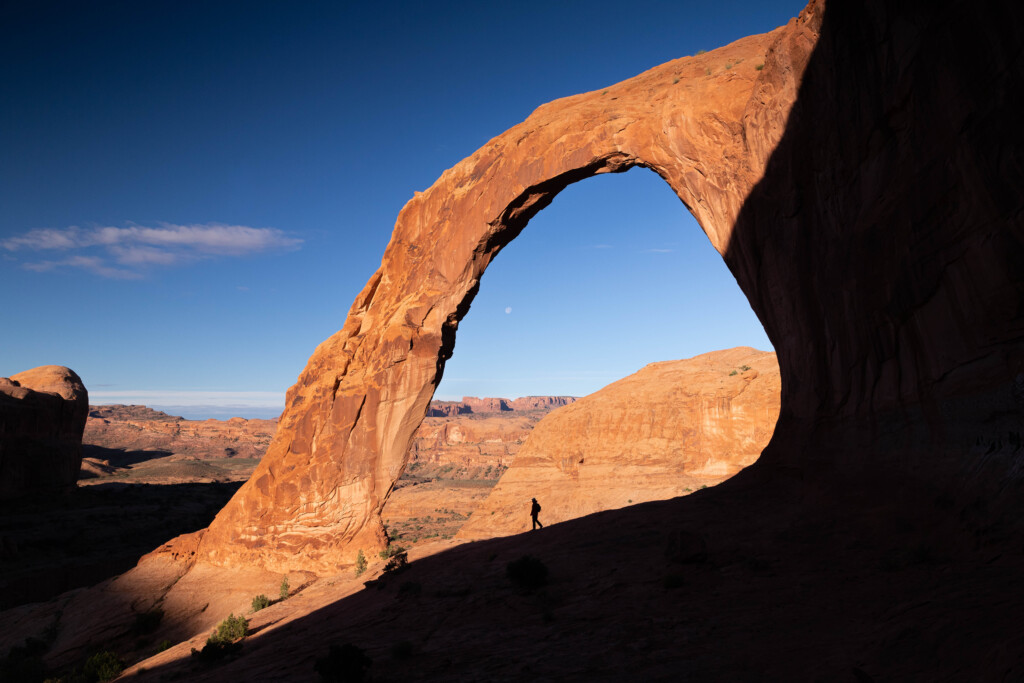
Frames can be made up of just about anything. From tree branches to rock formations, to overpasses, and more. Anything that creates a box or outline in your photo is fair game. Since your eye will be automatically drawn to look through this frame, you’ll be lead straight to the subject. That’s why it’s crucial to place your subject within your frame whenever you use this technique!
Related: Rules Of Composition In Photography
– Find inspiration To Kick Start Your Photography
Just like anything in life, you need a little motivation to get things moving. In photography, there’s no better form of motivation than feeling inspired by others’ work. By finding other photographers you admire, you have something to try and emulate and work towards. In fact, the main reason I got into photography was that I was enamored by someone else’s work.
With social media, inspiration isn’t hard to find. Just a quick browse through Instagram and you’ll find hundreds of incredible photographers that you’ll love. By keeping tabs on what they’re doing, it’s easy to have a constant flow of inspiration to get out and shoot photos with!
What Camera Should You Buy As A Beginner Photographer
At some point in your photography, you’ll have to say goodbye to your smartphone and pick up a real camera. The truth is, there’s no competition between a smartphone and a real camera. No matter how advanced smartphone technology gets, they simply lack the control a real camera has with camera settings.
How Much Should A Beginner Photographer Spend On A Camera?

Before sharing which cameras are best for beginners, how much can you expect to spend? There are hundreds of great cameras out there that range in price from a few hundred dollars to the price of a luxury vehicle. Luckily there’s an easy place to start as a beginner photographer.
Just getting into photography, you shouldn’t be spending more than $800. You can pick up an entry-level camera for around $500 with a kit lens. If you have the extra cash, you can splurge and get a second lens to play with.
Depending on your circumstances, $800 may seem like a lot for a camera. However, these cameras will last for many years to come and unlock full creative control in your photography.
I bet you can’t say the same about the new phone you’ve had to buy every couple of years.
Even though it’s easy to spend thousands of dollars on camera gear, try to limit yourself. Better gear doesn’t equal better photos. Instead, start with an entry-level camera and kit lens, and upgrade as you improve.
You’ll know when it’s time for a new camera when you start feeling limited by what you’re shooting with now.
Recommended Camera For Beginner Photographers
If I could only choose one camera to recommend, I would suggest going with the Canon Rebel series. These cameras are the perfect entry-level DSLRs that offer everything you need to get started in photography. Each year they come out with new models with the latest version being the Canon Rebel T7i.
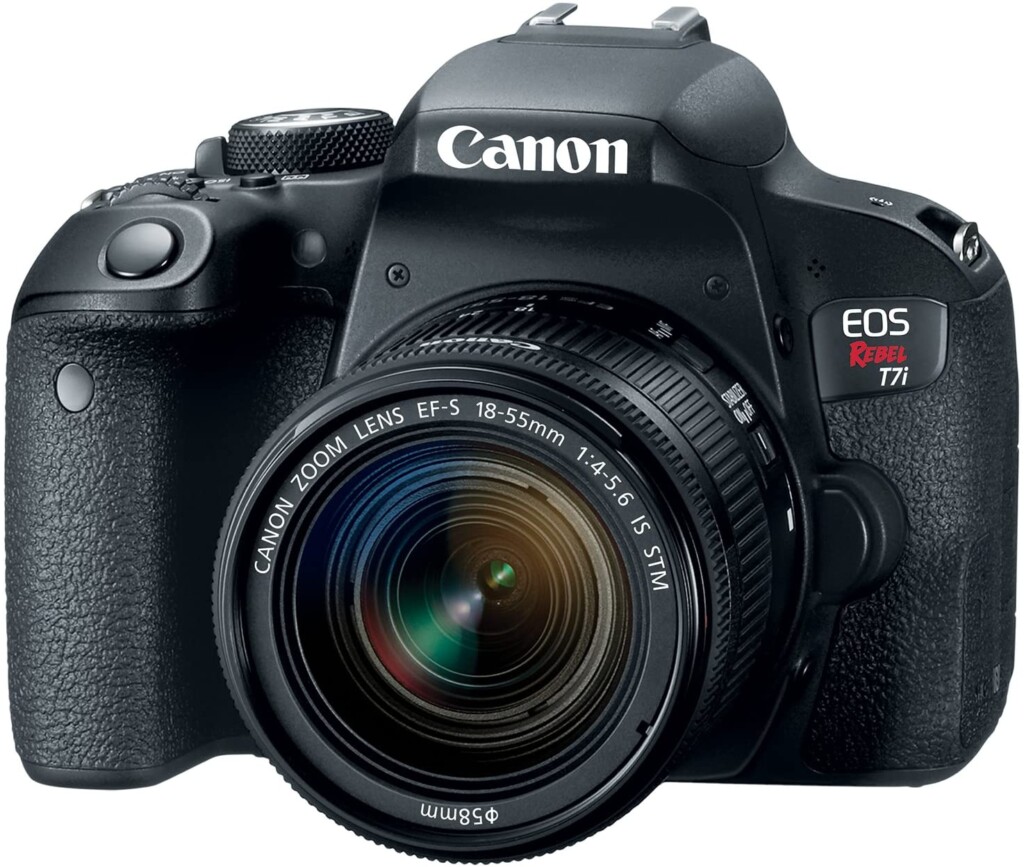
Canon is one of the best beginner-friendly camera manufacturers. There aren’t any hidden features or confusing menu systems to throw you off. Everything is clear and to the point. That’s the reason I’ve become a full-time Canon user over the years.
To see all of the cameras I recommend for photographers, check out my recommended gear page! (top cameras for photography)
Types Of Cameras
Even though most cameras look largely the same, there’s a lot of difference between them all under the hood.
DSLR
DSLR cameras (Digital Single Lens Reflex Cameras), have long been the main type of camera used by professional photographers. These cameras get their name from a mirror in front of the sensor that reflects light traveling through the lens, up the viewfinder. This is how you can get a real-time preview of your scene when looking through the viewfinder on a DSLR camera.
When you go to take a picture, this mirror lifts out of the way to let light hit your sensor. As the light exposes your sensor, the information is recorded and becomes the picture you see on your camera.
– Advantages To Using DSLR Cameras
The big advantage of DSLR cameras is that they offer a real-time preview of your scene without any lag. When you’re taking pictures, the mirror opens and closes between photos so you can see what’s happening. Since there are no electronic parts to this, the light that passes through your lens reaches the viewfinder instantly. Especially when shooting sports, this is a huge advantage.
The second pro of using a DSLR camera is the battery life. Since there aren’t as many electronic components compared to a mirrorless, DSLR camera lasts considerably longer. Rather than needing to carry a mountain of batteries with you, you’ll be able to shoot for longer with each battery.
– Downsides To DSLR Cameras
Since there are mirrors in the camera, DSLR bodies tend to be larger than a mirrorless or point and shoot camera. With larger internal components, there’s no way for manufactures to make them as small as other camera types.
The other downside is the fact that you can’t get a preview of your camera settings through your viewfinder. Since you’re only seeing reflected light, it’s impossible to know exactly how your photo will look with your current settings. Although you can work around this by shooting in Live View (previewing the shot on the LCD screen), this can be more challenging for some beginners.
Mirrorless
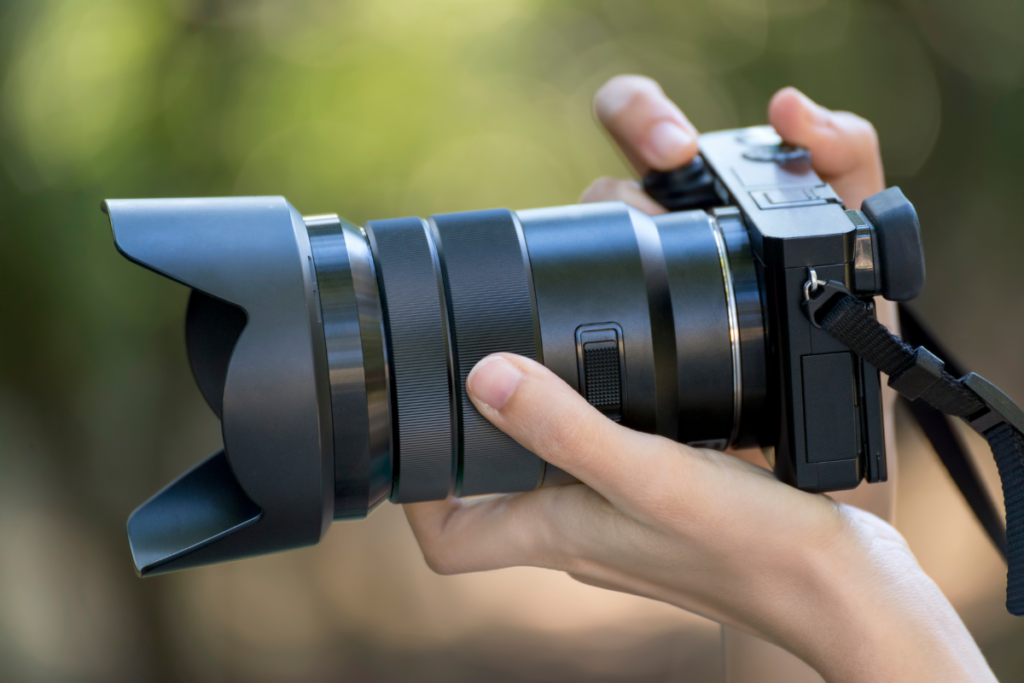
A mirrorless camera gets rid of the mirror system found inside of a DSLR and leaves the sensor exposed to light at all times. Without the mirror system of a DSLR, a mirrorless camera can maintain a much smaller size.
Additionally, since there’s light constantly exposing on the sensor, you get a preview of your photo through the EVF (electronic viewfinder). Rather than seeing a reflection, the EVF will show you what your photo will look like with your current settings. Especially for beginners, this can be really useful.
– Advantages to Mirrorless Cameras
The first advantage of a mirrorless camera is the size. Without a mirror system, it slims down the camera body by a fair amount. If you want something less bulky or slightly easier to carry around, a mirrorless camera is a great option.
The second advantage of a mirrorless camera is the EVF. With an electronic viewfinder, you get to see exactly what your photo will look like based on your settings. Unlike a DSLR, you could adjust your shutter speed and instantly see the exposure change on the EVF.
– Downsides To Mirrorless Cameras
The main downfall of a mirrorless camera is there is a lag in the EVF when taking photos. Since you aren’t seeing a reflection from a mirror-like with a DSLR, it takes more time to bring back an image to view. When shooting in bursts, this is a serious pain in the butt.
The second downside to a mirrorless is the fact their batteries don’t last as long. With far more electronic components and displays, it quickly sucks up the battery life. If you’re going for a long trip without any power, having a mirrorless won’t be ideal. That is unless you have lots of backup batteries!
Crop Sensor vs. Full Frame
Besides DSLR vs. Mirrorless, there is a difference between the size of the sensors. Most cheaper and entry-level cameras are crop sensors (APS-C) while more professional bodies feature a full-frame sensor. Even though you can take great photos with each kind of sensor, it will affect how your camera sees the world.
With a full-frame sensor, the sensor size is equivalent to that of 35mm film. With this sensor size, all lenses will look equal to their focal lengths. An 18mm will look like 18mm, a 50mm will look like 50mm, and so on. Since these sensors are larger, they can process more information and come with better image quality.
Now that isn’t to say that a crop-sensor (APS-C) can’t take great, high-quality pictures. However, you will notice a difference in how certain lenses look. This is because of something known as crop factor. Since crop sensors have a physically smaller sensor size than a full-frame, the image will be cropped by 1.5x. This crop factor of 1.5x is an average but will vary between camera brands.
To give you an example, an 18mm lens will look more like a 27mm lens because of the 1.5x crop. Since there’s less room for light to be processed, it ends up making certain focal lengths on full-frame lenses more zoomed in. Luckily you can buy lenses built for APS-C (crop sensor) cameras that account for these crop factors.
To better understand crop factor and see its effects in action, check out the video below:
How To Teach Yourself Photography
Now that you have a basic footing with getting started in photography, it’s time to teach yourself how to use a camera. At first a camera might seem like an extremely overwhelming piece of gear, but once you break it down, it’s very simple. All you need to do is remember a few crucial settings.
Shutter Speed
Your shutter is a little device that opens and closes in front of your camera’s sensor. When it’s open, light is able to pass through and expose your sensor to create an image. In short, this is how a photo is captured.
The shutter will affect two areas of your photo: the exposure, and how motion is captured.
The reason it affects exposure is simple. The longer the shutter is open (such as with a slow shutter speed), the more light will hit your sensor. With more light, you end up with a brighter photo. If your sensor becomes overwhelmed with light, you get an overexposed image.
On the other hand, if the shutter isn’t open for long enough, there won’t be enough light hitting your sensor. In this case, you end up with a dark or underexposed photo.
The amount of time your shutter will open and close can be preset using the shutter speed setting.
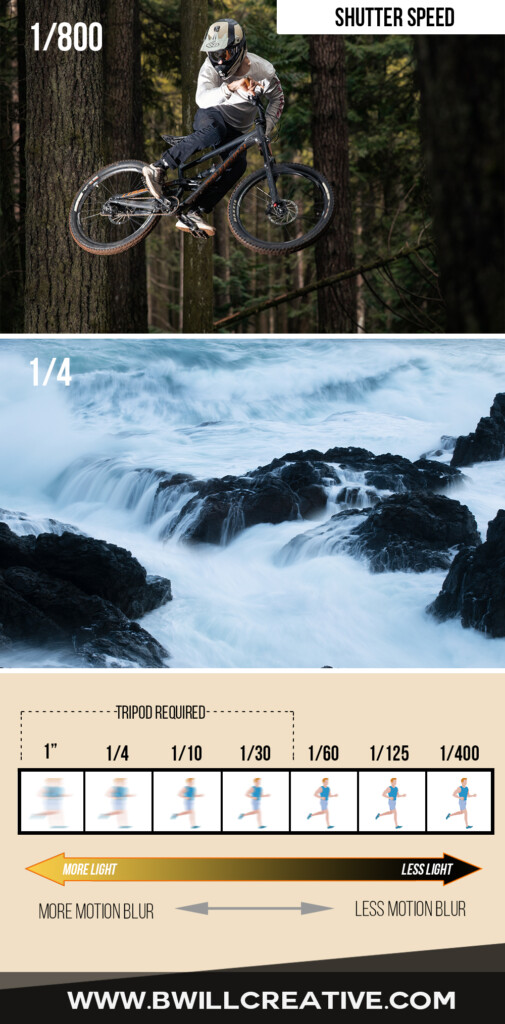
The shutter is measured in seconds ranging from as fast as 1/4000 of a second, to 30-seconds. Depending on how long the shutter is open, this will affect how motion appears in your image.
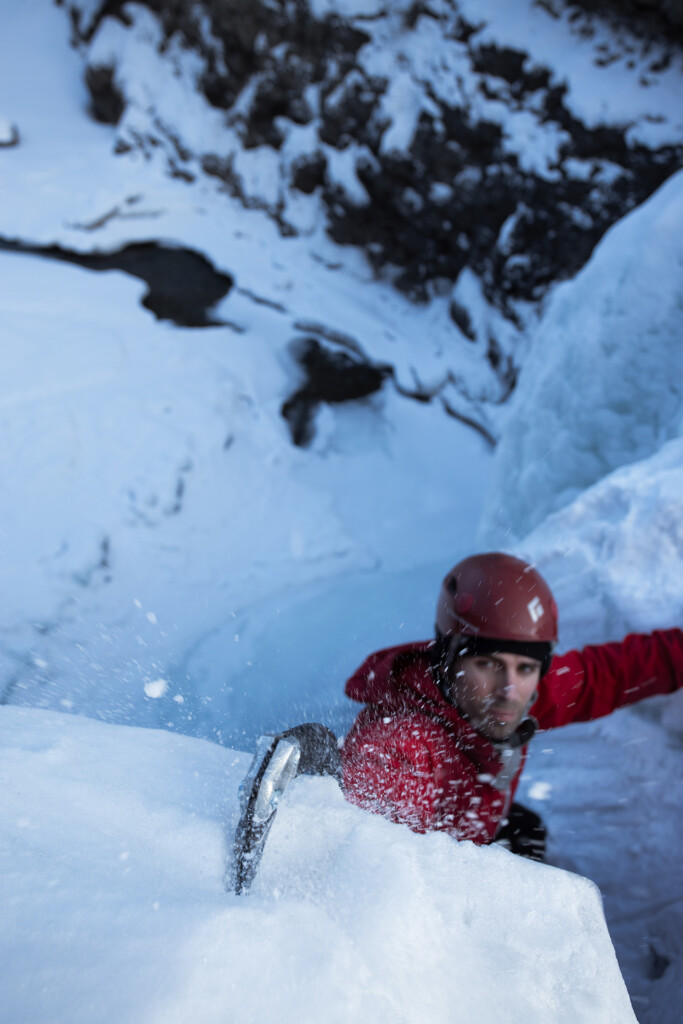
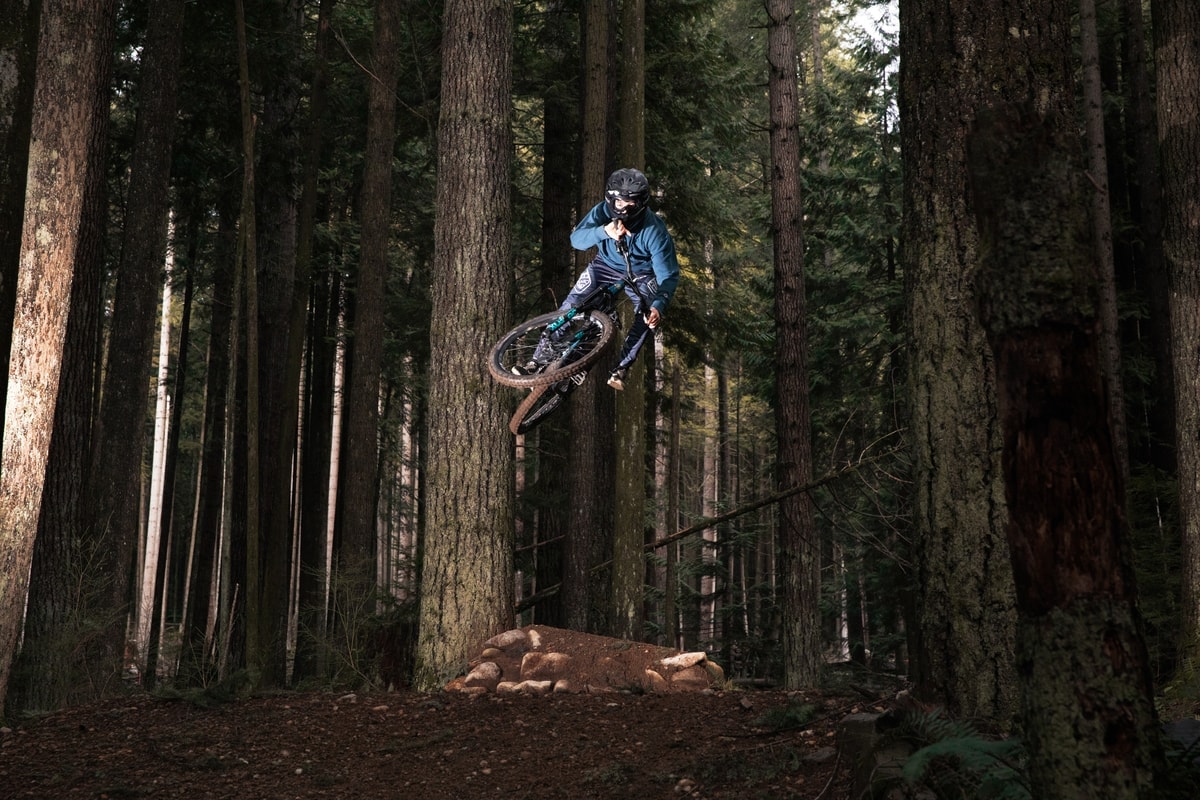
With a faster shutter speed, you’ll be able to freeze motion in place. Since your shutter opens and closes extremely fast, it will capture the light from a certain moment and perfectly freeze everything in place. Whenever you’re shooting something moving quickly, make sure to use a fast shutter speed.
When you use a slower shutter speed, you get the opposite effect. If anything moves while the shutter is open for a longer period of time, it will become blurred in the photo. This motion blur is used creatively to capture long exposure photos and is a fun effect to experiment with.
To learn more about shutter speed in photography, check out my guide to shutter speed for beginners.
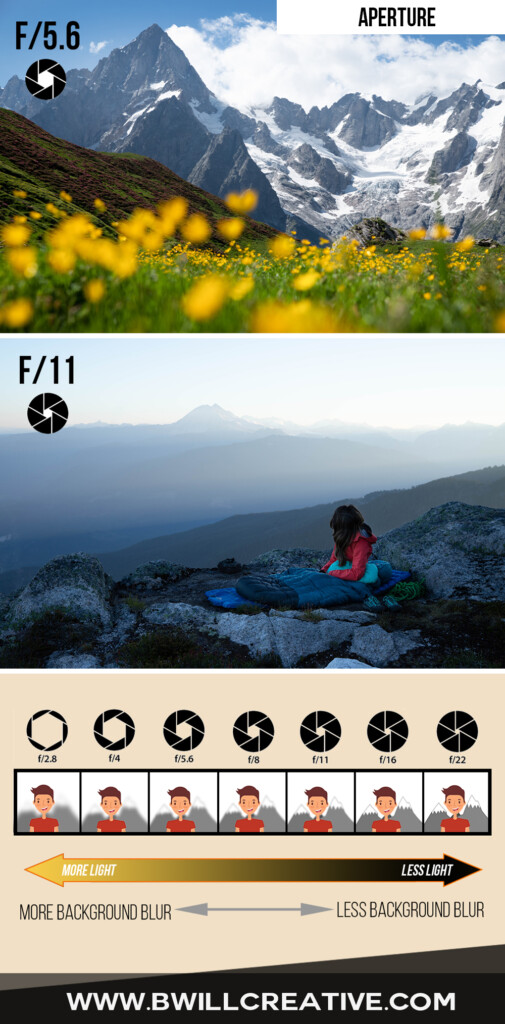
Aperture
Next up on the list comes the aperture. The aperture is a small donut-shaped hole inside your lens that limits how much light passes through your lens. Made up of a series of “leaves” the aperture can open and close to change the exposure and depth of field in your photo.
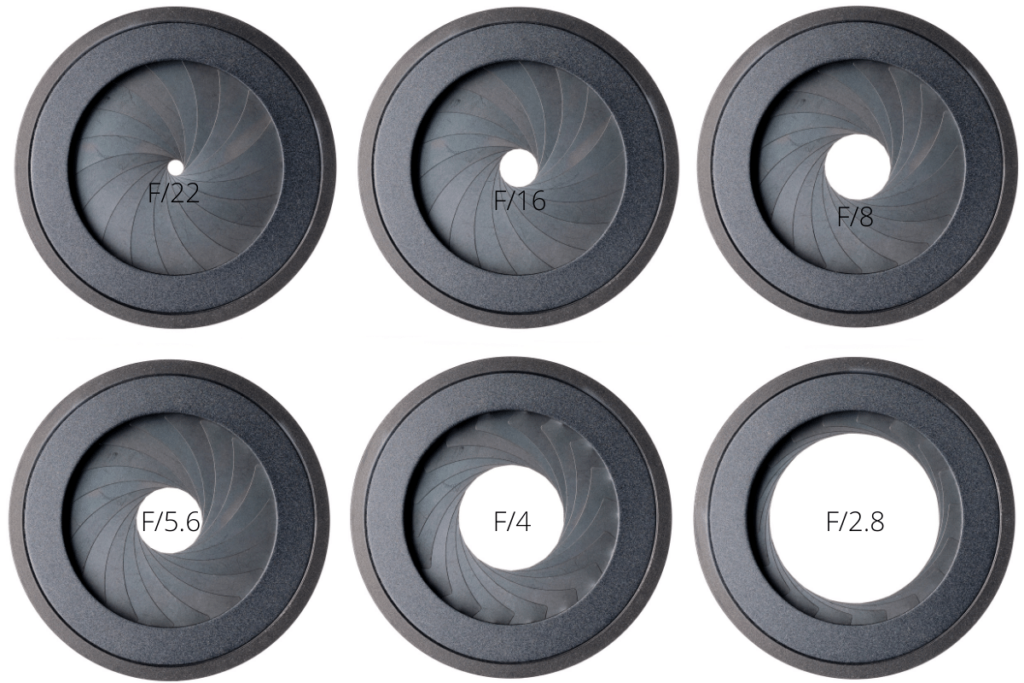
The reason it affects exposure is simply that with a larger hole (wider aperture), more light is able to pass through. Therefore you get a brighter exposure. By closing the aperture, less light is able to pass through which then darkens the exposure.
To complicate things slightly, the aperture also affects how much is in focus at once. This is also known as depth of field. With a shallow depth of field, you have a small amount in focus at once. This is ideal for portraits when you want to blur the background behind your subject.
If you’re using a larger depth of field, everything from your foreground to background will look more in focus. This is ideal for something like landscape photography when you want to see everything in the photo clearly.
The size of your aperture is measured in f-stops. For example, a wide aperture would be something like F/2.8 (shallow depth of field), while a small aperture would be more like F/16 (large depth of field). By adjusting these aperture settings, you can help to balance out your exposure while also getting creative with blur effects.
To get a more in-depth understanding of aperture, check out my guide to aperture for beginners.
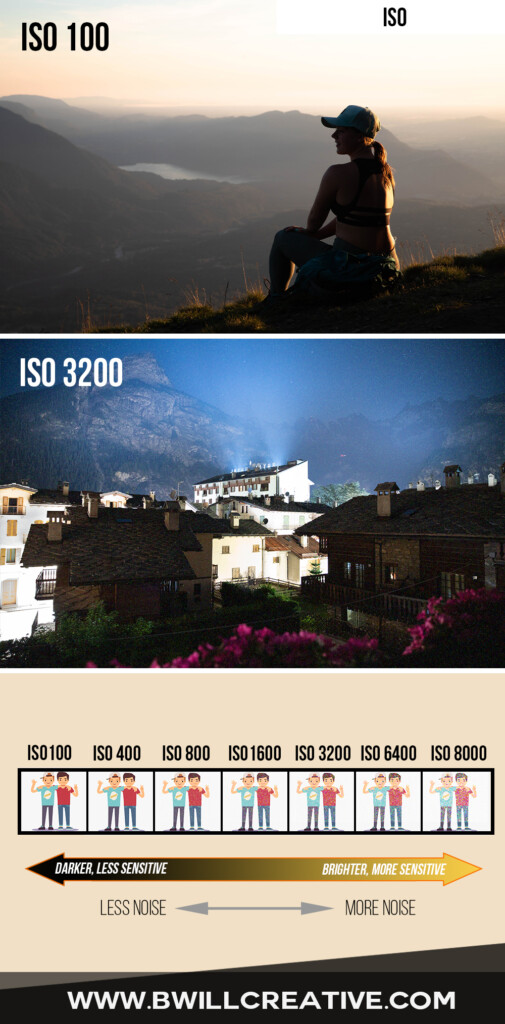
ISO
The last of the exposure settings is called ISO. This exposure setting is much easier to understand and doesn’t have as much to it. Simply put, the ISO affects the sensitivity or your sensor to light. The more sensitive your sensor, the brighter your photo will become.
At first glance, this seems like the ultimate camera setting. Just increase the ISO and call it a day. What else could you need? As it turns out, the downfall of using a high ISO comes in the form of grain.
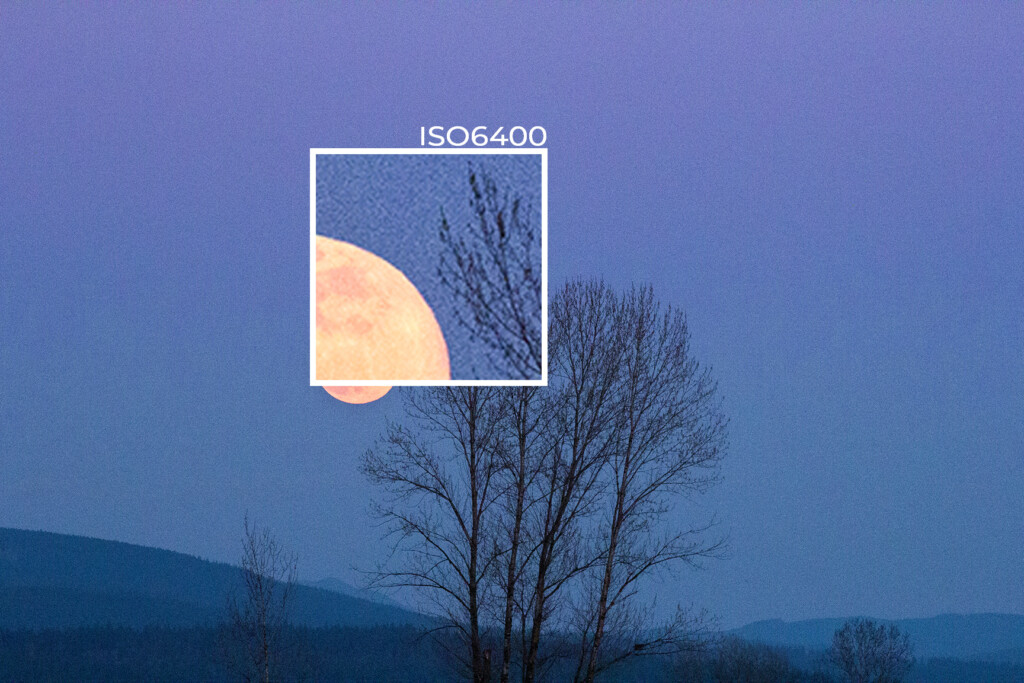
Grain is like static that appears in your photos. At really high ISO’s, this grain can become overwhelming and ruin your pictures. That’s why you need to use your ISO setting sparingly.
ISO settings are extremely simple to read. The lower the number, the less sensitive your sensor and the less amount of grain you’ll see. On most beginner cameras, the ISO will range from ISO100 to ISO6400. Depending on the lighting conditions you’re shooting in, you may need to increase your ISO to help out your shutter speed and aperture settings.
To get a better look at how ISO works in photography, be sure to look at my guide to ISO for beginners.
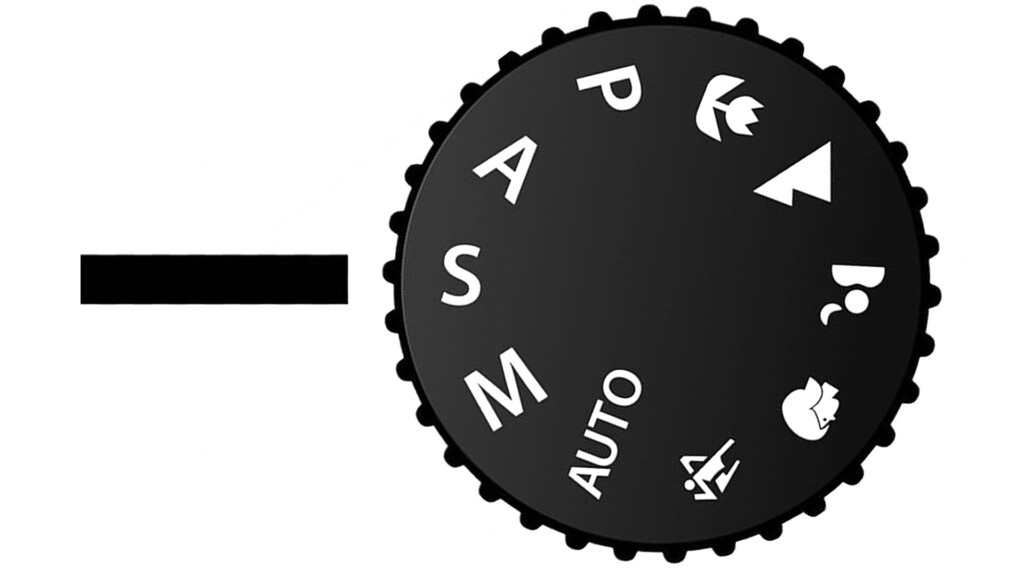
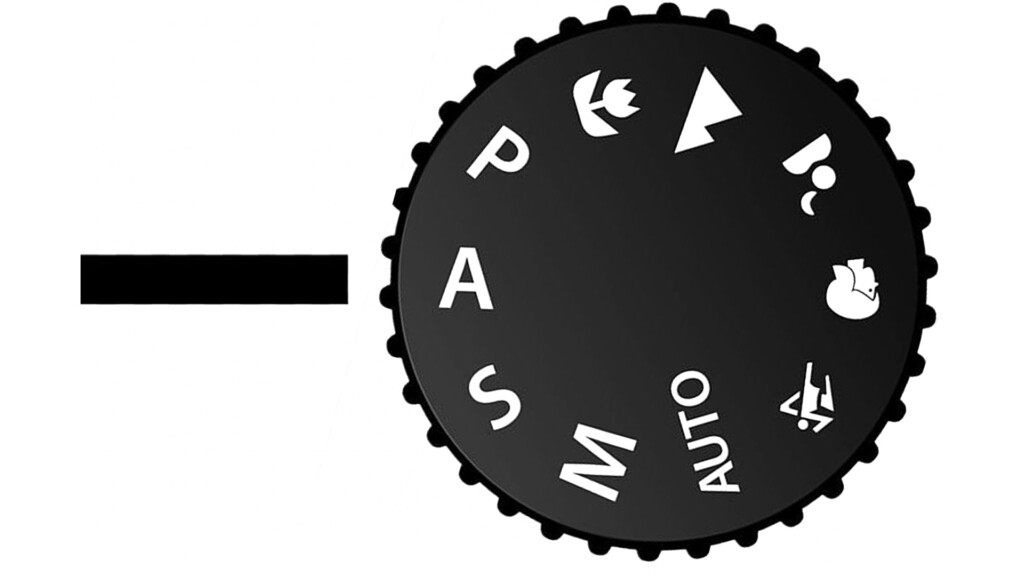
Camera Modes
When you’re driving a car, you have drive, reverse, and neutral. All of these options will “drive” your car, but affect it in different ways. Camera modes work the same. With different camera modes, you can change what settings you use to take a picture.
Although I’ve already covered the different camera modes, let’s discuss some of the most important ones you’ll find yourself using on the regular.
1. Automatic (Auto)
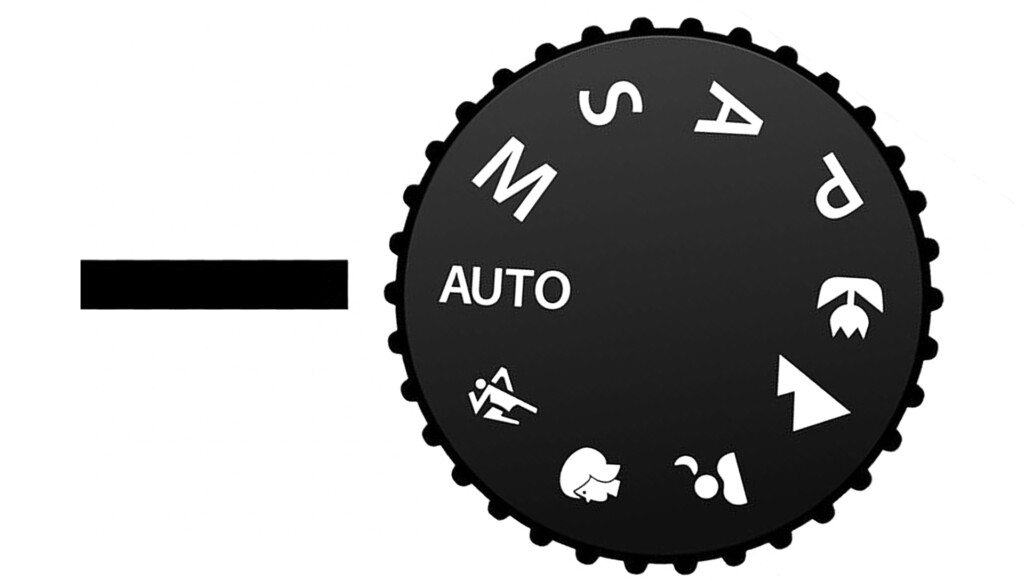
Just as the name suggests, automatic mode gives all the control over to the camera. Instead of you having to think about camera settings, all need to do is point the camera and press the capture button. When you first start in photography, automatic is a reasonable option. It lets you get comfortable with the feel or your camera while letting you focus solely on composition.
The downside to automatic is that it’s hard to tell your camera your exact intent for a photo. If you want to get creative with a long exposure or capture an action shot, you’ll need to use specific camera settings. In automatic mode, your camera only cares about the exposure of the photo, not your creative intent.
2. Shutter Priority (Tv or S)
Shutter priority is a step up from automatic since it gives you manual control of your shutter speed. All your other settings are left up to your camera to decide. This is useful when you want to create a specific effect with your shutter speed. Depending on if you want to freeze or blur motion, your shutter speed will vary. By using shutter priority, you can choose these effects with ease.
3. Aperture Priority (Av or A)
Similar to Shutter priority, aperture priority gives you manual control of your aperture, while your camera chooses your other settings. This is perfect if you want to maintain a shallow depth of field in your photo to create blurry backgrounds.
4. Manual Mode
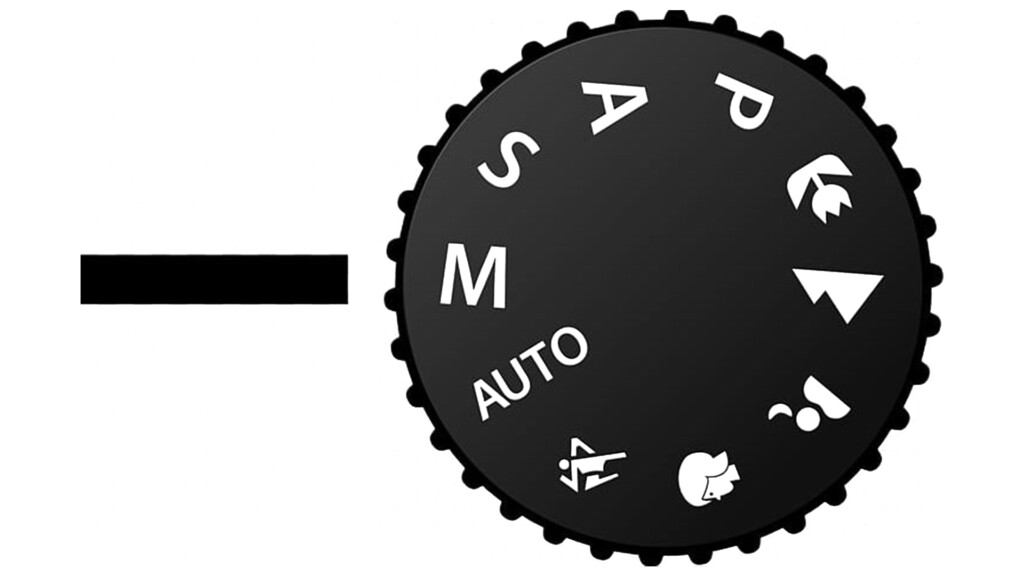
Manual mode is when all the training wheels come off and you’re in charge of every setting on your camera. From shutter speed, aperture, and ISO, it’s all up to you to choose the best settings. Manual mode is ideal because you can choose exactly what your photo will look like. Since you’re in control of every aspect of the image, you can get more creative with your photography in this camera mode.
At first, you’ll find it difficult to balance all of your exposure settings at once. To help you out, look into the exposure triangle to better visualize how they all work together.
If you want a more direct path to success, check out my photography ebook called Goodbye Automatic!
Related: Best Camera Modes For Photography
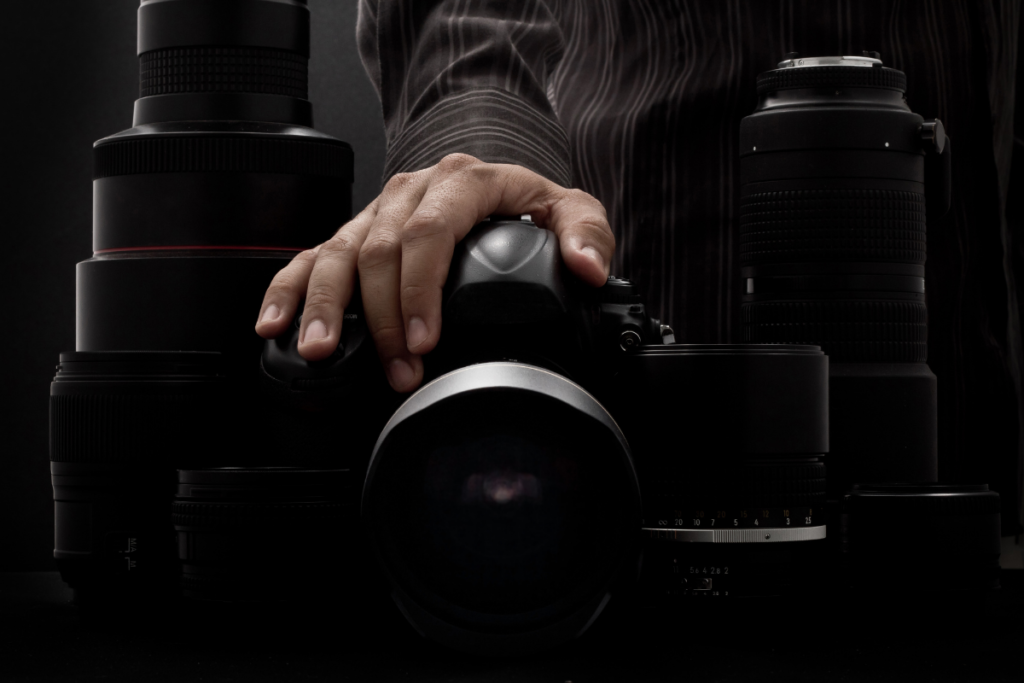
Understanding Lens Types
With camera types and settings out of the way, it’s time to get to lenses. Without these, you won’t be able to capture much of anything. Although I trust you already know the purpose of a lens, it’s important to note the difference between each kind of lens. Depending on what kind of photography you want to do, certain kinds of lenses will prove more useful than others.
If you just want to see the best lenses for beginner photographers, check out my recommended gear page!
– Prime Lens
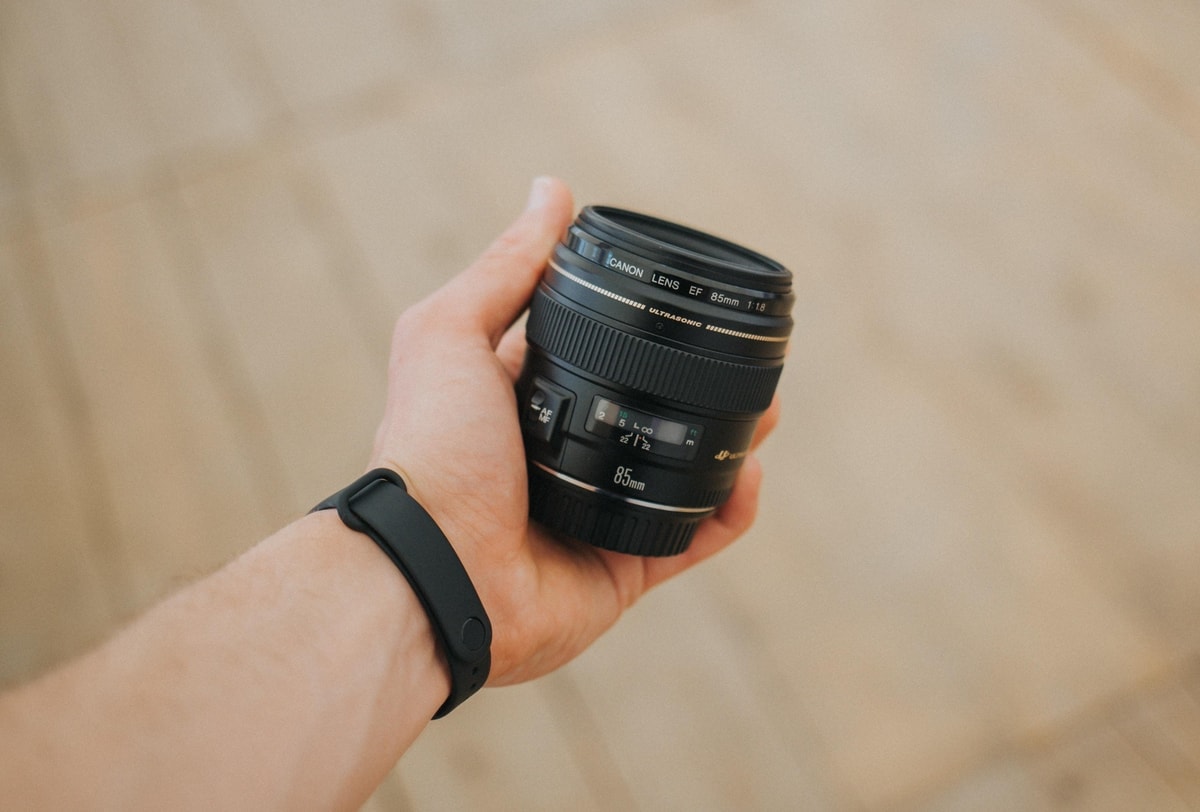
A prime lens is one of the most basic types of lenses since it has a fixed focal length. This means that you cannot zoom in or out, but are stuck at one lens size. The advantage of this is that they’re often much smaller and lighter than a regular zoom lens. If you’re wanting to keep your camera as compact as possible, prime lenses are your answer.
The second reason why people love prime lenses is that they’re faster. This means that they have a wider aperture making them perform better in low light and have a more appealing background blur.
Prime lenses come in all types of focal lengths but the most popular are often the 35mm, 50mm, and 85mm prime lenses.
– Zoom Lens
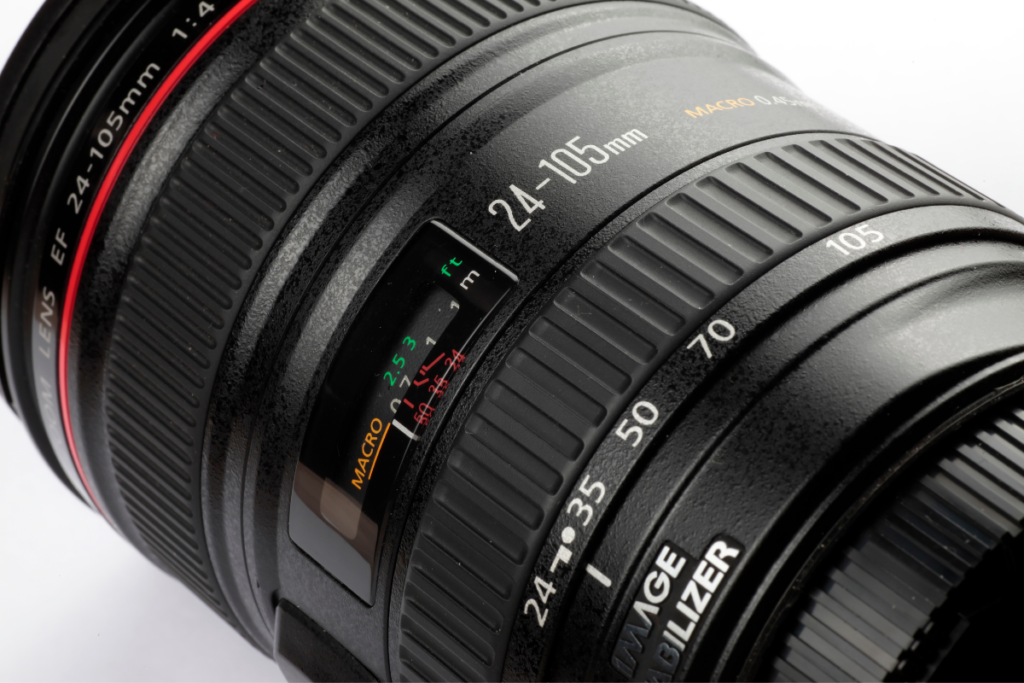
A zoom lens has an extremely varied focal length letting you shoot things anywhere from 30mm to 300mm, all on the same lens. The focal range will, of course, alter from lens to lens. For many beginners, a zoom lens is the perfect do it all lens since it can capture just about any focal length. If you’re tight on cash or just don’t want to deal with multiple lenses, these are your best options.
The downside to a zoom lens is they often lack a wide aperture and have variable aperture settings. Typically sitting around the F/4 range, these lenses aren’t very good for low light or night photography. With a variable aperture, the widest aperture will also change from F/4 – F/6.3 as you zoom the lens.
With that said, these are some of the best lenses for beginner photographers looking to get good value for the money.
– Wide-Angle Lens
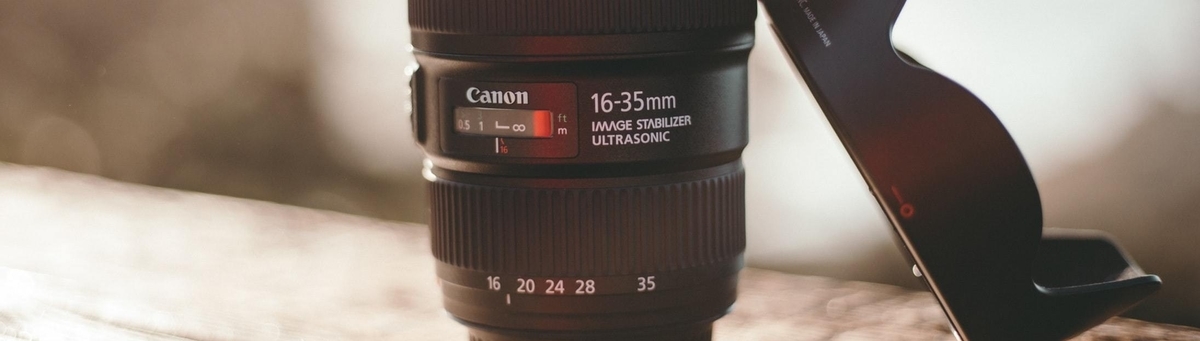
A wide-angle lens is perfect for capturing everything in a scene. Especially when you’re shooting indoors or in crowded spaces, a wide-angle lens is perfect for getting the exact shot you want.
There are tons of great wide-angle lenses on the market but it’s important to consider what you want out of the lens. Even though you can find ultra-wide-angle lenses, that doesn’t mean they’ll capture the type of photo you want. The main concern with these lenses is lens distortion.
With such a wide field of view, it’s common for wide angles to distort parts of your photo; especially around the edges. This distortion can make straight lines become curved or make your body look longer than it really is.
Whenever you’re using this kind of lens, be wary of the effects it can create. Often you can combat this distortion by changing up the angle of your camera. To avoid heavy distortion, try to choose a wide-angle lens no wider than 10mm on APS-C cameras.
– Telephoto Lens
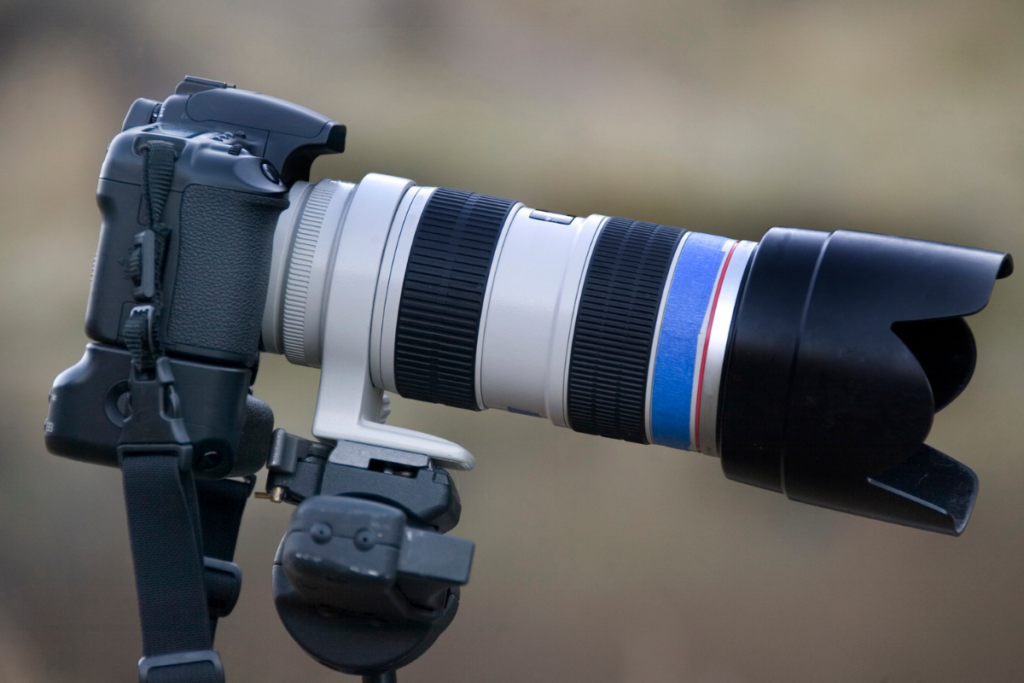
Lastly, the telephoto is the ultimate lens for zooming into things far away. Whether you’re wanting to photograph a distant mount peak or wildlife from a safe distance, a telephoto is your answer. The most popular zoom range for a telephoto tends to be 70mm – 200mm, but there are variations to this.
Telephoto lenses don’t have many downsides to them except for their size and weight. Since they have a considerably longer focal length than other lenses, they end up being a lot longer in size. This inevitably increases the weight of it as well.
Only look into getting a telephoto if you have a particular reason for one. They take up a lot of room in your bag and can be a pain in the butt to carry around. For many beginner photographers, this is reason enough to avoid getting a telephoto lens at first.
With a solid understanding of the different kinds of lenses, you can find all of my top picks for beginners on my recommended gear page!
Is Photography Easy To Learn?

Now that we’ve gone over all the essentials of how to get started in photography, you’re probably wondering how easy all this. Although everyone learns in their own ways, photography is relatively easy to learn when you take it in small chunks.
Don’t overwhelm yourself by trying to master every aspect of photography all at once. Take things one at a time and work your way through it. Create a solid foundation to build your skills on. Try to focus on one thing at a time so that you don’t start to feel overwhelmed.
The great thing about photography is that, unlike school, you actually want to learn what you’re being taught. You’re proactively seeking out information (like this article) to learn something new and get better at taking photos. When you’re enjoying what you do, the entire process feels pain-free and simple.
If you’re having a hard time learning photography, start to ask yourself why. What do you struggle with the most that you feel is holding you back? If you answer a specific setting or camera mode, take a step back and try to figure out where you’re going wrong. Often times people will forget a small detail that totally throws a wrench in things.
Now if you answered something along the lines of “I’m having a hard time because my photos don’t look as good as that persons”, then we have a problem. Like anything, photography takes time to learn and get good at. It’s not fair to compare yourself to someone else who likely has years of experience on you. With more time and practice, your photos will improve. There’s simply no arguing that consistent effort creates consistent results. By sticking with photography for the long haul, anyone could shoot at a professional level.
How Long Does It Take To Learn Photography?
Although it’s hard to give a specific timeline, it usually takes people around 1 year to learn photography. Even if you have all the basics down in the first couple of weeks, it takes time to build confidence while shooting. It takes even more time to build that creative eye to find the best shot in any situation.
The reality is, you’ll always be improving and there’s always something new to learn. However, after about a year of consistent practice and shooting, you’ll be well on your way.
Is Photography A Good Career Path?
Every photographer has considered whether this is something they want to turn into a career. If you’re on that same boat, then here’s something to consider.
Photography is a good career path if you’re in it for the long haul. When starting out you’ll struggle to find work and build your client list. There will be some months where you hardly make any money at all. However, once you get through the hard times and have built a solid group of clients, photography can be an extremely lucrative business.
As is anything with freelance type work, there are a lot of ups and downs. You won’t have a consistent schedule working 9-5 Monday to Friday. You’ll often work weekends, lose sleep to finish projects, and sometimes wonder where your next paycheque will come from. For some, this seems like an absolute nightmare while for others it’s an enticing challenge.
Photography is something that you should try to transition into. Don’t outright quit your day job in pursuit of photography from scratch. Start trying to culminate work for yourself in your free time and land yourself a few paid photo gigs. As time goes on and the stars align, you’ll be able to replace your regular income with photography.
In short, photography is a good career path if you’re self-motivated, have a clear plan, and can deal with the stress of freelance work.
How To Stay Interested In Photography
I’ve had countless friends tell me all about how excited they are to get into photography. They buy their first camera, start taking pictures for a few months, then suddenly stop. Whenever I ask what happened, the answer is always the same:
“I just lost interest.”
I’d be lying if I told you I’ve never felt bored with photography. There are times where you don’t feel like taking photos or completely forget why you’re doing it to begin with. To help yourself stay interested in photography, make sure to use the following strategies:
1. Spice Things Up With New Styles Of Photography
If you’re only shooting the same thing over and over, it’s no wonder that you’re getting bored. Just because you’re losing interest in one style of photography, doesn’t mean it’s time to quit altogether! Instead, start experimenting with different genres of photography and see what you can capture. If you usually shoot landscapes, try taking portraits. If you usually shoot macro, try shooting the night sky.
Whatever alternate genre you choose, try to make it completely different. That’s how you’ll find the most challenge and is a guaranteed way to reignite a fire in you!
2. Find A Friend Or Club To Shoot With
If you’re always shooting alone, it can be a little boring. Instead, find a friend or join a photography club to go and take photos with. With other photographers around you, it’s fun to talk about photography and see what each other are shooting. With people who are excited about photography around you, it’s bound to boost your motivation as well.
3. Take Your Camera Somewhere New
If you only shoot in the same couple areas every time, do some research and find somewhere more exciting to visit. Plan a day trip to go explore in a new area one weekend and see what awesome shots you can find. This is not only a ton of fun for personal reasons, but having new scenery to photograph is always inspiring.
4. Learn Something New In Photography Or Photo Editing

When you aren’t learning anything new, things can start feeling dry pretty quickly. To help get inspired, look up new tutorials online around photography or photo editing. There is so much to learn in both worlds that you could spend a lifetime and still not know everything. By doing a bit of research on a regular basis, you’ll have loads of new ideas to implement into your own work.
5. Try To Teach Someone Else
There’s no greater satisfaction than seeing the joy on someone’s face who just learned something new. It’s even better when you’re the one who shared that information with them. No matter how new you are to photography, odds are that you know more than one of your friends. If you know someone who has expressed interest in learning, spend a day to share what you know. This is a lot of fun to do and helps to keep you inspired with photography.
Now that you know how to get started in photography, all that’s left is to get out there and do it.
Happy Shooting,
– Brendan 🙂
