
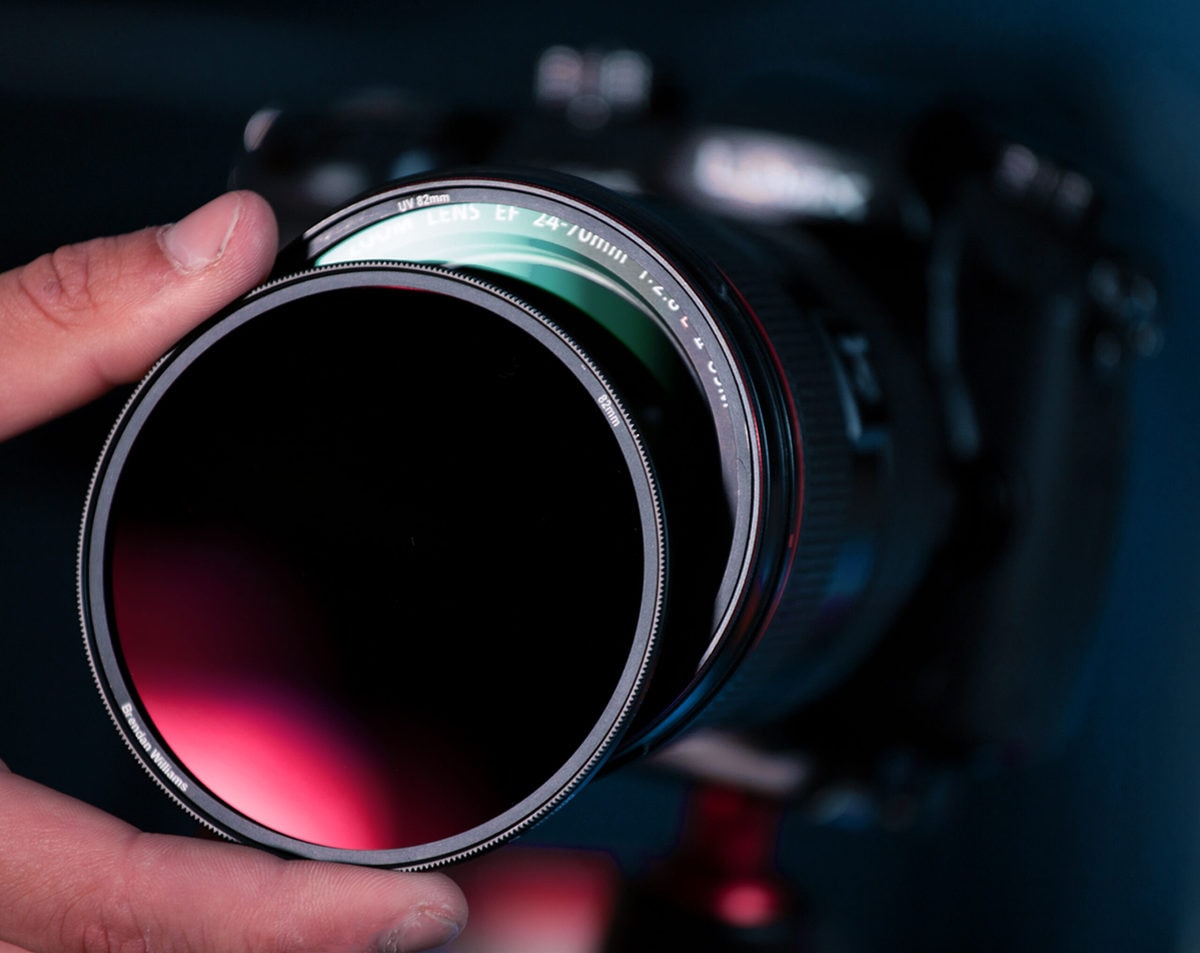
Are Lens Filters Worth It For Photography?
No matter what type of photos you like to shoot, lens filters can be a useful tool to have in your camera bag. Whether it’s for protecting your lens, reducing glare, improving contrast, or capturing long exposure effect, each type of lens filter offers something unique to your photography. If you’re just starting out or haven’t yet decided if lens filters are worth it, the decision doesn’t always seem clear. Just because one photographer gets value out of a particular filter, does that mean you will too? To help answer this question and help you realize which lens filters are most useful to you, this post will break down the different types of lens filters and their uses.
Whether you’re a beginner or professional photographer, lens filters are definitely worth the investment. With a UV filter, you can better protect your lens element from damage, while polarizers and ND filters offer more creative effects. Each type of filter provides a unique advantage to your photography and are worth buying in the long run.
Let’s go over the different types of lens filters in photography and start to see what makes each one advantageous to use.
Types Of Lens Filters
There are 3 main types of filters called UV, Polarizers, or Neutral Density (ND) Filters in photography. Each filter has its advantages and can be used across any genre of photography. However, certain filters, such as ND’s, tend to be more useful for landscape photography and long exposures rather than shooting portraits.
Here’s a list of the typical types of filters you’ll see for photography:
- Clear UV Filters
- Polarizers or Circular Polarizer (CPL) Filters
- Neutral Density Filters (ND) Of Varying Densities
- Graduated ND Filters
We’ll break down the uses of all these filters later on, but for now, it’s important to at least be familiar with the different filter names. Luckily there are only 4 primary ones to remember, but there are different types of each filter. Just like there are dozens of truck types you can drive, there are several types of ND filters, polarizers, or UV filters as well.
You could drive a Semi-truck, a pickup truck, or a box truck. You could shoot with an ND.6, an ND.8, or an ND.1.2. Although all those vehicles fall under the same umbrella of category (“truck”), they all serve different purposes. The same goes for all types of lens filters.
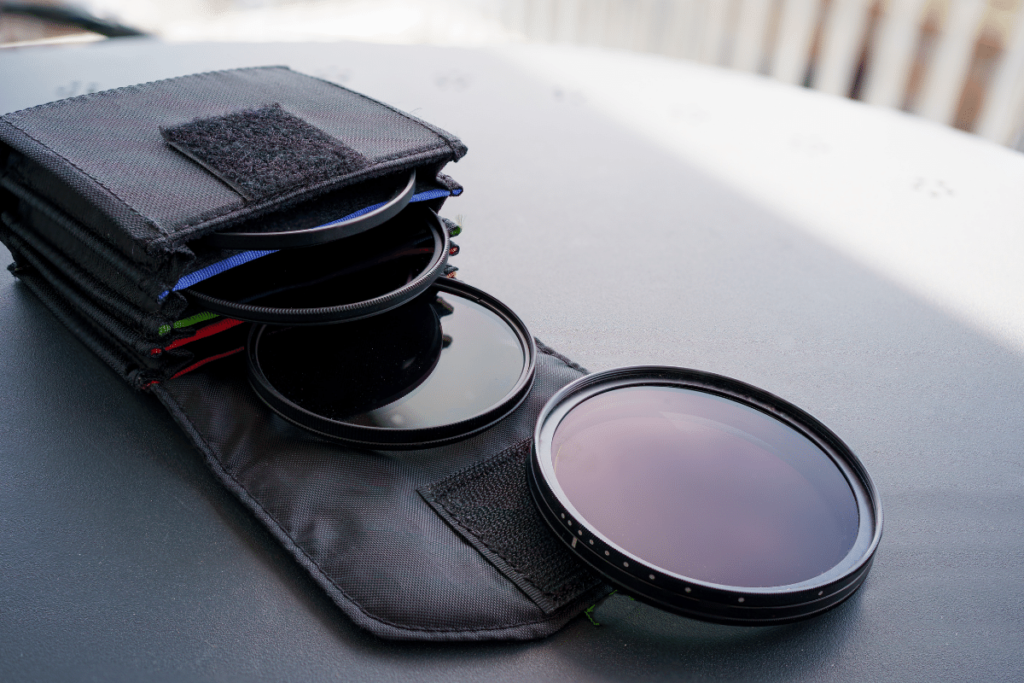
– Lens Filter Shapes And Mounting Systems
Besides the type of filter, there are several different ways a filter actually mounts onto your lens. In photography, the two most common types of mounting systems are screw-on or filter trays.
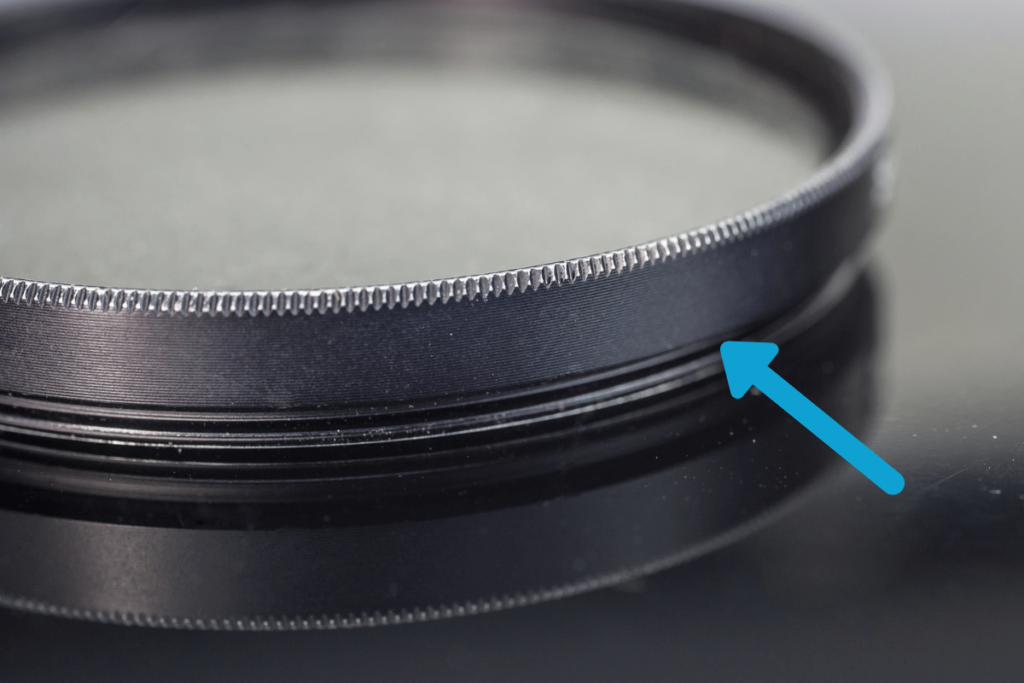
With a threaded or screw-on lens filter, there are actual threads on the filter that physically screw onto the front of your lens. These are often the most popular mounting system and tends to be more cost-effective, as well. All types of filters can be found with this mounting system.
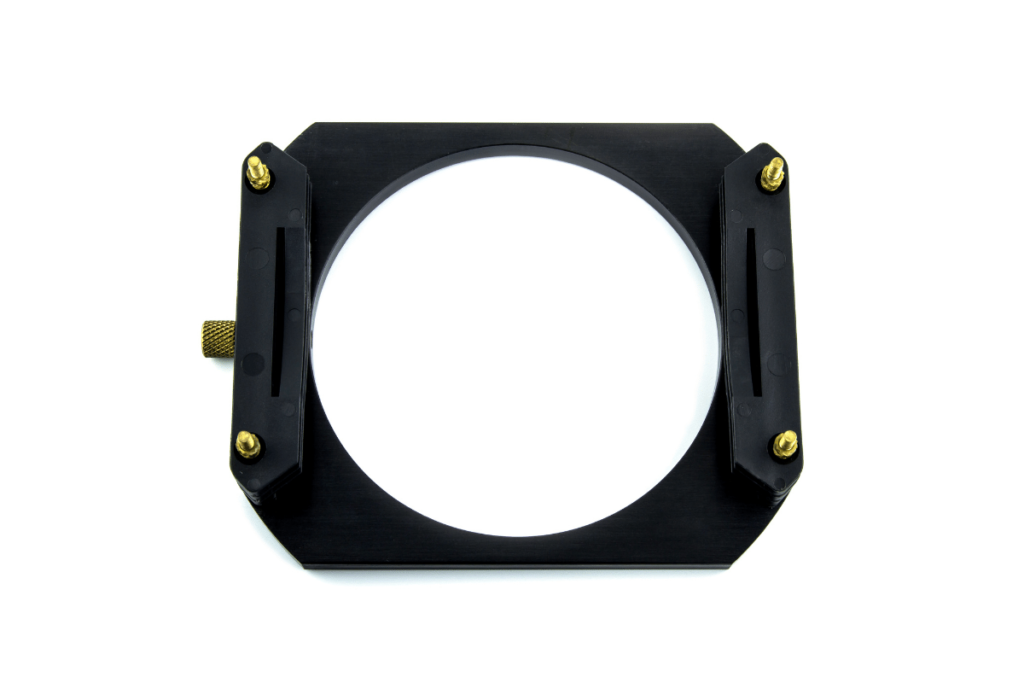
On the other hand, a filter tray is designed for 4×4 filters that don’t have any physical treads on the filter. Instead, it’s just a piece of glass that slides into a tray that’s mounted on your lens. These filters tend to be more expensive, but they are easier to adjust the position of. For graduated ND filters especially, this is super valuable.

Not all types of filters are made in 4×4 sizes. This shape of filter, along with the filter tray mounting systems, is primarily used for ND and graduated ND filters. Since it can be useful to adjust these filters’ up or down position, a filter tray can make life easy.
Do Lens Filters Affect Image Quality?
Lens filters can affect image quality in a variety of ways. With certain filter coatings, you can get more ghosting or double reflections that can make parts of an image look unappealing. The other way lens filters can affect your photos is by creating a color cast. It’s common for ND filters and Polarizers to leave a certain tint to your pictures that can skew the overall color.
Although these effects aren’t ideal, that doesn’t mean you should steer clear of lens filters altogether. Instead, being aware of these problems can help you to mitigate them while you’re shooting.
– Ghosting
Ghosting and double reflections are a problem with any type of filter since light can end up reflecting off the inside of the lens filter. By bouncing off your lens element, reflecting off your lens filters, and going back into your camera, you end up seeing doubles of certain things. This is particularly common with light flares.
Ghosting is something to look out for, particularly in UV filters. Since they are clear and transmit more light, there’s a higher chance of ending up with reflection problems. To fix this, lens filter companies have designed different types of coatings to combat ghosting. I break down all the types of UV filter coatings in this post.
In a nutshell, nanocoated or multi-coated filters are important to reduce any ghosting issues in your pictures.
Regardless of what filter you’re using, your chances of ghosting are reduced by cutting glare on your lens with a lens hood or avoiding shooting into direct sunlight if possible.

– Color Cast
Color cast only occurs with polarizers and ND filters, not UV filters. Since polarizers and ND’s darken your photo, they also give off a slight tint to your pictures.
The easiest way to think of color cast is by putting on a pair of sunglasses. While wearing sunglasses, everything might appear a little bluer or purple compared to without them. The same goes for color cast with lens filters. While using certain types of filters, you’ll end up with a blue, purple, or green hue in your photos.
Luckily, color cast is easy to correct with the help of some photo editing. By adjusting your white balance in post, you can correct the color cast of your filter. So even though it might look a little off in-camera, it will look normal after you make some basic photo editing adjustments.
If you’re new to photo editing, check out my guides to editing photos in Lightroom and Photoshop to help get started!
Ghosting and color cast are the two primary ways lens filters can affect your photos. Although they’re not the end of the world, it’s worth knowing about before you start using filters. Even with these downsides, lens filters are still worth it to use in your photography.
Now let’s go through each type of filter individually to help highlight the value of each.
Are UV Filters Worth It?
A UV filter is valuable to any photographer. Although it doesn’t have any effect on the look of your photo, it does provide an effective means of protection for your lens. Rather than accidentally scratching your lens element, a UV filter is a replaceable means of providing a barrier between your lens and the outside world.
What UV Filters Do
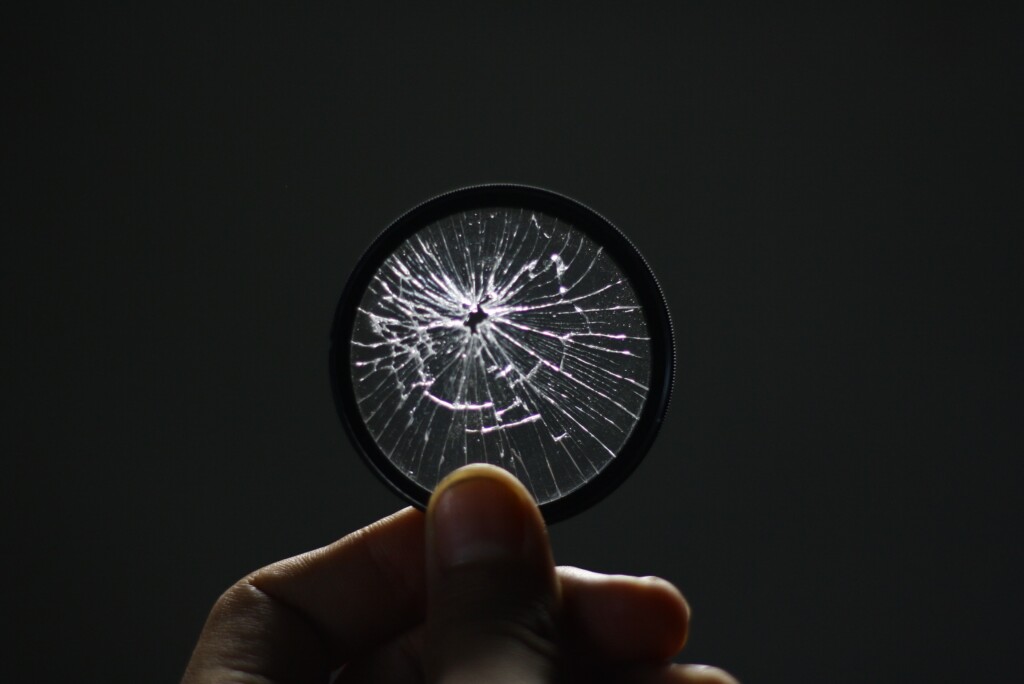
A UV Filter is mostly meant to protect your lens from dust, scratches, or other forms of damage. No matter how careful you think you’re being, it’s almost inevitable that your lens will take a surprise hit. Maybe it swings into something from your neck, gets knocked over on an unsteady tripod, or bumps into something in your camera bag.
Whatever the case, damaging your actual lens can be costly, especially if you damage the actual front element. If you wind up with a scratched or cracked lens, your only choice would be to replace the entire thing. No matter what kind of lens you’re shooting with, that’s a lot of money.
By using a UV filter, you can create a barrier between your lens and everything else. If your lens does take an unfortunate hit, I’d much rather damage a $50 filter than a $1200 lens. The easiest way to look at UV filters is a cheap and replaceable means of insurance for your lens.
Since they’re meant for protection, you can leave a UV filter on your lens at all times. The majority of the time, you won’t notice any significant downsides to having the UV filter on. However, there are some situations where it’s not a good idea to use.
When You Should Not Use UV Filters
You should avoid using a UV filter when stacking multiple filters or shooting into direct sunlight. While using several filters at once, a UV filter creates an unnecessary layer that could create more double reflections. Likewise, shooting into direct sunlight can cause similar ghosting problems as light can reflect off the inside of the filter. In these situations, it’s best not to use a UV filter.
Whenever you decide to take off your UV filter for a photo, make sure you have a safe place to store it. Every filter you buy will come with some kind of filter case to keep it in. It’s worthwhile leaving these in your bag, so you don’t run the risk of damaging your filter by leaving it sitting by itself in your camera bag.
Besides the risk of damage, keeping it in the case avoids the likelihood of the filter getting dirty. Even in a clean camera bag, you’ll notice some bits of dust or lint clinging to your filter. Rather than having to clean your filter over and over, storing it in a case will help to keep it spotless.
Can You Use A UV Filter With Other Filters?
Yes, you can use a UV filter with other filters by threading them to the front of your UV filter. However, with more layers of filters in front of your lens, you may have problems with ghosting. In most cases, it’s advantageous to take off your UV filter before using additional filters such as polarizers or neutral density filters.
With that said, don’t feel like it’s an absolute must to remove your UV filter rather than stacking things. For example, if it’s raining or just plain cold outside, threading filters sucks. Unless you’re shooting into direct sunlight where ghosting will be more noticeable, there’s not much harm in leaving the UV filter on.
Ultimately, it comes down to the situation. It is possible to stack filters with your UV, but it may lead to problems in your photo. These problems only really occur on sunny days when light is landing directly on your lens element. Luckily you could mitigate this by using a lens hood or adjusting your camera position to a more shaded area if necessary.
Who Should Use UV Filters?
UV Filters are useful to all levels of photographers. Both professional and beginner photographers care about their camera gear’s safety and lifespan, and a UV filter helps with this. No matter what types of photos you take, having added protection on your lens is always a good idea. That’s why a UV filter is perfect for anyone and everyone with a camera.
Since UV filters are so cheap, they are a reasonable investment for any photographer. For $50 – $100 you can get a quality UV filter that protects your lens and extends the lifespan of your gear.
In my mind, that’s a no brainer.
Each time you get a new lens, it’s a good idea to buy a UV filter to go along with it. That way, your lens stays protected from the moment it leaves the packaging.
To see my top picks for UV filters, check out my Recommended Filters List.
Are Polarizing Filters Worth It?
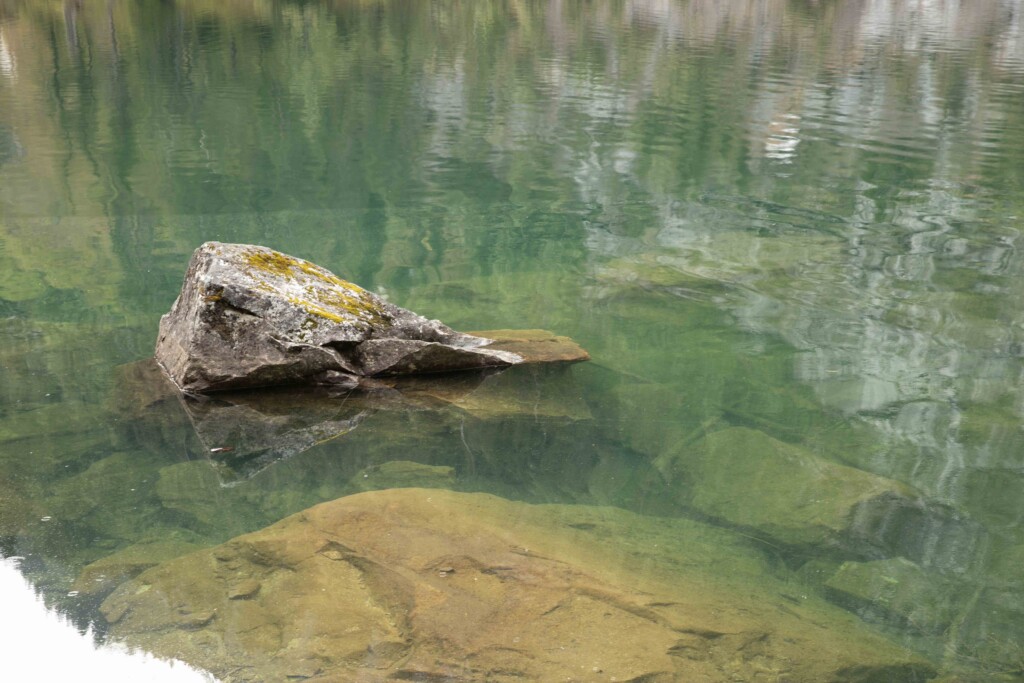
Polarizer filters provide a means of cutting glare, improving contrast, and eliminating reflections in your photos. Since these unique advantages cannot be found with any other lens filter, polarizers are worth it for any type of photography.
What Polarizers Do For Your Photos
Polarizers are like an elusive and mysterious filter to many beginner photographers. Many people talk about it, but it’s not immediately clear what they do.
In short, a polarizer works to eliminate reflected light in your photos, helping to improve the color and contrast in your picture. Reflections don’t just come from shiny surfaces like a window or water. In reality, light can reflect off of any surface from a model’s face, the leaf on a tree, or even a cloud!
It’s almost hard to believe how many surfaces reflect light, but all that reflected light is cut out with a polarizer.
So what exactly does that mean?
Since reflected light appears as a bright spot in your photo, it makes it hard to expose for. By preventing that reflected light from entering your lens in the first place, a polarizer helps to balance your exposure, improve contrast, and make colors appear more vivid.
Since all of us love nicely exposed pictures and beautiful colors, there are few reasons you wouldn’t want to use this filter.
To learn the science behind how polarizer filters affect your photography, check out this post.
Can You Use Polarizers All The Time?
Yes, you can use a polarizer for all your photos, but it won’t always provide an advantage. Polarizers perform best in bright conditions or when shooting something with obvious reflections. If you were shooting in low light or in a shaded forest, you might not see the same advantages.
It’s also important to note that polarizers will darken your images by 1 stop. So if you’re running out of light or are shooting images at night, using a polarizer may not be the best idea.
Some photographers swear by using a polarizer in every shot, but all the photos they take are taken in daylight. These filters provide a lot of value in brighter conditions and help to reduce glare across your entire photo. However, if there’s less light, there’s not much point in using them.
The Downside To Using A Polarizer
The immediate downsides that come with using a polarizing filter are the color cast and image darkening. The color cast created by every brand of polarizing filter can be distracting and alter your photo’s overall hue. The secondary disadvantage comes with a 1 stop loss in exposure while using these filters, making it harder to shoot in shade or low light.
Color cast is, unfortunately, an unavoidable part of using lens filters in photography. In most cases, polarizers will leave a green, purple, or blue hue to your photo. However, compared to the color cast of an ND filter, it’s significantly less noticeable. This is simply because the filter is less dense and allows more light to pass through it.
Luckily you can fix the white balance of your photo and correct the color cast by using a variety of editing programs.
The second downside is how a polarizer will darken your image by 1-stop. That means your exposure will be cut in half when using this type of filter. For example, if you were shooting with a shutter speed of 1/100 without a filter, a polarizer would force you to shoot at 1/50 to get the same exposure.
To learn more about stops and calculating exposure, check out this guide.
If you’re shooting in low light or trying to keep your shutter speed faster, this is going to cause some problems for you.
What Types Of Photos Are Polarizers Good For?
A polarizing filter can be used for any type of photo. This filter proves useful for portraits, landscapes, wildlife, product, or even event photography. Since it cuts glare, improves contrast, and makes colors appear more vivid, it offers desirable advantages to any niche of photography.
Although they might not work for every photo you take, they are nice to have in your camera bag. After first getting a polarizer myself, it made me wonder why I didn’t start using one earlier.
Especially when you’re taking pictures of water or through a window, the advantages a polarizer filter offers are second to none. There’s no other filter or post-processing technique that can eliminate glare as a polarizer can. That’s why I believe it’s a useful filter for any type of photography.
You may not need it all the time, but it makes a world of difference when you do.
To see all my favorite polarizer filters, check out my recommended filters page!
Additionally, you can learn more about polarizers and their effects in this complete guide to polarizers in photography.
Are ND Filters Worth It?
ND filters help to darken your photos and enable you to capture long exposure images at any time of day. For in-camera effects such as smoothing water or streaking clouds, there’s no better filter to use. ND filters are absolutely worth it for capturing more creative in-camera effects, especially for landscape photographers.
When To Use ND Filters
An ND filter is more of a specialized filter in photography. Since you only need to use them in select situations, they aren’t that useful for every photo you take. Instead, ND filters should be reserved for capturing long exposure effects.
Long exposures use a slow shutter speed to capture motion blur in moving objects in your frame. The result is a beautiful fine-art feel to your images that cannot be replicated in any other way.
ND filters are typically used to compensate for too much light in the middle of the day or around sunset. Since it’s that much brighter at these times of day, it’s hard to get your shutter speed slow enough for a long exposure look. However, with an ND filter, you can limit how much light enters your camera, making it easy to slow down your shutter speed.
For example, a popular ND filter is a 10 stop ND filter. That means if you were shooting at a starting shutter speed of 1/100 without a filter, you could use a 20″ shutter speed to match the same exposure with a 10 stop ND.
These long exposure effects are particularly popular amongst landscape photographers. However, they’re not something commonly seen in portrait photography or food photography, for example. That’s why ND filters aren’t necessarily useful for all photographers.
Using Graduated ND Filters
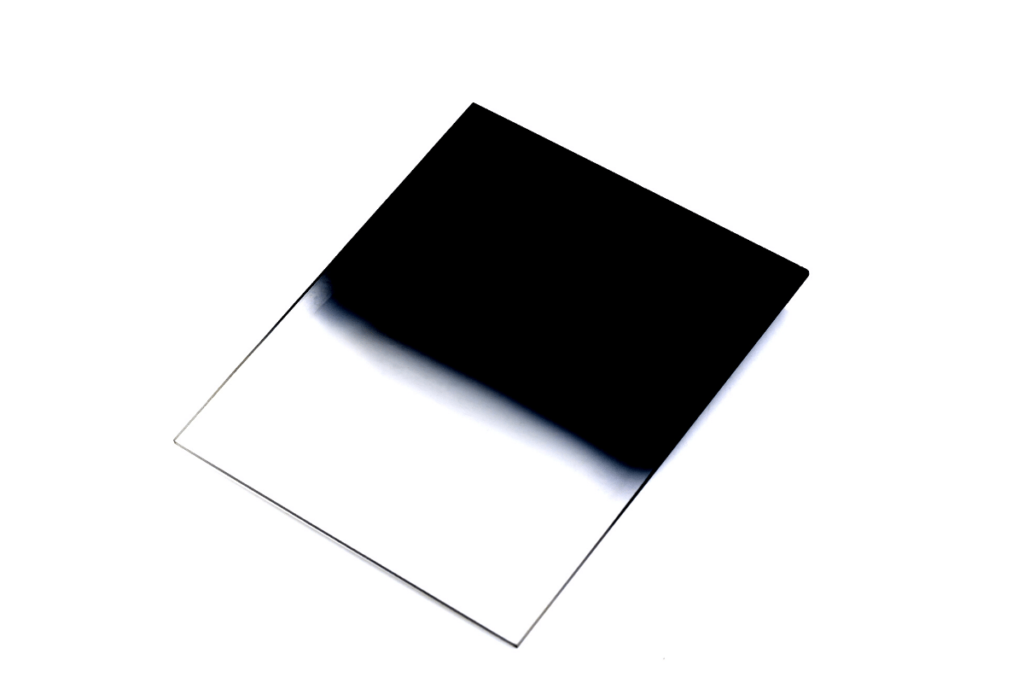
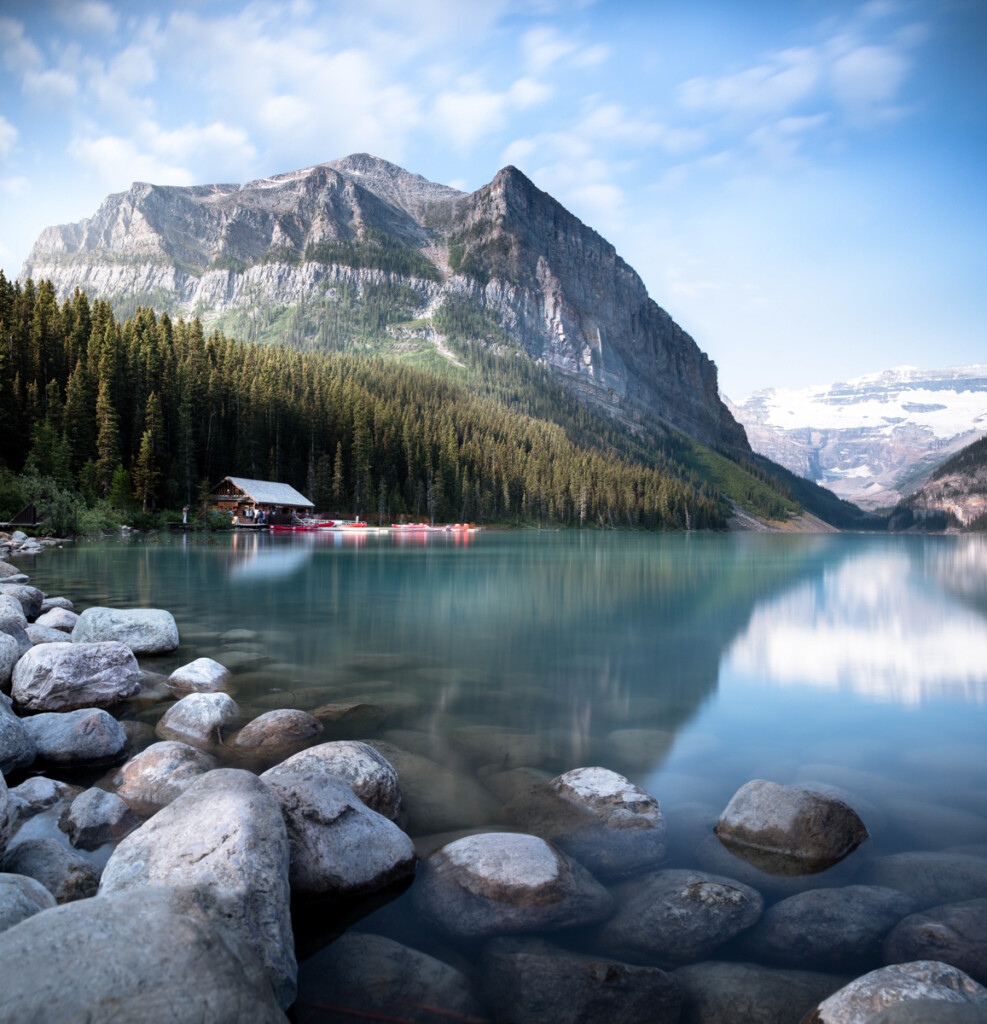
An alternative version to the ND filter is a graduated ND. These filters have an ND filter on one side and transition or clear on the other. When dealing with a large variance in exposure, an ND filter can help balance things out. Especially in landscape photography, you can use a graduated ND to equal out the exposure between the foreground and the sky.
Graduated ND’s are a slightly more specialized version of the ND filter and are only really useful for landscape photographers. Since a portrait photographer, for example, would never want half of their subject to be darker than the other, it wouldn’t make sense to use this type of filter.
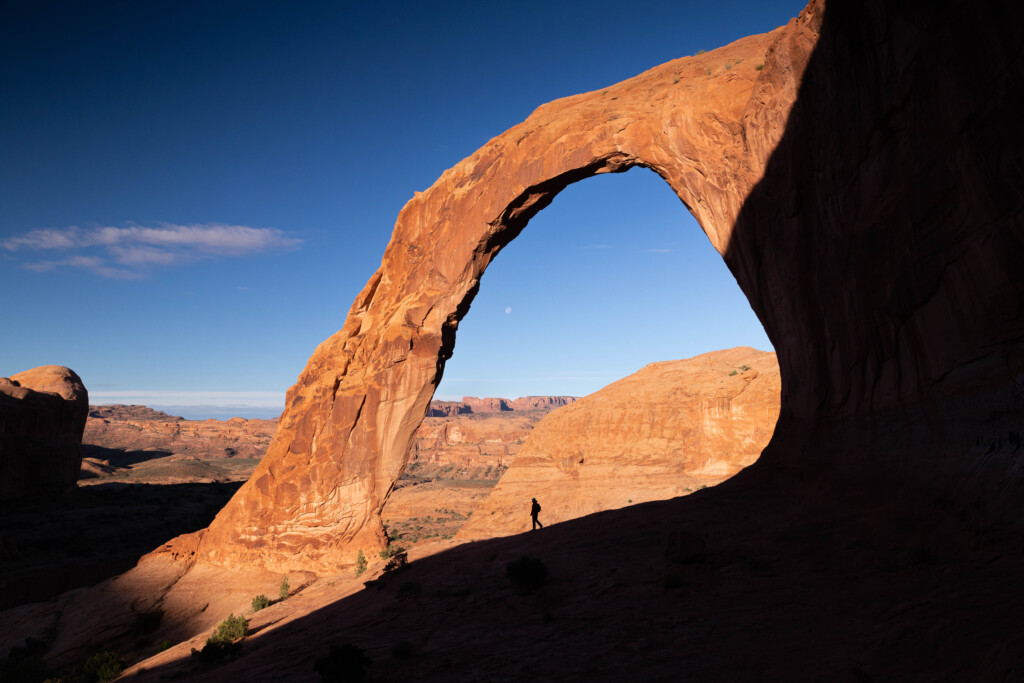
With more open images of an overall environment, a graduated ND makes a big difference. Just take the image below for an example. There was a big difference in exposure between the sky and the arch lit up by sunrise, but to balance it all out, I used a graduated ND filter to help the overall exposure.
Are Cheap ND Filters Any Good?
ND filters come in at a wide range of price points from $10 to $300, so can a cheap ND filter still be good?
Cheap ND filters will still help you to capture long exposures, but they lack the same quality as some more expensive filters. By using a cheap ND filter, you’ll end up with a harsher color cast, more ghosting, and reduced sharpness in your photos.
If you’re tight on cash, there are some decent cheap ND filters out there, but be aware that there are some sacrifices with cheaper ND filters. For any type of ND filter, I would avoid any under $50 that you’ll find online. In some cases, these extremely cheap filters are made of plastic instead of glass, are uncoated, or make your photos look soft.
Since an ND filter is something that will stay with you as you improve, it’s a good idea to invest in one that you’ll like for the long term. You can find a list of my top recommended ND filters here.
The Downside To Using ND Filters

As fun as ND filters can be to take photos with, they can also be a bit of a pain. With a slower shutter speed comes a few extra steps when taking pictures. You’ll need to use a tripod to keep your camera stable, remember how to calculate stop compensation, and deal with the color cast that comes with dense ND filters.
Since the ND filter darkens your picture and lets you use a slow shutter speed, that means a tripod is necessary to keep your camera still. Otherwise, you’ll end up with a blurry shot from trying to capture the image handheld.
If you don’t already own a tripod or don’t want to carry one around, using an ND filter may be more of an extra burden than you anticipated.
Secondly, color cast is a big factor with ND filters. As the filters get darker and allow less light transmission, the color cast can become overwhelming. Unless you’re already planning to edit your photo and correct it in post, it can be difficult to deal with.
Although there are some downsides to using ND filters, I still believe that they’re worth it if you’re shooting the right type of photos.
What Types Of Photography Are ND Filters Good For?
ND filters are best used for landscape photography. Since this type of photography commonly uses long exposure effects, an ND filter can really help to improve your landscape images. Whether you’re shooting waterfalls, the ocean, or clouds moving over an open field, an ND filter will help to add a fine art look to any photo.
Since they darken your photos so much, most ND filters aren’t ideal for more handheld styles of photography. Things like portrait photography, sports, or events wouldn’t get as much benefit from these filters.
With that said, you can get less dark ND filters such as a 3-stop ND filter. These can help to improve your depth of field when shooting portraits in really bright conditions, while still allowing you to shoot handheld. However, this may be more work than it’s worth for your photography.
Which Filter Brands Are Best?
Now that you know which filters there are to choose from, which brands should you keep an eye on? Below is a list of some of the most reputable filter brands in the industry.
1. Lee Filters:
![]()
Provide top of the line filter systems with a price tag to match. If you want a filter with exception quality and ones used by professionals worldwide, Lee is a great option to go with. Assuming you have money to blow of course.
2. B+W Filters:
![]()
This company makes a wide range of filters at both hobbyist and professional prices. Many of my lens filters are from B+W, and I’ve never had any complaints about them.
3. NiSi Filters:
![]()
NiSi has all the typical lens filters you would look for, along with some great combo filters to make life easy. I have used NiSi ND filters in the past and love the quality and price tag on them. After trying them for yourself, you’ll understand why they’re on my recommended list of filters!
4. Hoya Filters:
![]()
Hoya makes exceptional filters in terms of image and build quality. The UV filters I currently use for all my lenses are from Hoya, and I love them. With a wide range of quality filters to offer, Hoya is a great brand to look out for.
5. Tiffen Filters:
![]()
Tiffen is a trusted filter brand in both the photo and video world. They have an exceptional selection of filter options for any creative purpose and don’t cheap out on quality.
6. K&F Concept:
![]()
This filter company is a great option for getting your foot in the door with lens filters. They offer high-quality filters without the insane price tag that comes with more “professional” brands. If you don’t want to shell out too much cash, K&F filters are a worthy option to look at.
What Lens Filters Should You Buy First?

The first lens filter every photographer should buy is a UV filter. Since they’re so affordable but offer so much value in terms of lens protection, it’s a no-brainer. For your second and third filter purchases, looking into polarizers or ND filters should be your next bet, depending on the photos you like to take.
For most photographers, a polarizer is going to serve as the most useful second step to your lens filter collection. These filters are valuable to such a wide range of situations and shooting styles that you’ll definitely get use out of it.
But be warned, once you start using a polarizer, you may not want to shoot without one ever again!
Lastly, an ND filter is the third type of lens filter you should buy. Since these filters are more specialized, they don’t offer value to all types of photographers. However, if you love shooting landscapes or even real estate photography, having an ND filter is a valuable creative tool. By darkening your exposure, you can capture unique fine-art styled effects with ease.
As for graduated ND filters, these are an extra cost that may not seem necessary to you at this point. As your photography progresses, a grad filter can help to balance your exposure, but you can still make do without it. It’s sort of an added luxury that’s nice to use but not always necessary.
Now that you know whether lens filters are worth it for photography, you can better understand which filters may be most useful to you. To help you get started with some great buying options, check out this list of top lens filters for photographers!
Happy shooting!
– Brendan 🙂


