

Removing backgrounds opens up creative possibilities, such as allowing you to place your subject in a new setting, isolating an object for use in an advert, and so much more. Luckily, it’s simple to remove a background in Photoshop.
Photoshop has a wide array of background removal tools, from one-click solutions to complex and time-consuming options. In this tutorial, you’ll learn the different background removal options so you can choose the best method for your image and selection needs.
Let’s get started!
Video Tutorial
Option 1: The Remove Background Button
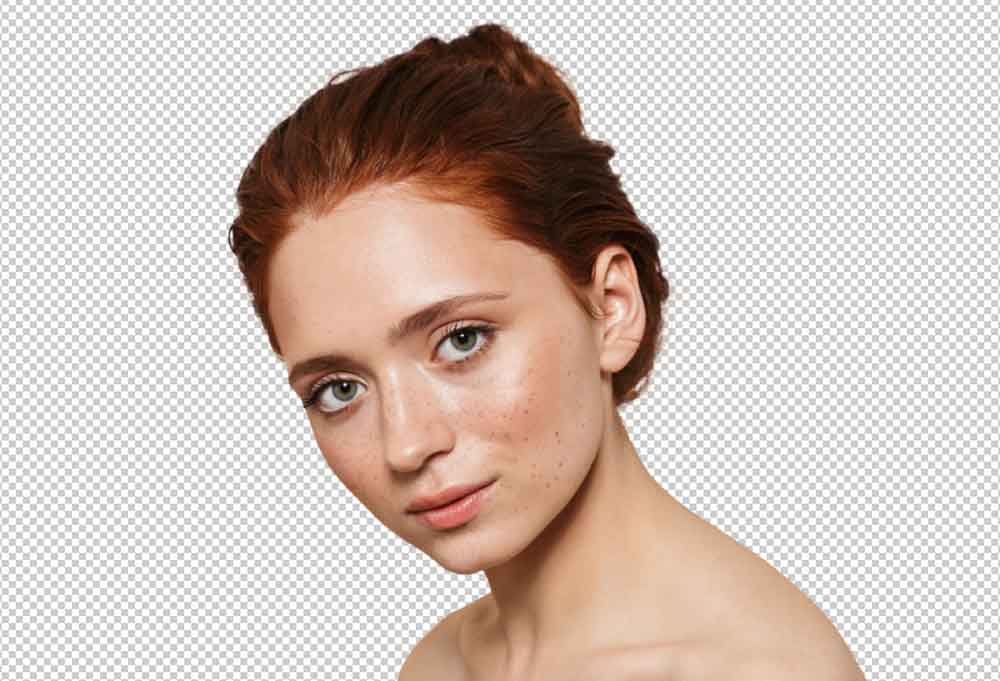
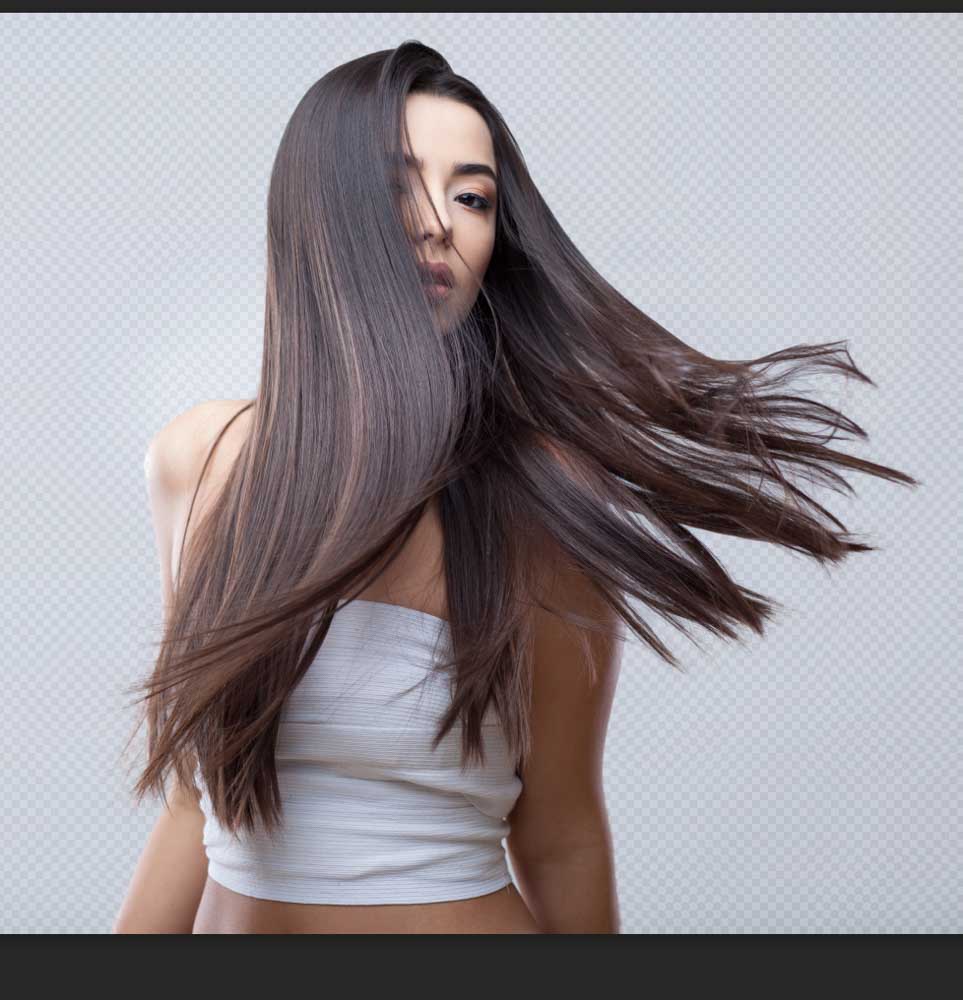
Starting with the most simple tool, the Remove Background button does just that — it removes the background of your image with one click. It simplifies the process of selecting and removing the background by making a selection, adding it onto a layer mask, and cutting out the image all at once.
This button is best for images in which the subject is fairly distinct from the background — the accuracy may surprise you and will save you tons of time.
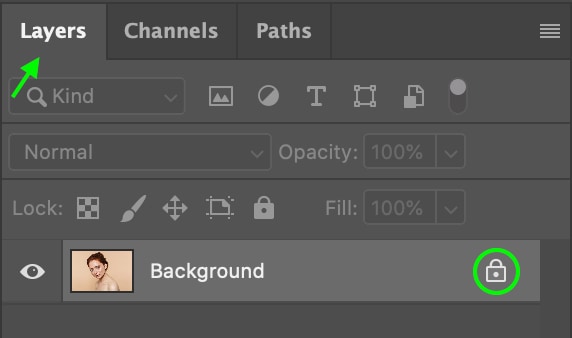
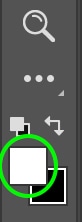
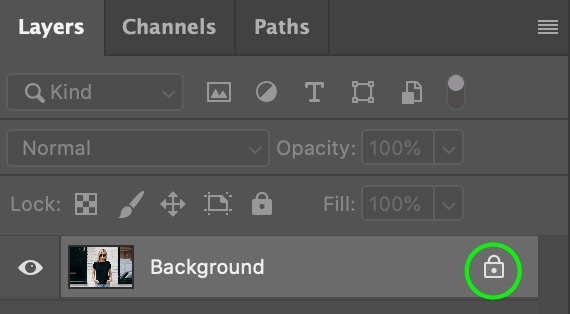
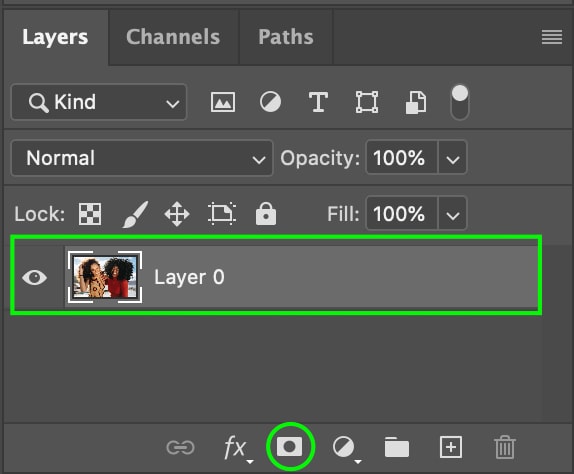
Step 1: Unlock The Background Layer
To use the Remove Background button, first head to the Layers Panel to unlock your image layer by clicking the lock symbol on the right.
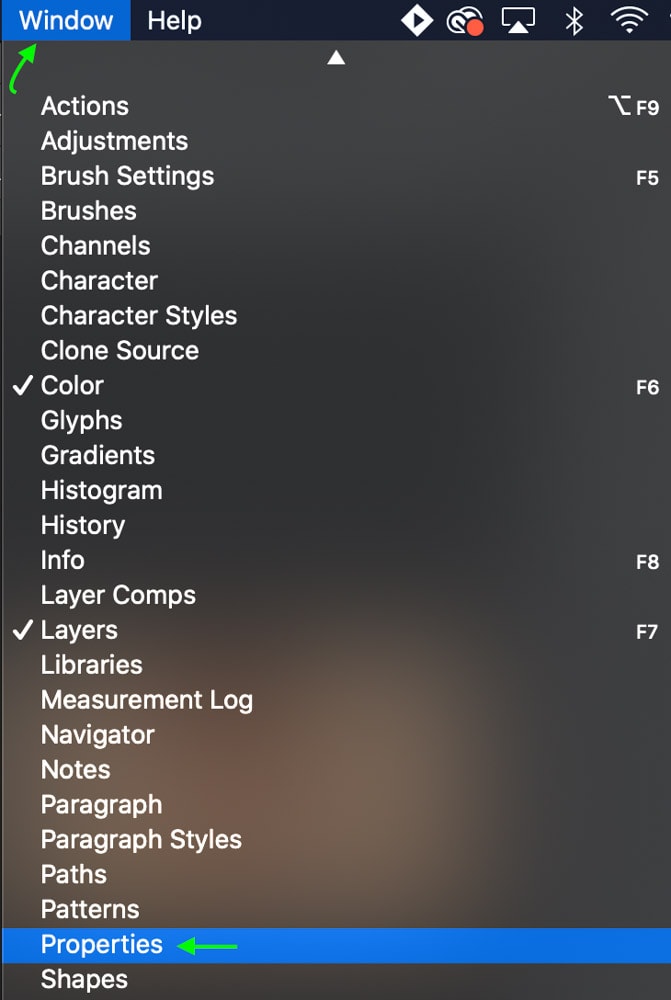
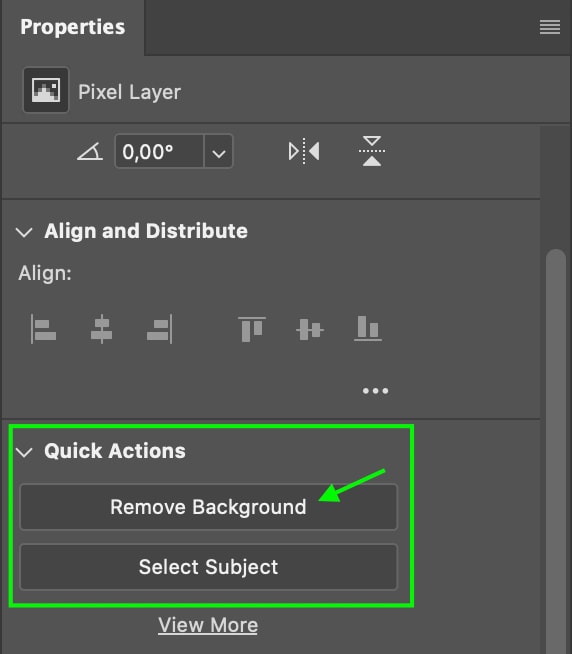
Step 2: Click The Remove Background Button In The Properties Panel
Next, head to your Properties Panel. If you don’t see this panel, head to Window > Properties to show the panel.
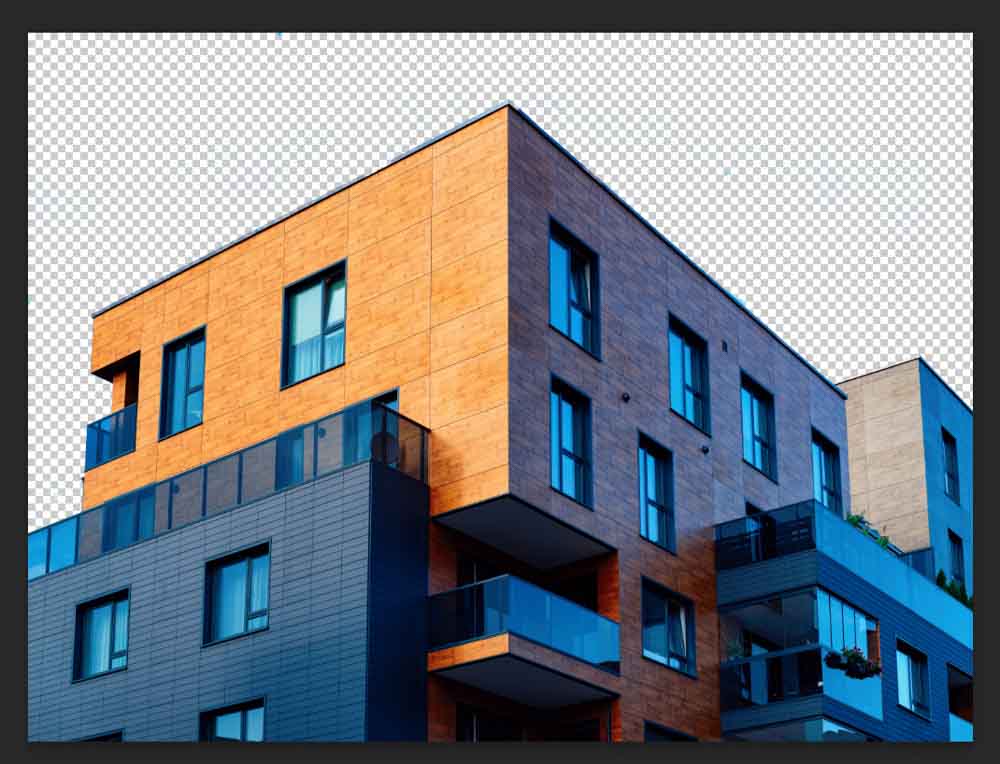
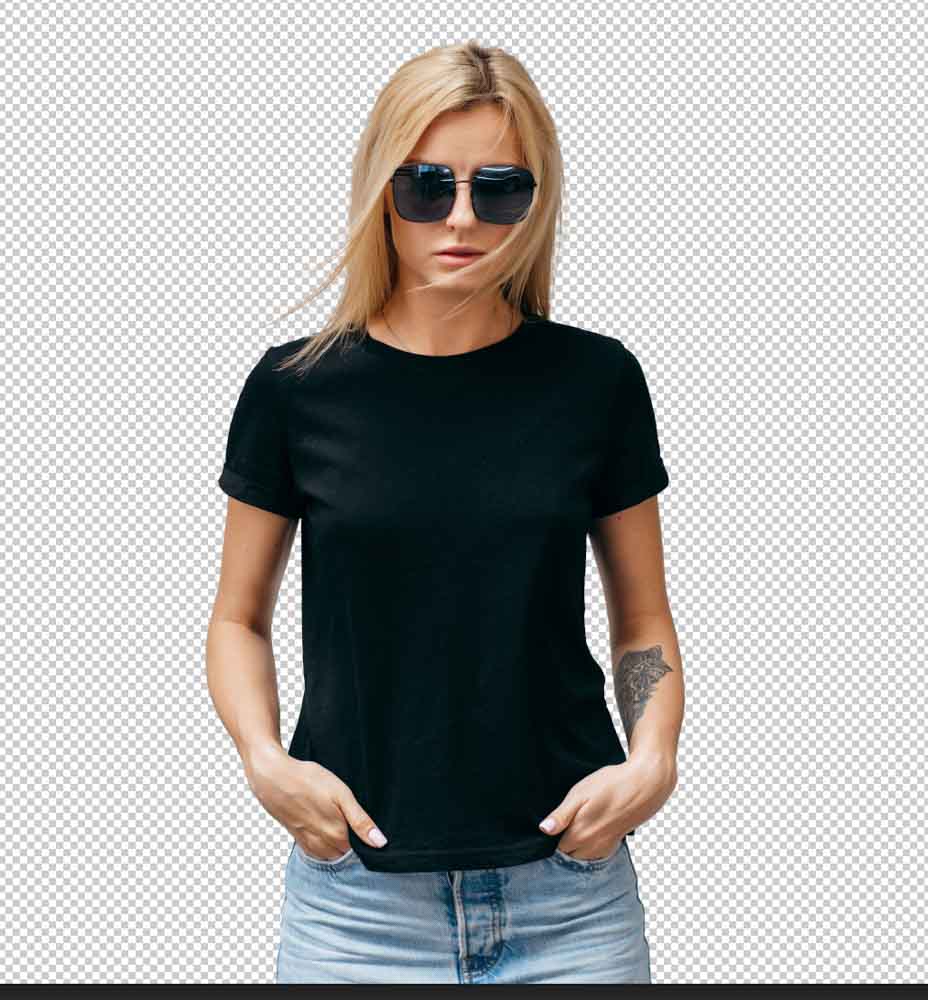
In the Properties Panel, you’ll see the Quick Actions area at the bottom. Simply click the Remove Background button, wait for Photoshop to make the selection, and the background will become transparent.
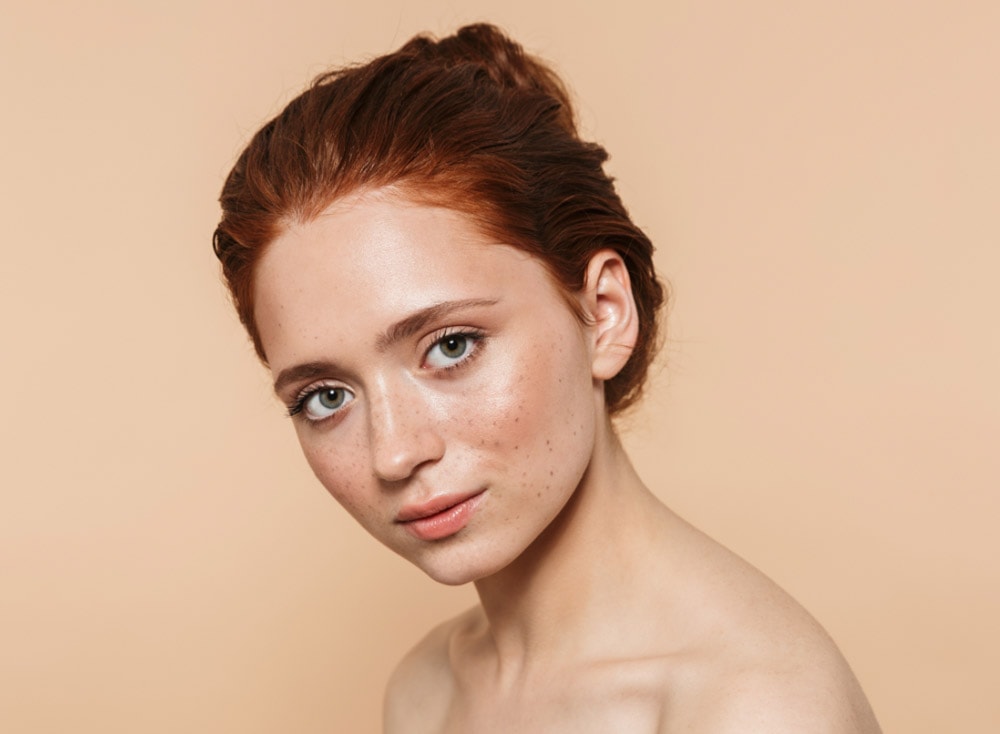
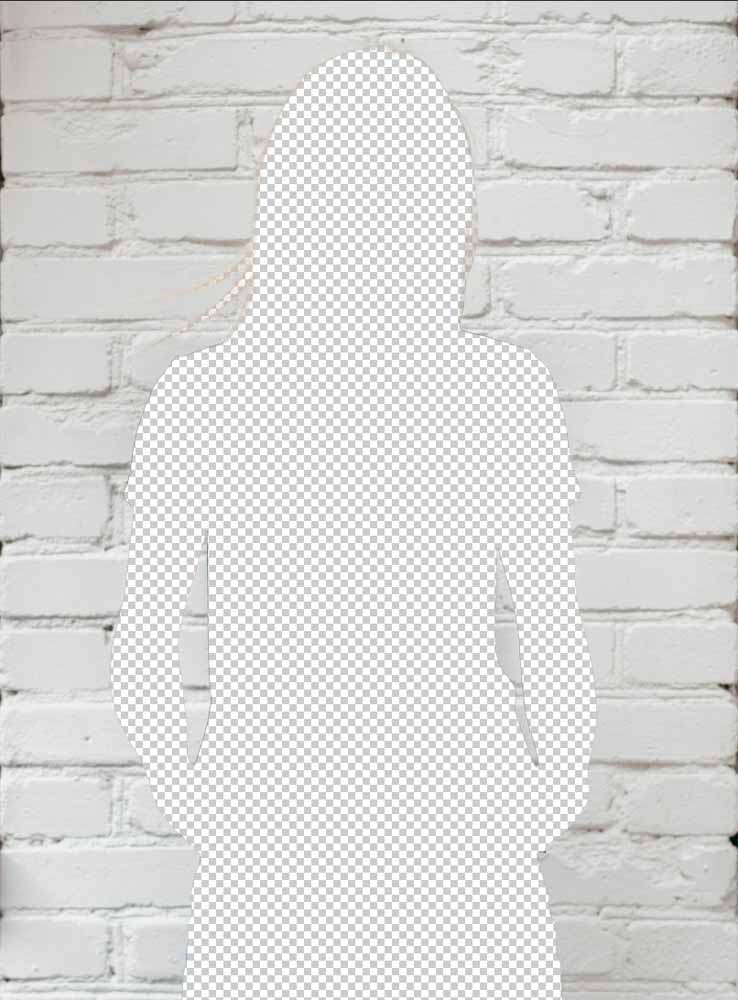
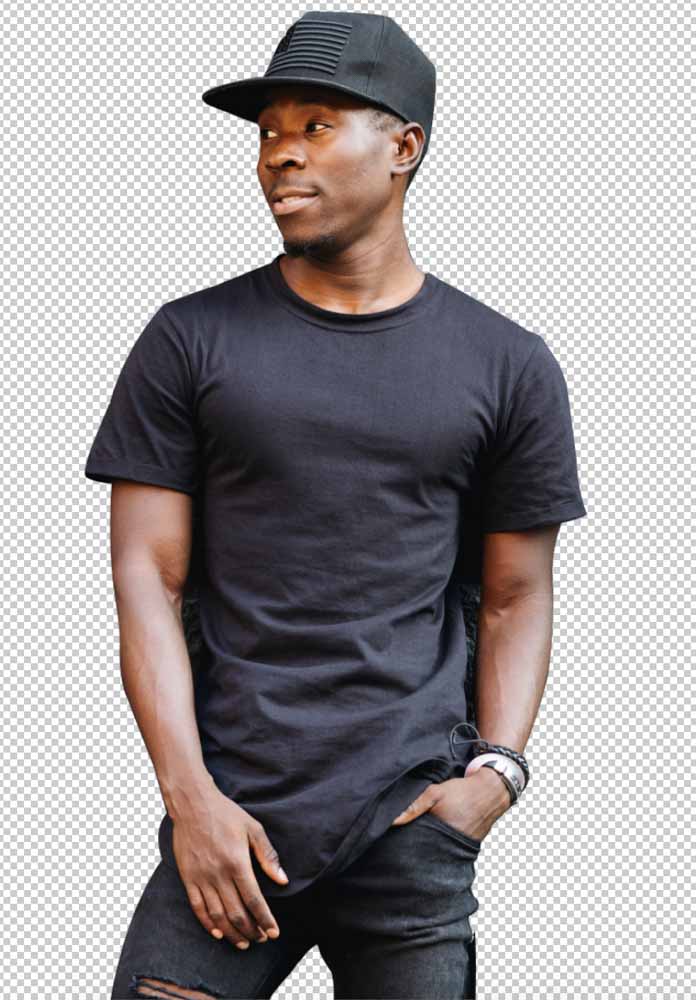
Below, you can see an image before and after using the Remove Background button.
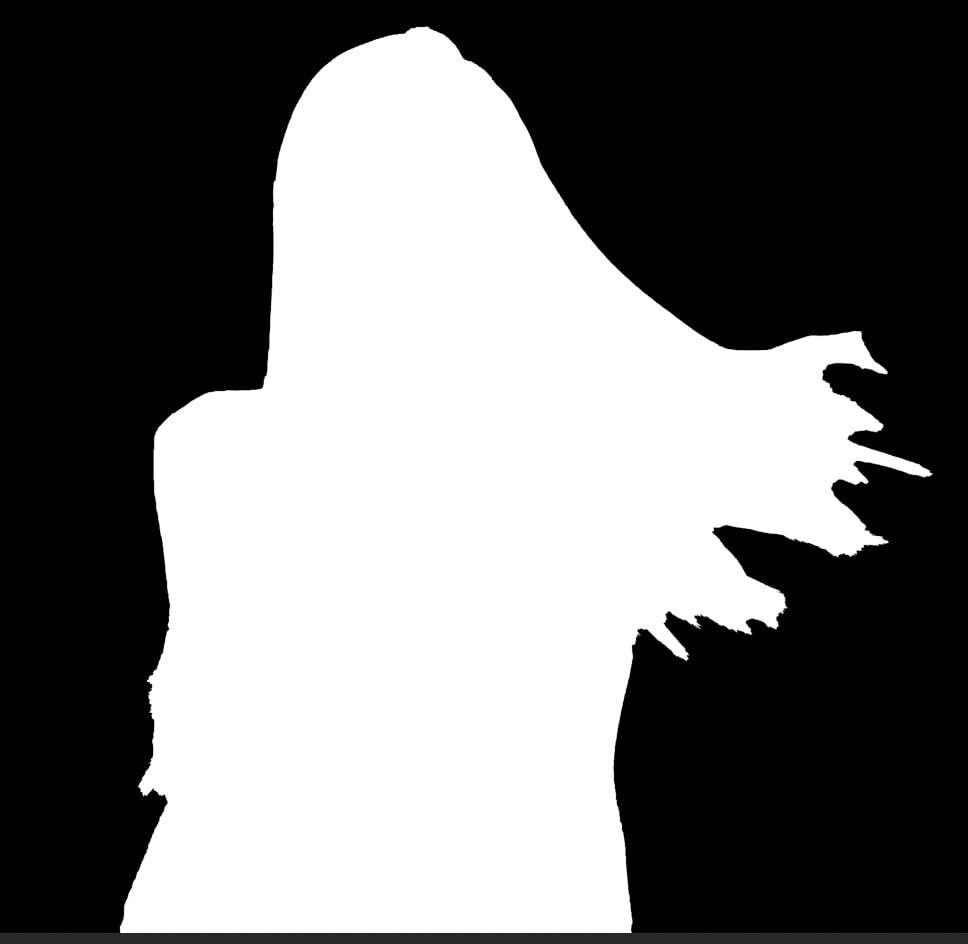
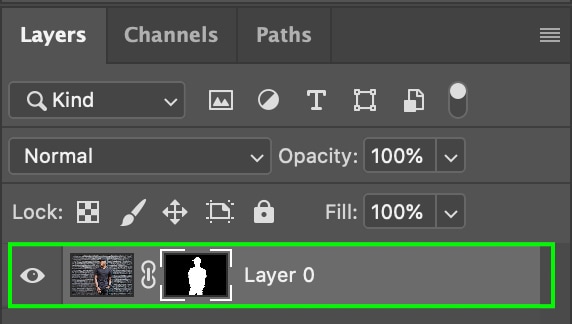
Step 3: Activate The Layer Mask View
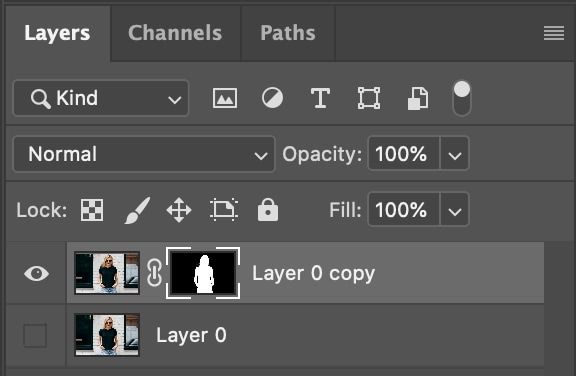
If you’d like to double-check that the image was cut out accurately, you can view the area in black and white by holding Alt (Win) or Option (Mac) and clicking the Layer Mask in the Layers Panel.
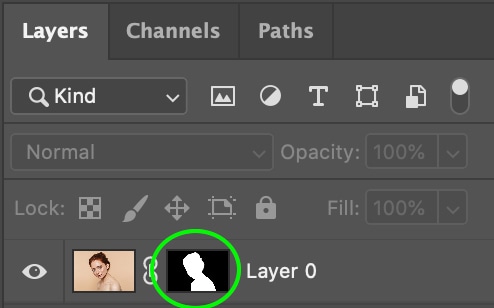
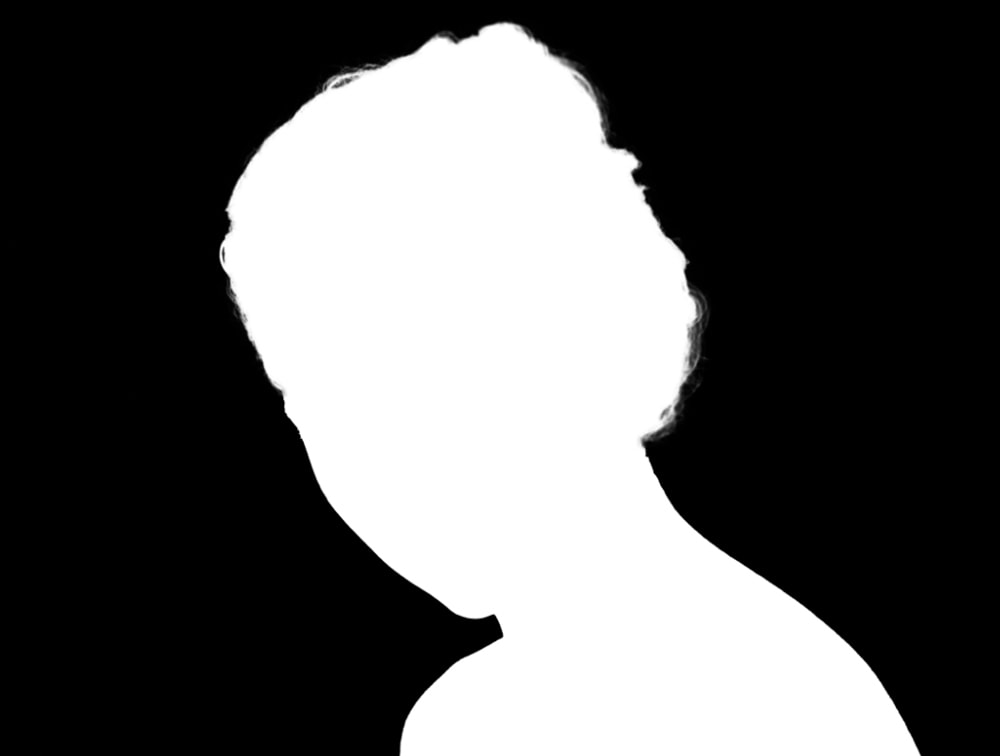
This allows you to see the exact selection Photoshop made, as everything transparent will be pure black, while everything visible will be pure white.
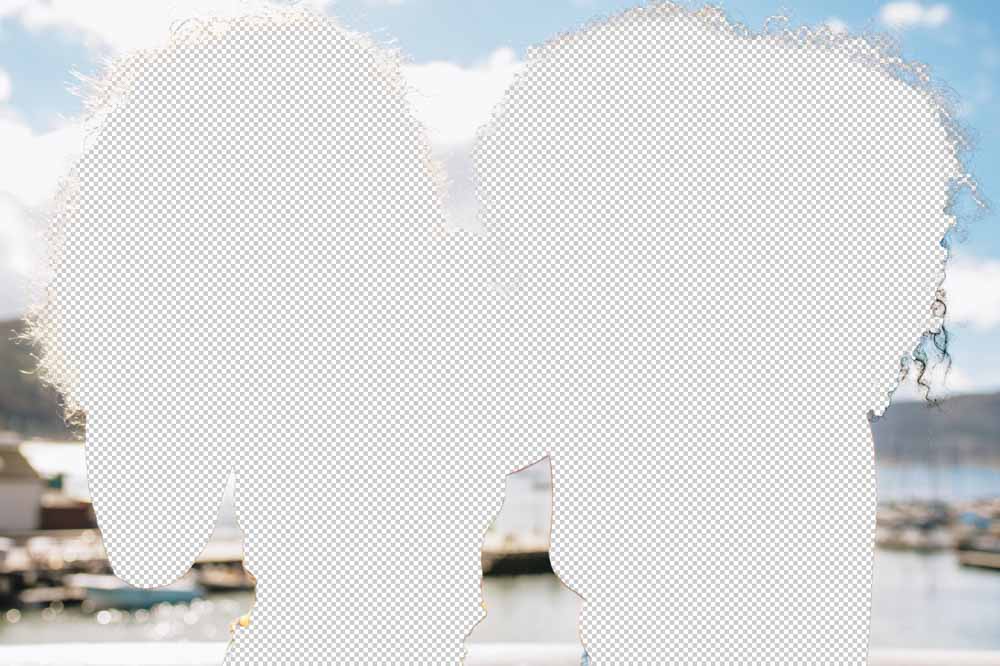
Step 4: Touch Up The Layer Mask (Optional)
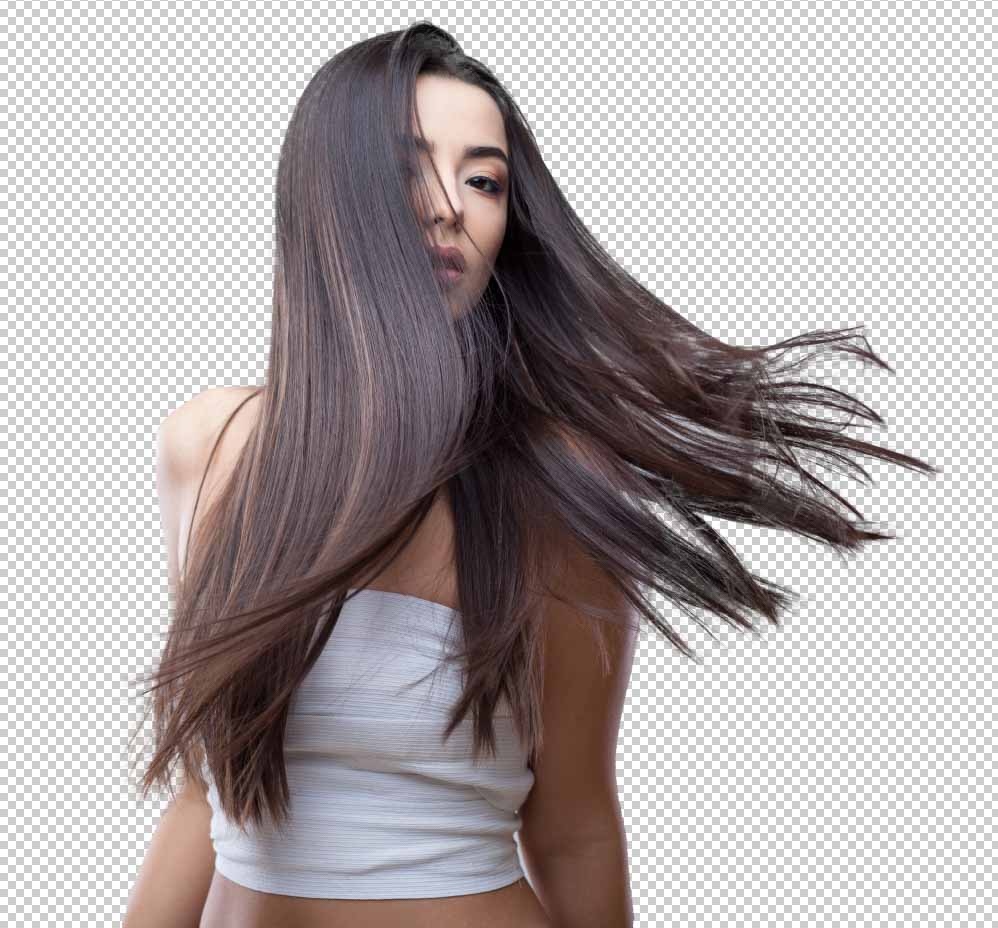
If you see any gray areas, such as parts of the hair in the above image, that means they are not fully visible or fully transparent; but rather something in between. For example, 50% gray would be 50% visible. With fine details such as the hair, these gray areas aren’t a problem, but they would be an issue if they were found in the middle of your subject.
While the process is generally very accurate, you can touch up the mask to correct any possible issues quickly.
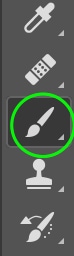
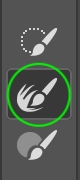
We can refine the mask using the brush tool. Select the Brush Tool from the toolbar (B).
In the Options Bar, make sure the Blend Mode is set to Normal.

Set Opacity and Flow both to 100%.

Then, set the foreground color to white if you’d like to make a transparent part of the image visible or black if you’d like to add more transparent areas to the image. Below, I’ll set my foreground color to white to reveal more details near the edge of the cutout.
Now you can paint over the mask areas that you’d like to include or remove from the selection, and when you’re satisfied, hold Alt or Option and click the Layer Mask again. You’ll have your final cut-out image.
Option 2: The Object Selection Tool
The Object Selection Tool (W) is best for selecting foreground subjects that aren’t overly complex, though Photoshop can detect hair or fur using a special button we’ll get into in a moment.
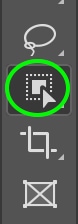
Step 1: Activate The Object Selection Tool (W)
You can find the Object Selection Tool (W) in the Toolbar on the left.
Step 2: Set The Mode To Rectangle And Check The Object Subtract Option
In the Options Bar, set the Mode to Rectangle and make sure Object Subtract is checked.


Step 3: Draw A Rectangular Marquee Around The Subject
Now, you can draw a rectangle marquee around your image. Make sure the selection is as close to the edges of your subject as possible.
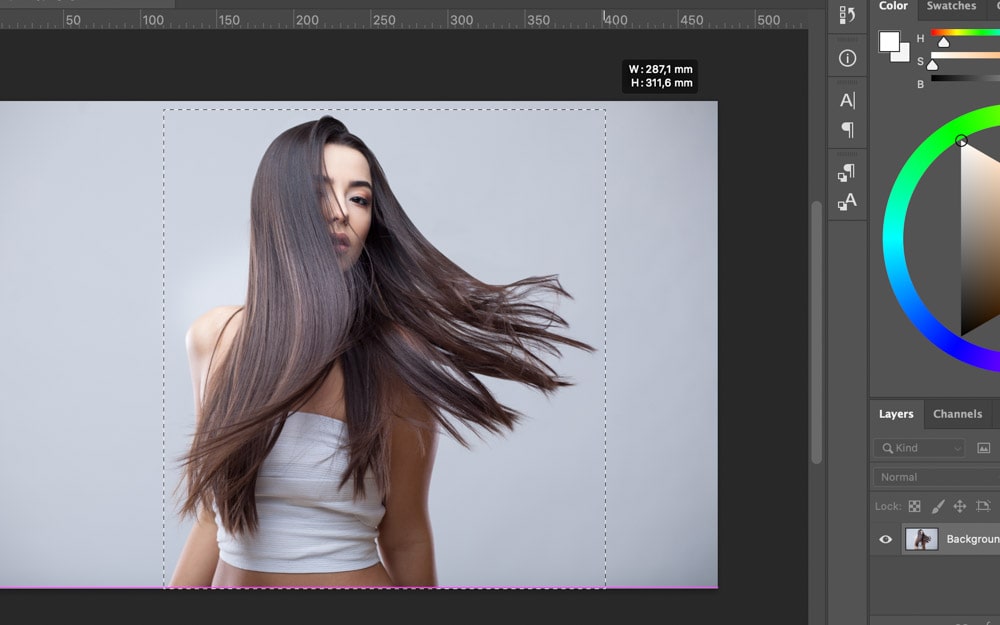
When you release the selection, it will snap to the edges of your subject inside that selection, creating an active selection around your subject.
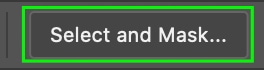
Step 4: Refine The Selection In The Select And Mask Workspace
Now, click the Select and Mask button at the top.

Once you press the button, the background of the image will become transparent.
In the Properties Panel that appears once you’ve clicked the button, you can switch the view you see by clicking the View icon and choosing the one you’d like.
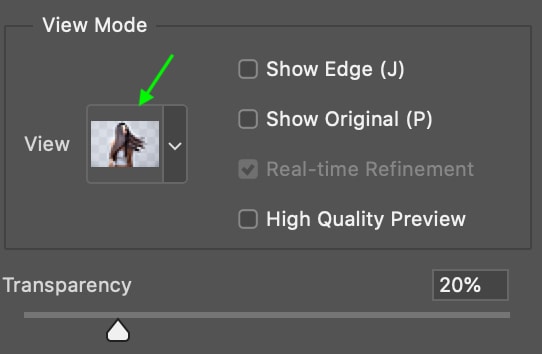
I recommend going with an all black and white image, as this will allow you to easily see what areas can be refined.
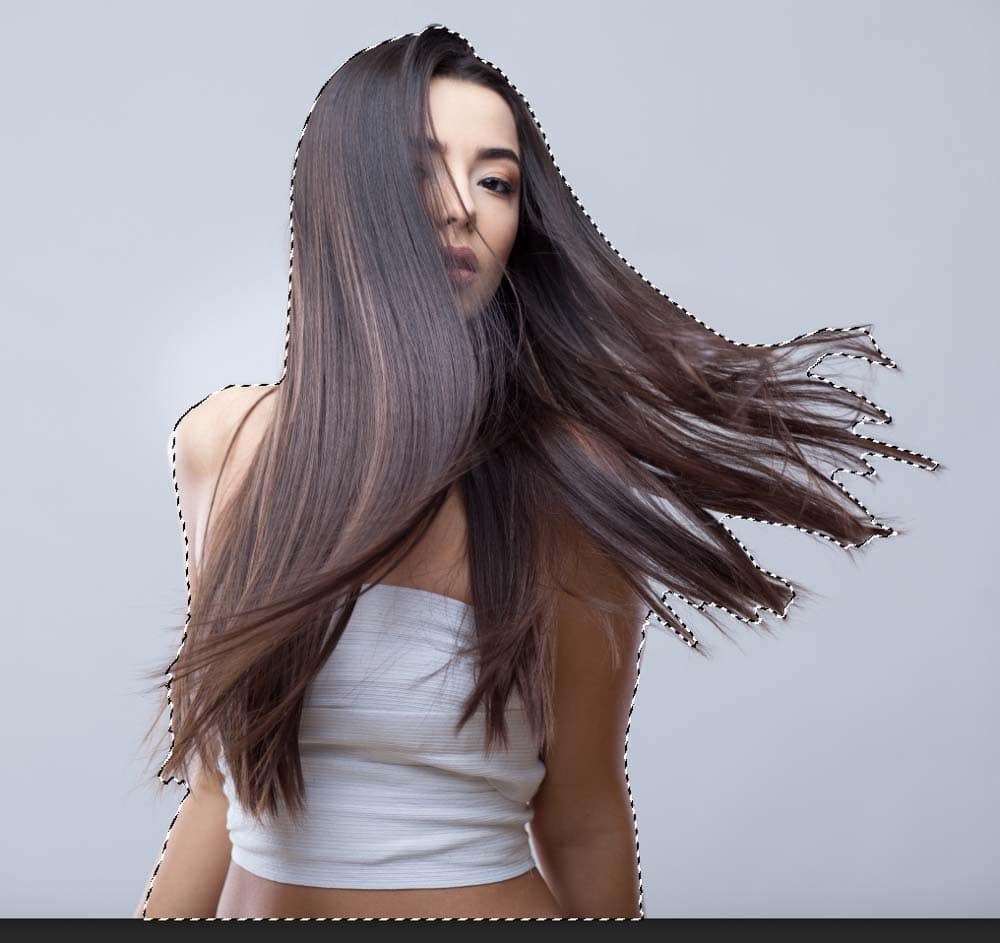
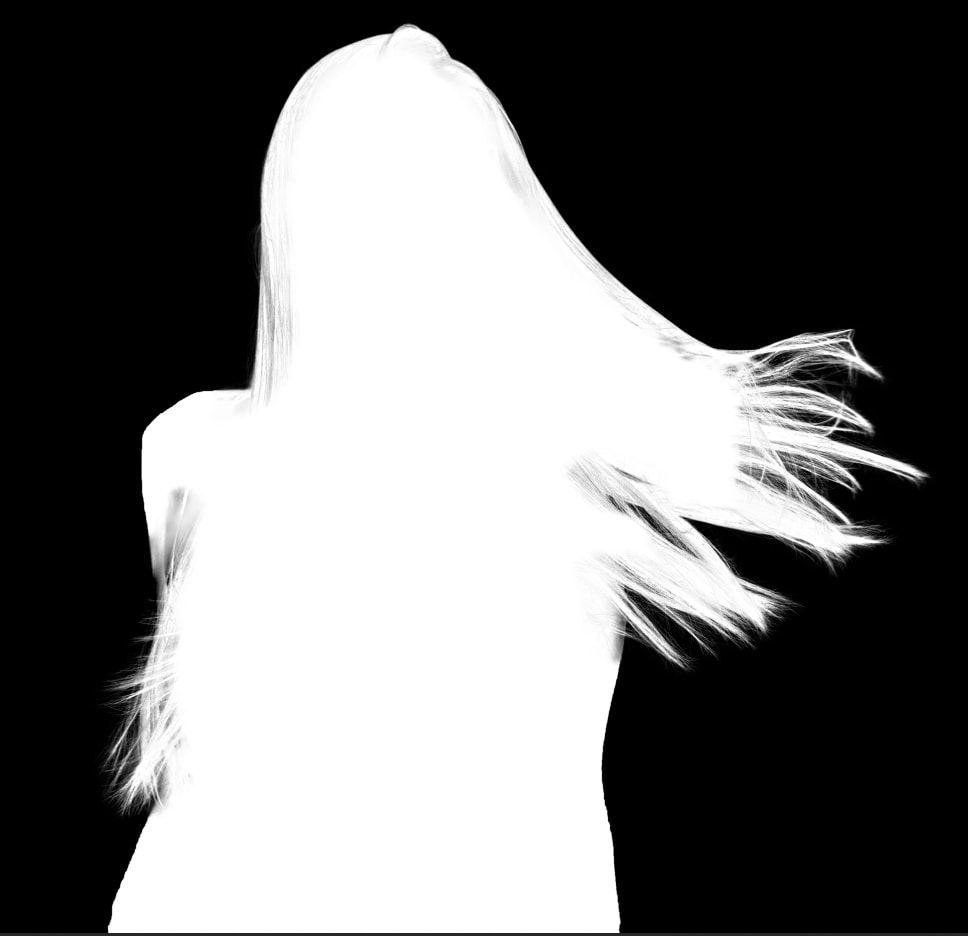
Often, this method won’t select individual strands of hair, so you can refine the selection of hair by clicking the Refine Hair button at the top of the select and mask window.

Now, compared to the image above, the image below looks much more like strands of hair.
You can refine other areas by clicking the Refine Edge Brush icon on the left, then clicking the Plus icon to add areas or Subtract to take them away. To the right of these icons, you can click the drop-down menu to increase or decrease the size of your brush.
Once you’ve chosen your brush size, paint over the areas you’d like to refine. When you’re satisfied, head to the Output tab of the Properties Panel and check Decontaminate Colors to remove any fringing around the edge of the selection. Set Output To New Layer with Layer Mask to ensure you continue editing non-destructively.

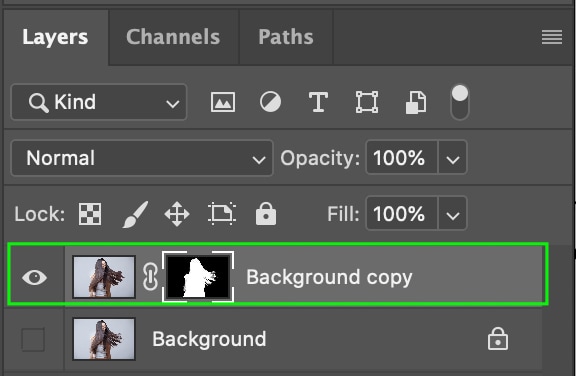
Click OK, and you’ll see the final image with a transparent background. In the Layers Panel, you’ll notice that there is now a Layer Mask applied to the layer you’re working on.
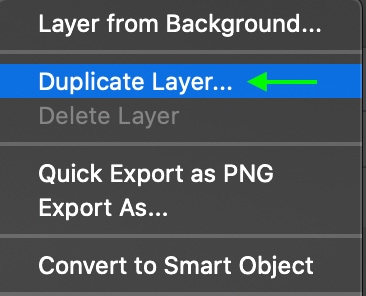
Option 3: The Background Eraser Tool
The Background Eraser tool can be used to erase parts of a background by erasing only a specific color or color range that you set. It samples colors as you drag the tool over them and erases only those colors, leaving all other colors untouched.
The Background Eraser Tool is a great tool to use if your image has elements in the mid-ground that you’d like to keep. It also works best if the background is made up of only a few colors or similar color tones. If your background has lots of different colors and exposures, this tool might take longer to use than one of the other options.
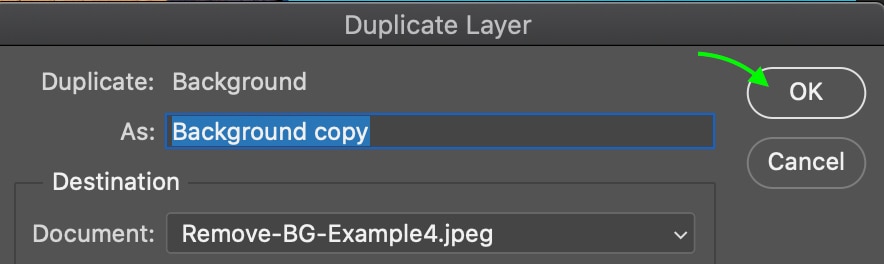
Step 1: Duplicate The Layer To Edit Non-Destructively
It is important to note that Eraser tools like the Background Eraser will remove the individual pixels from your image for good, so be sure to duplicate your image layer before starting to erase.
You can do this by heading to the Layers Panel. Right-click (Win) or Control + click (Mac) the Background Layer and select Duplicate Layer.

Add a suitable name to your layer and press OK.
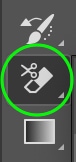
Step 2: Activate The Background Eraser Tool (E)
You can then find the Background Eraser by clicking and holding the Eraser Tool and selecting the Background Eraser Tool. You can also right-click (Win) or Control-click (Mac) the icon to open the options.
Step 3: Drag The Eraser Over The Background Areas
You’ll notice your cursor changes to a circle with a crosshair in the center. The color of the pixel under the crosshair will be the color Photoshop samples and erases as you drag your cursor along the image.
This allows you to get right up to the edge of your subject, and as long as the background is contrasted enough, you can erase it without erasing any pixels from the subject.
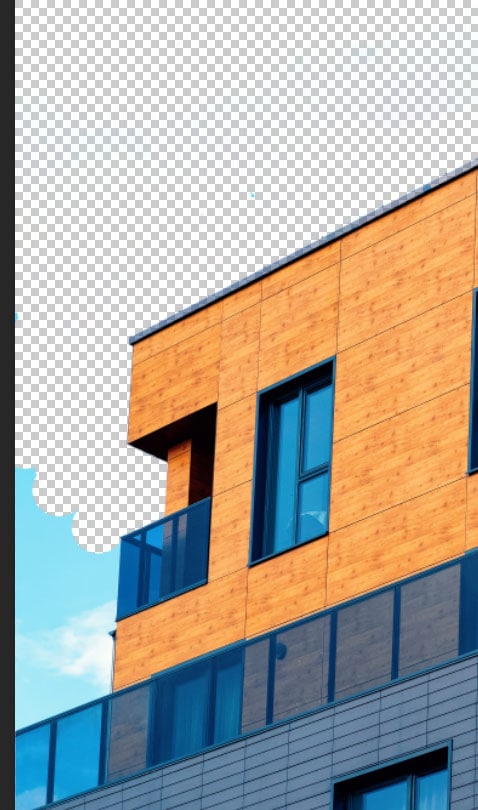
Do this until the background is completely erased.
You can undo any mistakes you make here by pressing Ctrl + Z (Win) or Command + Z (Mac). You can do this as many times as you need to.
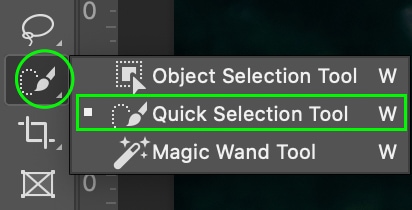
Option 4: The Quick Selection Tool
The Quick Selection Tool allows you to draw a selection onto your image, and the tool will snap the selection to the edges of the subject, allowing you to make the rest transparent. This tool is best if you’ve got lots of contrast between your subject and background, as the automatic snapping to the subject might not be as accurate if the subject and background appear too similar.
Step 1: Activate The Quick Selection Tool (W)
You can find the Quick Selection Tool (W) in your Toolbar. It may be hidden under the Object Selection Tool, so right-click (Win) or Control + click (Mac) the icon and select the Quick Selection Tool.
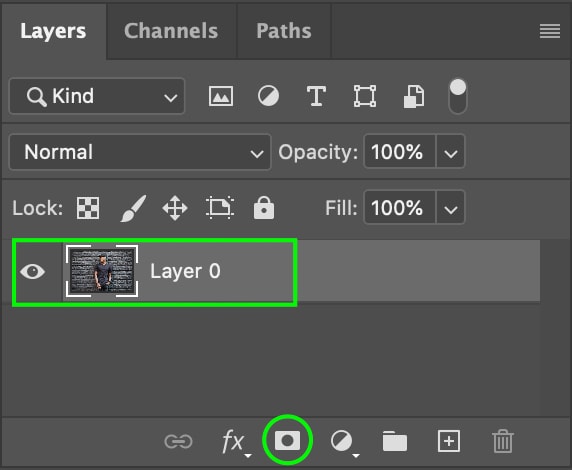
Head to your Layers Panel and make sure to unlock the layer. The layer name will automatically change to Layer 0.

Now, in the Options Bar, click the new selection icon.

Step 2: Drag Over The Subject To Select It
Drag your cursor around the subject, and you’ll see the selection appear as you go, following the edges of your subject. If you lift your cursor, you can still add to the existing selection using the Add to Selection icon.
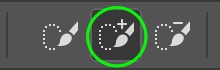
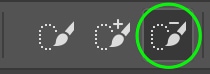
If you accidentally add part of the background to your selection, you can select the Subtract from Selection icon and drag over the area you’d like to subtract.
Step 3: Refine And Invert The Selection Using The Select And Mask Workspace
This will help you refine your image. Once you’re happy with the area you’d like to cut out, make sure the layer is selected and click the Select and Mask button in the Options Bar.

However, Photoshop may have cut out the subject instead of the background.
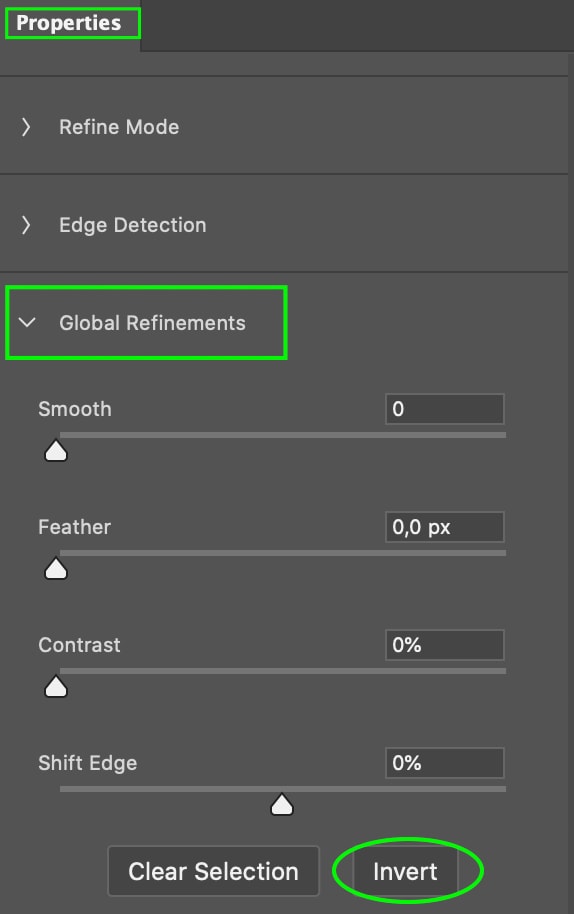
But no worries, we can invert the selection by heading to the Global Refinements tab in the Properties Panel and clicking Invert.
To fix up the hair that wasn’t included, select the Refine Hair button at the top. The selection will be more refined with the inclusion of the smaller strands of hair.

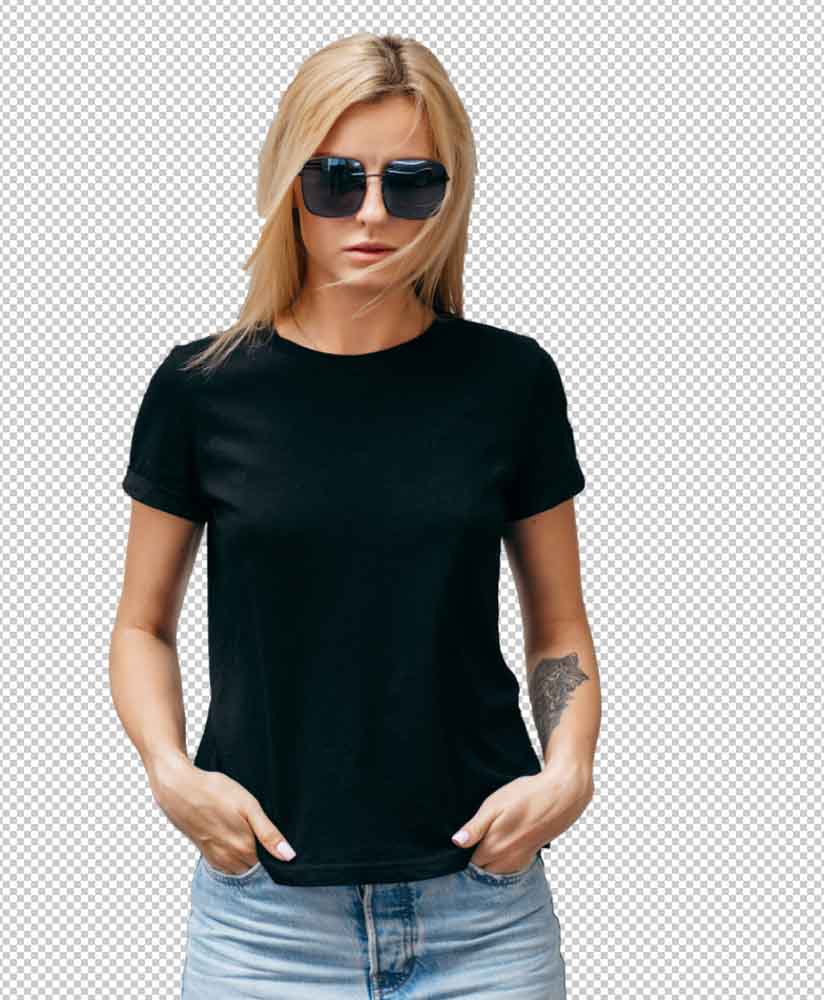
The hair is now included in the cutout subject. Now, you can set your output settings to New Layer with Layer Mask, and check Decontaminate Colors, then click OK.
The layer with the mask applied will appear in your Layers Panel.
Option 5: The Magnetic Lasso Tool
The Lasso tool can do a pretty good job making accurate selections — particularly the Magnetic Lasso tool. This tool will allow you to draw a selection around the edge of your subject, to snap the selection to the edge automatically.
This can take a bit longer for more complicated images as you’ll have to draw more anchor points in uneven areas, but this method does allow you tons of control over where the selection goes.
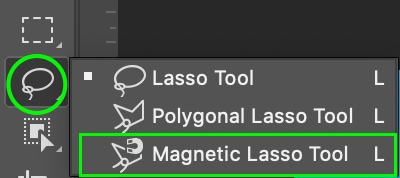
Step 1: Activate The Magnetic Lasso Tool (L)
To access the Magnetic Lasso Tool, click and hold the Lasso Tool icon and click the Magnetic Lasso Tool.
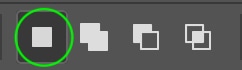
Then, in the Options Bar, click the first icon, New Selection.
Step 2: Adjust The Settings In The Options Bar As Needed
The Feather settings allow you to control how soft or hard the edge of the selection is. Width controls the size of the selection brush: any pixels closer to the dot in the middle will be favored as part of a selection, while anything outside will be considered the edge. Photoshop will automatically snap the edges to that.

The Contrast setting helps Photoshop know the amount of contrast — how much of a difference between two different colors and exposures — can be accepted as an edge. Lower contrast will have a wider tolerance. 10% is a good value to keep, but you can adjust it according to your needs.
The Frequency setting adjusts how many anchor points are added as you draw. Higher frequency makes more points, which is often better if the edge you’re working with is very uneven because there will be more chances for the path to snap to the edge.

Step 3: Drag Along The Edges Of The Subject
Now, draw along the edge of the subject, trying to keep the center of the brush right along the edge, as this will allow the selection to snap to the edge most accurately. If you accidentally add anchor points that you don’t need or want, simply press delete, and it will remove what you’ve drawn since the last anchor point.
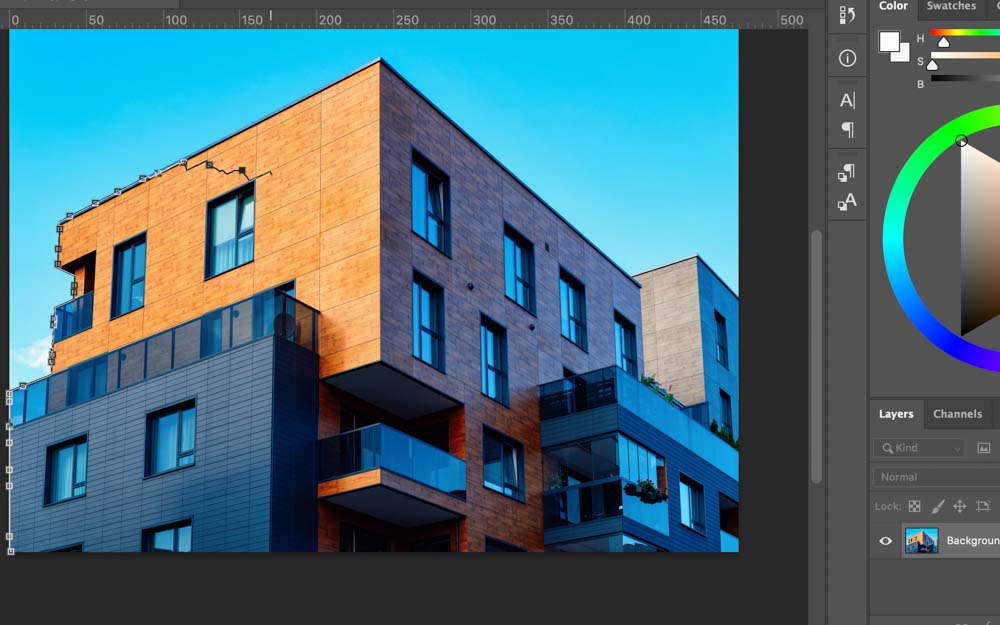

Once you’re finished drawing your selection, connect it to the point where the selection began.
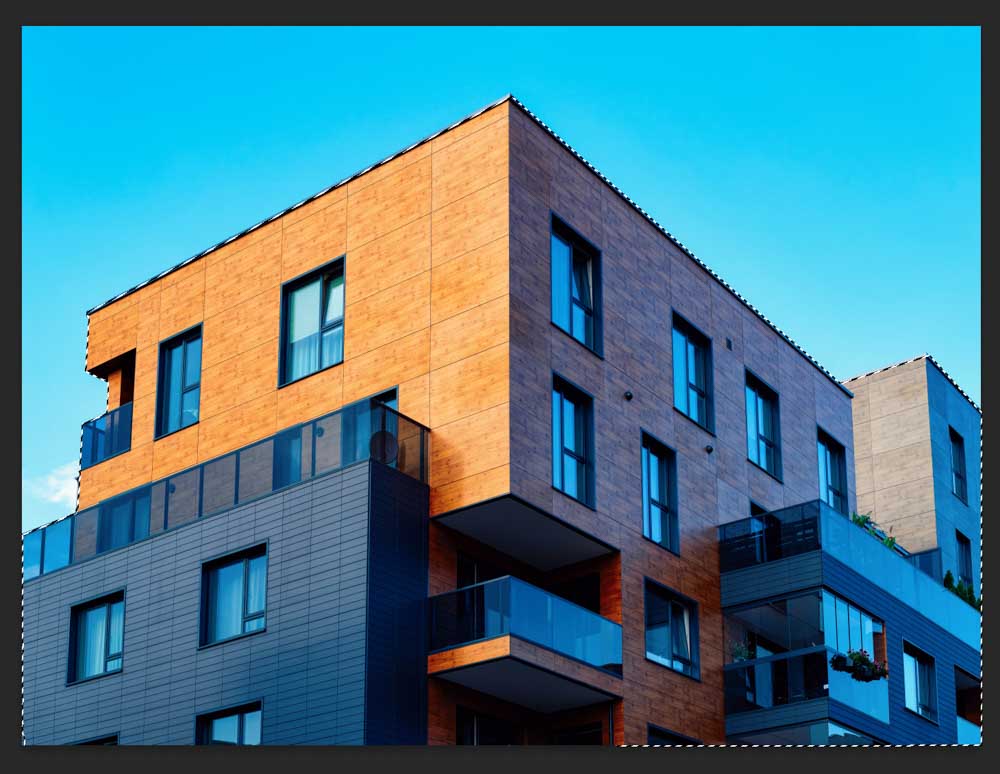
Step 4: Refine The Selection Using The Select And Mask Workspace
Then, in the Options Bar, click the Select and Mask button.
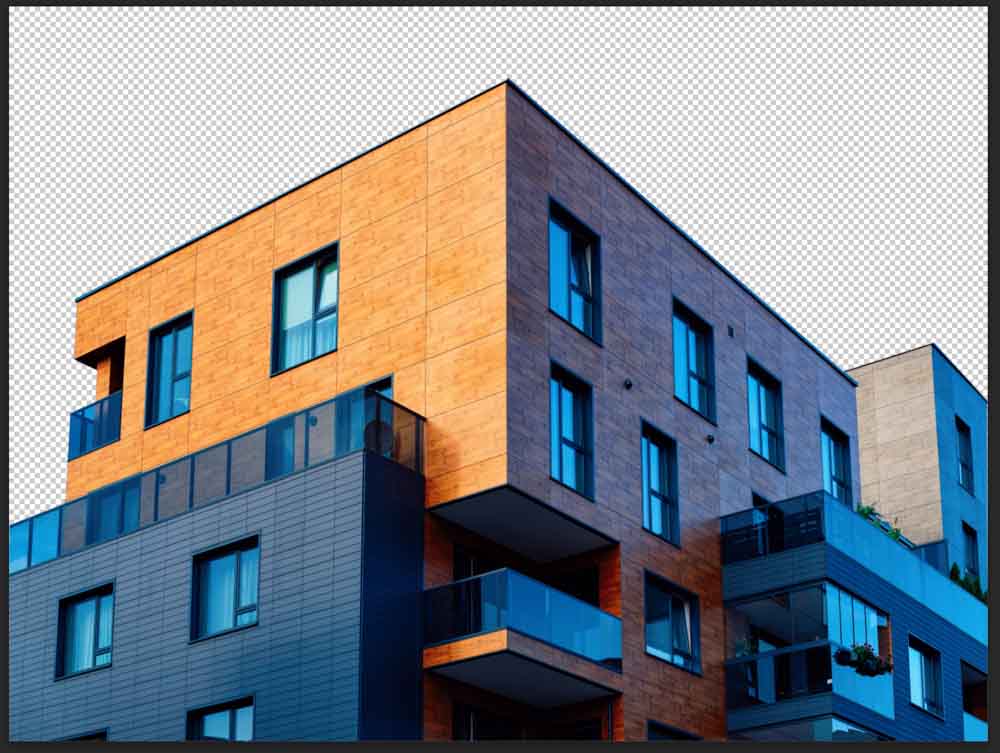
This will remove the background from the selection you’ve made. It’s okay if the selection isn’t perfect. In the below image, parts of the very bottom edge are cut off.

We can fix this by heading to the Brush Tool icon in the toolbar.
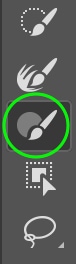
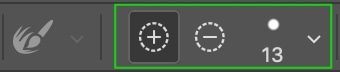
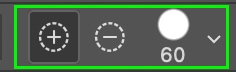
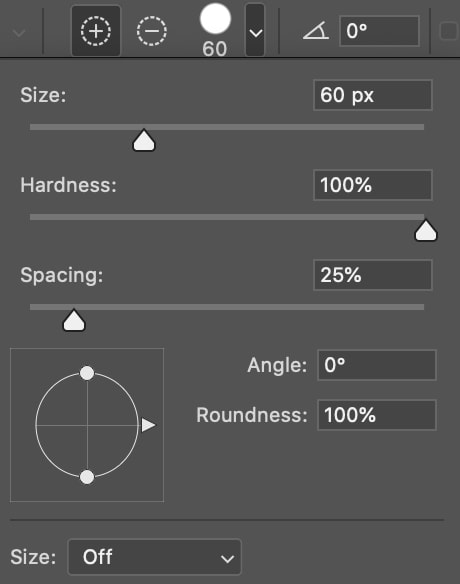
Now, with the plus sign selected to add to your subject or the Minus sign selected to add to the transparent background, you can adjust brush settings like Size, Hardness, and Spacing by clicking the Brush Size icon.
Once your settings are correct, brush along the areas you’d like to add to the subject or correct any weird edges. Once you’re satisfied, your background removal is complete!
Finally, in the Properties Panel, head to the Output Settings and make sure “Decontaminate Colors” is checked. Select Output To: New Layer with Layer Mask and click OK.
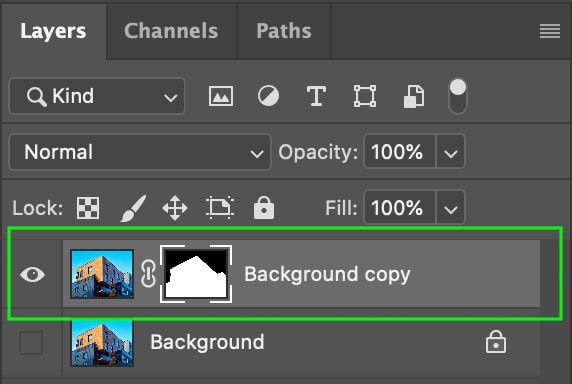
Your image will appear in your Layers Panel as a new layer with the Mask applied.
Option 6: The Magic Wand Tool
When you click an image with the Magic Wand, it automatically selects all adjacent pixels of the same color as the one you clicked. The tool is best applied to images that have a clear distinction, whether in color or exposure, between the subject and the background. It is also best if this edge isn’t overly complicated.
Make sure to unlock the primary layer of the image you’re working on. If you don’t, deleting the background can fill it with random elements of your image.
Step 1: Unlock The Background Layer
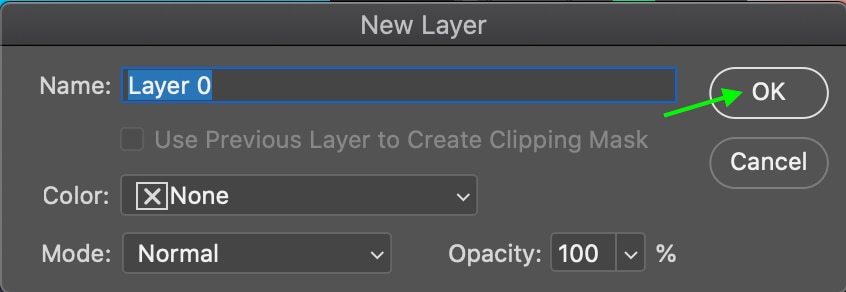
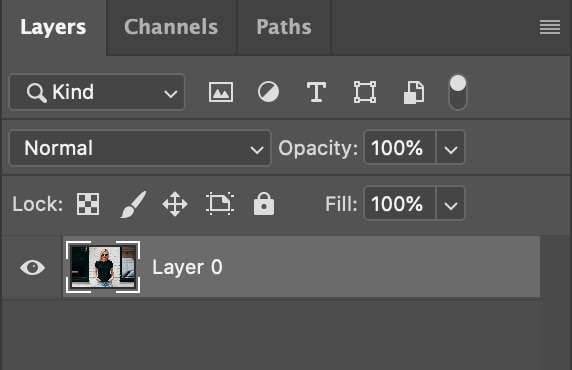
To start, head to your Layers Panel and right-click or Control + click your main layer and select Layer from Background.
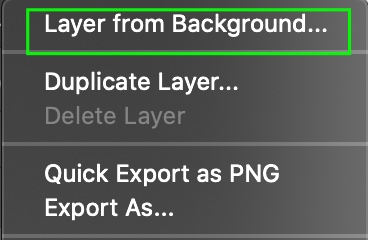
In the window that appears, name your layer if you’d like, then click OK, and you’ll see the layer in the Layers Panel.
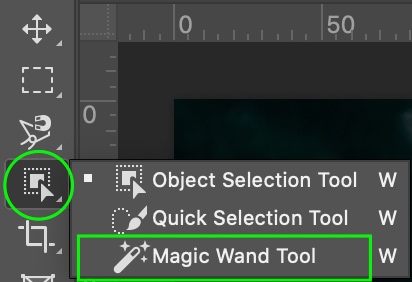
Step 2: Activate The Magic Wand Tool (W)
You can find the Magic Wand tool by clicking and holding or Control + clicking the Object Selection Tool and selecting Magic Wand Tool.
In the Options Bar, make sure the New Selection icon is selected.

Step 3: Adjust The Tolerance In The Options Bar
Check Anti-alias and Contiguous, and set your Tolerance — this refers to the variation of pixels picked up from the sample you make when you click your cursor on the background. The higher the Tolerance, the more of your image will be selected automatically. Because there is a bit of variation in my image, I will keep my Tolerance fairly high at 70.

Step 4: Click On The Background Of The Image
Now, click the background of your image, and Photoshop will automatically select the pixels around that area that are of a similar color or exposure.
You can add to your selection by clicking the Add to Selection icon at the top and clicking around the background until most or all the background pixels are selected.


If the selection goes too far into the subject, as it has gone onto the woman’s jeans in the above image, click the Subtract from Selection icon. It might help to lower your Tolerance as well.

Click the areas you’d like to remove from the selection and refine until you’re satisfied.

Step 5: Refine And Invert The Selection Using The Select And Mask Workspace
Then, you can click Select and Mask.
If the image appears inverted, with the subject transparent instead of the background, you can head to the Global Refinements tab in the Properties Panel and click the Invert button.
Lastly, you can set the Output Settings in the Properties Panel. Check Decontaminate Colors to remove fringing and set the output to New Layer with Layer Mask.
The new layer will appear in your Layers Panel with the layer mask beside it.
Option 7: The Pen Tool
The Pen Tool (P) is best when you need to cut the background out of a very specific edge; for instance, if you need to cut around a person or people or if you have a very busy background.
Since this tool allows you to have complete control over the selection of your edge, it is great for any edges that aren’t clearly defined — as long as you can see the edge of your subject, you can cut it out.
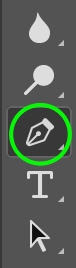
Step 1: Activate The Pen Tool (P)
To access the Pen Tool, press P or click the tool in the Toolbar.
Step 2: Set The Mode To Path In The Options Bar
Then, make sure the mode is set to Path in the Options Bar.

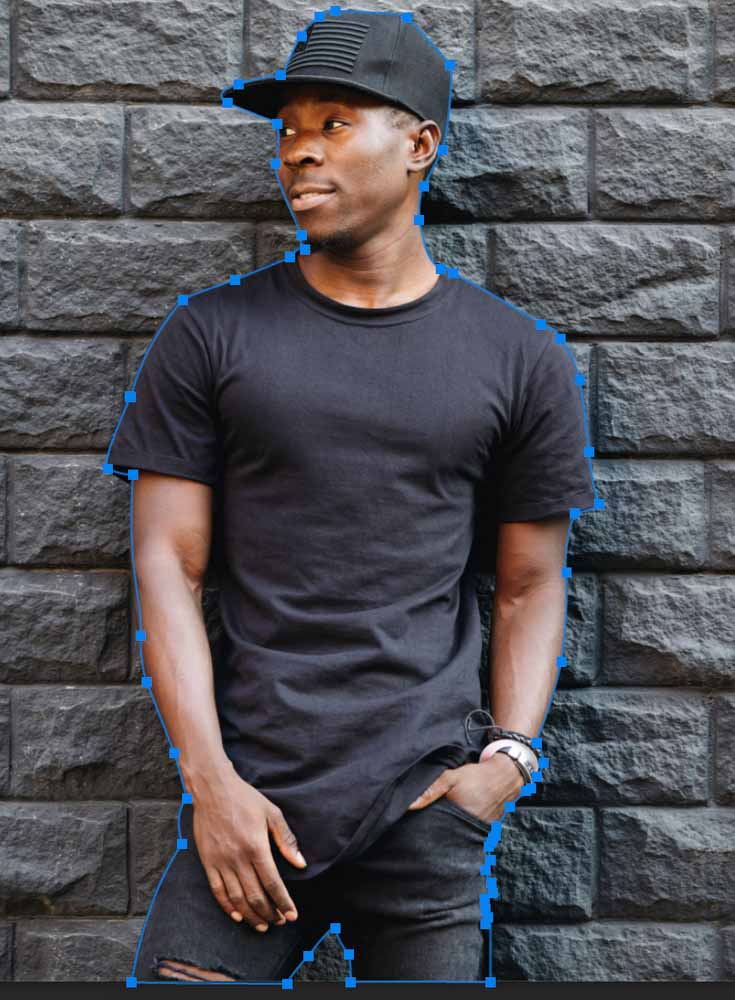
Step 3: Click To Add Anchor Points Around The Subject
Each time you click, an anchor point will be added, and the lines that connect them make up a path.
You’ll notice the paths between your anchor points are always straight. To curve them, click and hold, and you’ll see a control arm appear as a line along your last anchor point. The farther out you drag the control arm, the more control you’ll have over your curve.
You can drag along the line to adjust the curve of the path you’ve just made, even after you’ve moved on to create your next anchor point. To do this, hold the Alt (Win) or Option (Mac) key and click the round toggles at the end of the control arms.
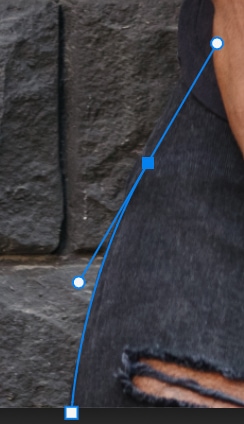
It is best to make sure the front of your control arm is lined up well enough along where you’d like your path to follow, like in the image above. If your control arm is off in another direction, the next anchor point you add might create an inaccurate path that doesn’t follow your intended direction.
If there are a lot of angles in your subject, you’ll need to add lots of anchor points. If you accidentally misplace an anchor point, you can press the Delete button to go back to the previous anchor point.
In the end, attach the end of the path to the beginning.
Step 4: Right-Click And Choose “Make Selection”
Now, right-click inside the complete path and choose Make Selection.
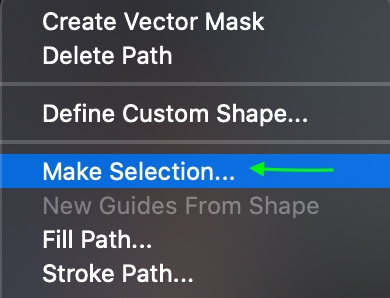
In the Make Selection window, check Anti-aliased and New Selection, and set Feather to 0 or 0.5 if you’d like nice sharp edges.
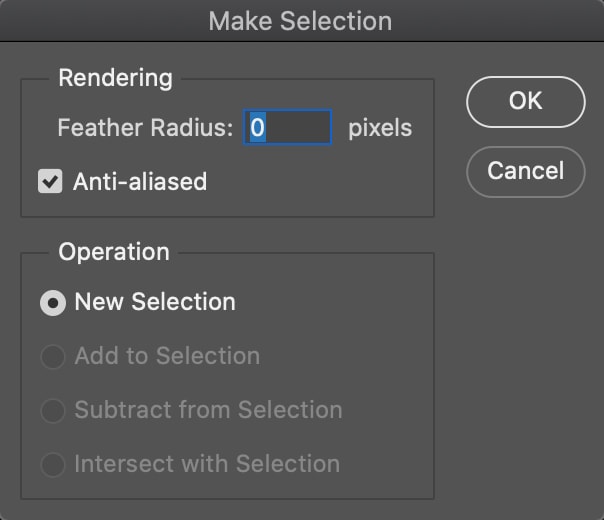
Click OK, and you’ll notice the path turns into a selection.

Step 5: Add A Layer Mask To Remove The Background
Now, click the layer you’d like to cut out and click the Layer Mask icon.
This will remove the background by applying the selection onto a layer mask. You’ll see the layer with the mask applied beside it in the Layers Panel.
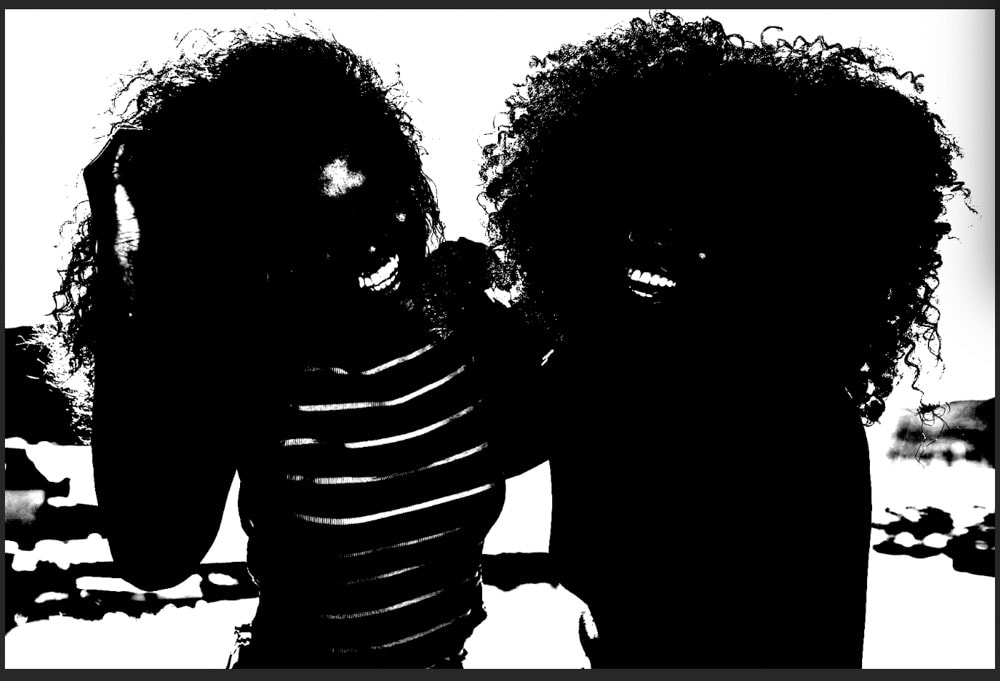
Option 8: Channels
Channels are the best tool to use for selecting and cutting out those more complex angles, such as hair or treetops.
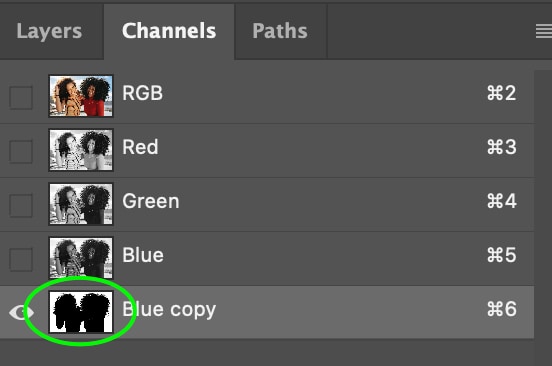
Step 1: Open The Channels Panel
The Channels Panel can be found right next to your Layers Panel. If you don’t see it, go to Window > Channels.

Step 2: Duplicate The Channel With The Most Contrast
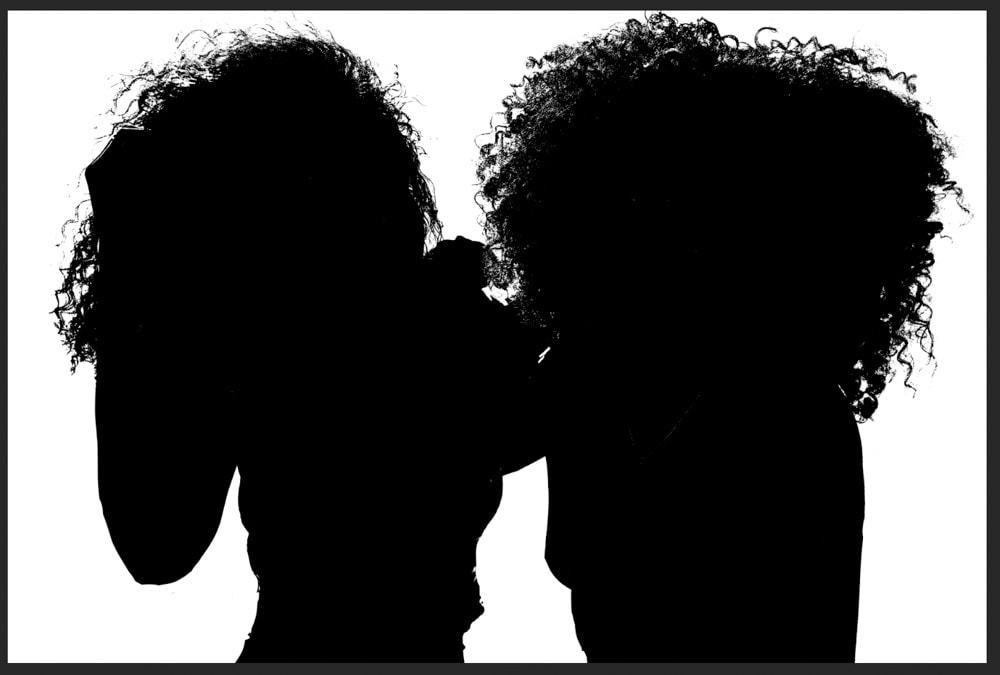
The three options here (besides the default RGB) are red, green, and blue, each representing a different color channel. Click through each, and you’ll notice they all have varying levels of contrast depending on your image. Find the one with the most contrast between the subject and the background. For me, it’s the Blue Channel.

Select the channel that gives the image the most contrast between subject and background and drag it down to the new layer icon. It will appear in your channels panel as a copy of whichever color you choose.


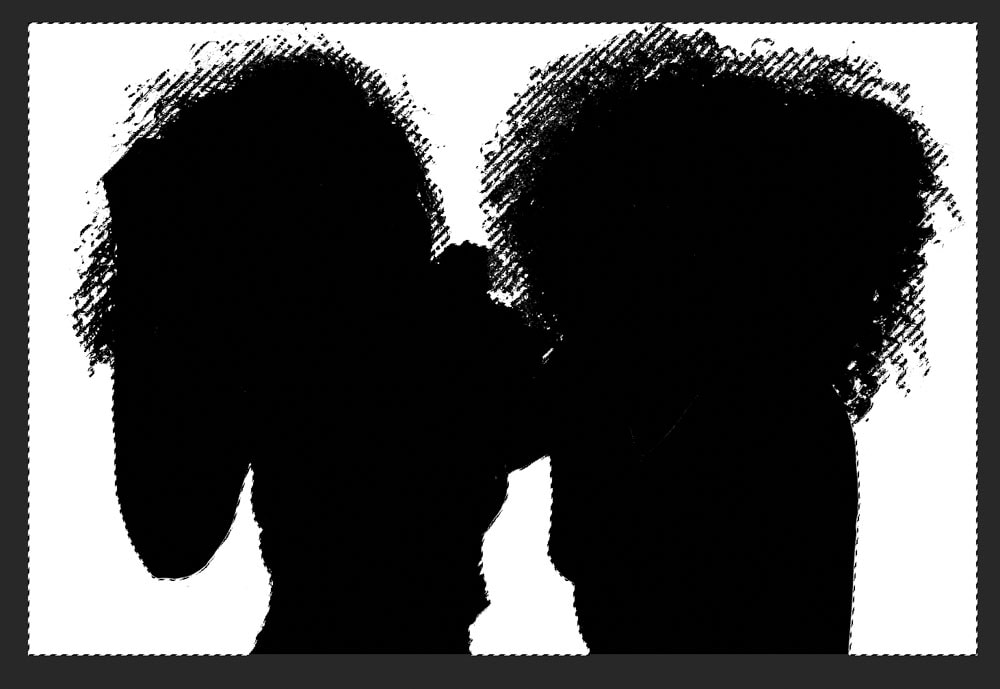
Step 3: Increase The Contrast Using The Levels Adjustment
Now, with the copied channel selected, press Control + L (Win) or Command + L (Mac) to open the levels window. In this panel, you can drag down the shadows and up the highlights to create the most contrast possible. The goal is to get your image as close to black and white as you can.

Step 4: Paint Areas Completely Black And White Using The Brush Tool
It’s okay if some areas don’t change to fully black or white, as we can fix them with the Brush Tool (B).
Again, the goal is to get the subject black and the background white. Set the foreground color to black if you’d like to remove light areas from your subject and white if you’d like to remove dark areas from your background. Paint over the areas that aren’t quite fully black or white.
Step 5: Turn The Channel Into A Selection
Turn this into a selection by holding Control (Win) or Command (Mac) and clicking on the channel copy thumbnail.
This will create an active selection in your image around the black areas.
Step 6: Remove The Background Using A Layer Mask
Now you can head to your Layers Panel, select the layer you’d like to cut out and click the Layer Mask icon.
To inverse the selection, press Control + I (Win) or Command + I (Mac). You will then have a transparent background with the subjects visible.

So, with these different methods to remove backgrounds in Photoshop, you have a wide array of options to deal with any background in any photo. Although the fastest options are the most convenient, they won’t always give you perfect results. For composite images and digital art, having clean selections is important. Therefore, using something like the Pen Tool would be most favorable.
I suggest trying each of these methods for yourself to get a feel for the techniques. That way, you’ll feel confident that you’re using the best background removal option for your photos!
Happy Editing!


